Product Registration and Warranty Information
Thank you for purchasing a Magic Chef product. Register your refrigerator online or via mail to activate warranty benefits. Warranty covers parts and labor for one year, with extended options available. Proper registration ensures validation of your appliance’s warranty and provides access to exclusive support services.
1.1. How to Register Your Magic Chef Refrigerator
To register your Magic Chef refrigerator, visit the official website and complete the online registration form with your product details. Alternatively, mail a copy of your purchase receipt and product serial number to the address provided in the manual. Keep a copy of your registration for future reference.
1.2. Warranty Coverage and Benefits
Magic Chef refrigerators come with a one-year limited warranty covering defective parts and labor. Extended warranty options are available for added protection. Warranty benefits include free repairs, replacements for faulty parts, and dedicated customer support, ensuring your appliance performs optimally throughout its lifespan.

Safety Precautions and Instructions
Always keep children away from appliance. Avoid using sharp objects for defrosting. Ensure proper ventilation and maintain a safe distance from heat sources to prevent fire hazards.
2.1. General Safety Guidelines
Always keep children away from the appliance and ensure proper supervision. Avoid using sharp objects for defrosting; instead, use the defrost button. Maintain adequate ventilation and keep the area around the refrigerator clear of flammable materials. Do not place the refrigerator near direct sunlight or heat sources, as this may cause overheating.
2.2. Electrical Safety and Precautions
Ensure the refrigerator is plugged into a dedicated, grounded electrical outlet. Avoid using extension cords or overloaded circuits. Before connecting, let the unit stand upright for 4 hours to prevent cooling system malfunctions. Keep the power cord away from water and heat sources to reduce fire hazards. Always unplug before cleaning or servicing.
2.3. Child Safety Features
Keep children away from the refrigerator to prevent accidents. Secure doors to avoid trapping. Ensure children do not play with controls or climb shelves. Supervise kids near the appliance to prevent unintended access or mishaps. Teach proper usage to avoid misuse and potential hazards.

Installation and Setup Requirements
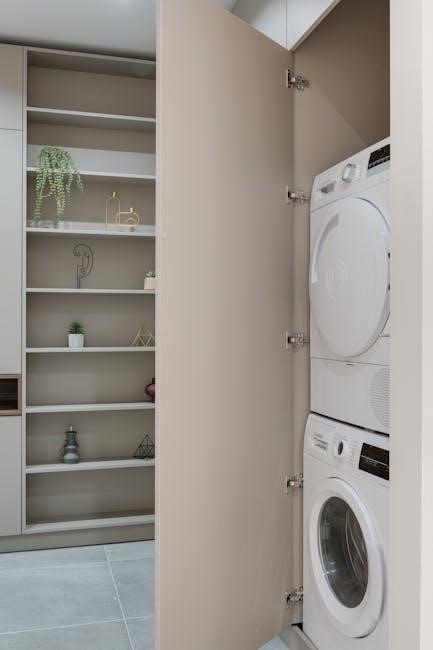
Place your Magic Chef small refrigerator on a strong, level surface. Ensure proper air circulation by maintaining 5 inches of clearance around the unit. Allow the appliance to stand upright for 4 hours before use to prevent cooling system issues. Secure the location to prevent tipping or instability.
3.1. Choosing the Right Location
Place your Magic Chef small refrigerator on a sturdy, level floor to ensure stability. Ensure at least 5 inches of clearance around the unit for proper air circulation. Avoid direct sunlight, moisture, and proximity to heating vents or ovens to maintain optimal performance and longevity.
3.2. Leveling the Refrigerator
Ensure the refrigerator is level by adjusting the feet to maintain balance. Use a level tool to check alignment and stability. Proper leveling prevents vibration and noise, ensuring efficient operation. Once leveled, allow the unit to stand upright for 4 hours before use to prevent cooling system issues.
3.3. Proper Ventilation and Clearance
Maintain adequate airflow around the refrigerator by leaving at least 5 inches of space between the unit and surrounding walls. Ensure the area is well-ventilated to prevent heat buildup. Keep the back and sides clear of obstructions to allow proper air circulation, which is essential for efficient operation and longevity of the appliance.
Operating Instructions for Optimal Performance
- Keep doors closed to maintain temperature and efficiency.
- Set thermostat between 3-5 for optimal cooling.
- Avoid overloading shelves to ensure proper air circulation.
4.1. Before First Use: Preparation Steps
Before first use, let the refrigerator stand upright for 4 hours to allow the cooling system to stabilize. Clean the interior and exterior with a mild detergent. Ensure all parts are intact and properly positioned. Allow adequate ventilation around the unit for optimal performance. Set the thermostat to the recommended level for initial operation.
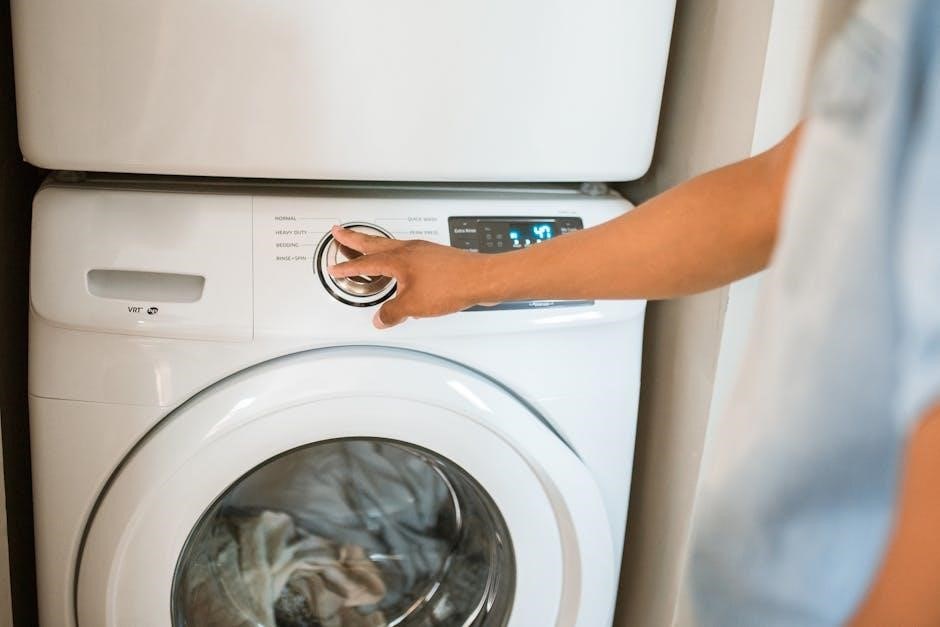
4.2. Temperature Settings and Controls
Set the thermostat between 3-5 for optimal performance. Adjust the temperature control knob to maintain desired levels. Frequent door openings may affect temperature stability. Ensure doors are sealed properly to maintain consistent cooling. Regularly check and adjust settings to optimize energy efficiency and appliance performance.
4.3. Door Management and Seal Maintenance
Regularly inspect door seals for wear or damage to ensure proper closure. Clean seals with mild soap to maintain a tight fit. Avoid using sharp objects near seals to prevent tears. Check door alignment and adjust hinges if necessary. Proper door management ensures consistent cooling, reduces energy consumption, and maintains optimal performance.

Maintenance Tips for Longevity
Regularly clean the interior and exterior to prevent dust buildup. Defrost the freezer compartment as needed to maintain efficiency. Check door seals for integrity to ensure proper cooling and energy savings.
5.1. Cleaning the Interior and Exterior
Regularly wipe the interior with a mild soap solution to prevent odors. Clean shelves and drawers with warm water and gentle detergent. For the exterior, use a soft cloth and non-abrasive cleaner to maintain the finish. Avoid harsh chemicals or scrubbers to prevent damage. Dry surfaces thoroughly after cleaning to avoid water spots.
5.2. Defrosting the Freezer Compartment
To defrost, turn off the refrigerator and remove all contents; Allow the freezer to thaw completely. Scrape off ice with a plastic scraper, avoiding sharp tools. Wipe down surfaces with a mild detergent solution. Rinse thoroughly and dry before restarting. Regular defrosting ensures efficient operation and prevents excessive ice buildup.
5.3. Energy Efficiency Practices
Magic Chef refrigerators are Energy Star certified, ensuring energy efficiency. Maintain proper door seals to prevent cold air loss. Set the thermostat between 3-5 for optimal cooling. Regularly defrost the freezer to avoid excess energy use. Keep adequate ventilation around the unit to enhance performance and reduce energy consumption.

Troubleshooting Common Issues
Identify issues like temperature fluctuations or unusual noises. Check if the appliance is level and doors are properly aligned. Reset the refrigerator if it malfunctions. Refer to error codes in the manual for specific solutions to ensure optimal performance and address problems promptly.
6.1. Identifying Common Problems
Common issues include temperature fluctuations, noisy operation, and frosting buildup. Check if the appliance is level and doors are sealed properly. Ensure adequate ventilation and verify thermostat settings. Consult the troubleshooting guide for error codes and recommended solutions to address these problems effectively and maintain optimal performance;
6.2. Resetting the Appliance
To reset your Magic Chef refrigerator, unplug it from the power source, wait 5 minutes, then plug it back in. This process can resolve issues like temperature fluctuations or unusual noises; Ensure the appliance is empty during resetting. Refer to the user manual for specific instructions and contact support if issues persist.
6.3. Understanding Error Codes
Magic Chef refrigerators display error codes like “E1” or “E2” to indicate specific issues. These codes refer to problems such as sensor malfunctions or temperature fluctuations. Refer to your user manual for code definitions and troubleshooting steps. Addressing errors promptly ensures optimal performance and prevents further complications. Contact support if codes persist after troubleshooting.
Parts Diagram and Components Guide
Your Magic Chef refrigerator’s parts diagram outlines internal and external components, such as shelves, door seals, and cooling elements; Refer to this guide for easy identification and maintenance, ensuring proper functionality and longevity of your appliance.
7.1. Identifying Internal and External Parts
Refer to the parts diagram to identify internal components like shelves, door seals, and cooling elements. External parts include the control panel, door handles, and leveling feet; Understanding these components aids in maintenance and troubleshooting, ensuring optimal performance and longevity of your Magic Chef refrigerator.
7.2. Understanding the Parts List
The parts list details components with corresponding codes, names, and quantities. It includes shelves, door seals, evaporator coils, and more. Each part is essential for functionality. Refer to this list for accurate identification and ordering of replacement parts, ensuring compatibility and proper maintenance of your Magic Chef refrigerator.
7.3. Ordering Replacement Parts
To order replacement parts, refer to the parts diagram for component codes. Order online, by phone, or through customer support. Ensure genuine Magic Chef parts are used for compatibility. This maintains warranty coverage and ensures optimal performance. Proper parts ordering is crucial for longevity and functionality.

User Manual Highlights and Key Features
Highlighting the Magic Chef refrigerator’s energy efficiency, compact design, and versatile storage options, ensuring optimal performance and user satisfaction.
8.1. Overview of the Magic Chef Refrigerator
Magic Chef refrigerators are designed for compact spaces, offering energy-efficient cooling solutions. Available in top-freezer and mini-fridge models, they feature manual defrost, adjustable shelves, and reversible doors. Ideal for small kitchens, dorms, or offices, these refrigerators provide reliable performance and space-saving design, perfect for everyday use.
8.2. Special Features and Functions
Magic Chef refrigerators include advanced features like Energy Star certification, manual defrost, and adjustable temperature controls. Some models offer reversible doors, compact designs, and quiet operation. These features ensure efficient cooling, energy savings, and user convenience, making them ideal for small spaces while maintaining performance and reliability.
8.3. Energy Star Certification Benefits
Magic Chef refrigerators with Energy Star certification use advanced energy-saving technology, reducing power consumption by up to 15%. This eco-friendly feature lowers utility bills and environmental impact without compromising performance. Energy Star models meet strict energy efficiency standards set by the U.S. EPA, ensuring sustainable operation while maintaining reliable cooling performance consistently.

Technical Specifications and Dimensions
Magic Chef small refrigerators offer capacities from 1.6 to 3.3 cu. ft., dimensions of 19.5X17.4X18.9 inches, and weigh around 90 pounds, ensuring energy efficiency and compact convenience.
9.1. Capacity and Size Options
Magic Chef small refrigerators offer capacities ranging from 1.6 cu. ft. to 4.3 cu. ft., with dimensions tailored for compact spaces. Models like the MCBR160B2 (19.5″x17.4″x18.9″) provide efficient storage while maintaining energy efficiency, ideal for small kitchens, dorms, or offices, ensuring versatility and convenience in various settings.
9.2. Energy Consumption and Ratings
Magic Chef small refrigerators are Energy Star certified, ensuring low energy consumption. Models like the MCBR350W2 consume approximately 240 kWh annually, with an estimated energy cost of $25 per year. Energy-efficient compressors and insulation contribute to eco-friendly performance while maintaining reliable cooling and minimizing utility bills.
9.3. Weight and Mobility Considerations
Magic Chef small refrigerators weigh between 75-90 pounds, making them lightweight and portable. Their compact size allows easy relocation, perfect for small spaces like dorms or offices. Ensure stable placement to prevent tipping and use a dolly for safe moving. The unit’s weight distribution supports mobility while maintaining balance and stability during relocation.

Environmental and Energy Considerations
Magic Chef refrigerators are Energy Star certified, ensuring energy efficiency and reduced environmental impact. Eco-friendly features minimize energy consumption while maintaining performance. Proper disposal and recycling options support sustainability and resource conservation.
10.1; Eco-Friendly Features
Magic Chef refrigerators feature energy-efficient compressors and insulation, reducing energy consumption. Eco-friendly designs meet Energy Star standards, lowering environmental impact. Advanced temperature controls minimize power use while maintaining performance. These features help reduce your carbon footprint and contribute to a sustainable future.
10.2. Proper Disposal Guidelines
Dispose of your Magic Chef refrigerator responsibly. Remove doors and shelves to prevent accidents. Recycle refrigerants and hazardous materials through certified centers. Check local regulations for appliance disposal options. Do not landfill intact units. Proper disposal protects the environment and ensures compliance with safety and environmental standards.
10.3. Recycling Options for Old Appliances
Recycle your old Magic Chef refrigerator through authorized centers. Many retailers and municipalities offer appliance recycling programs. Check local guidelines for details. Proper recycling ensures responsible handling of materials and environmental protection. Visit the Magic Chef website for a list of recommended recycling facilities near you.
Frequently Asked Questions (FAQs)
Common questions include optimal temperature settings, defrosting procedures, and noise issues. Solutions cover troubleshooting, maintenance tips, and feature clarifications. Refer to the manual for detailed answers and support contact information to address specific concerns effectively.
11.1. Common User Queries
Users often ask about ideal temperature settings, defrosting methods, and noise levels. They also inquire about energy efficiency, shelf adjustment, and door seal maintenance. Additionally, questions arise regarding warranty details, troubleshooting error codes, and proper installation requirements. These queries are addressed to ensure optimal performance and user satisfaction with the Magic Chef refrigerator.
11.2. Solutions to Frequently Encountered Issues
For temperature issues, adjust the thermostat between 3-5. Noise problems may require leveling the fridge. Defrosting can be done manually by pressing the defrost button. Ice buildup should be scraped gently with plastic tools. Refer to the troubleshooting guide for error codes and ensure proper ventilation to maintain performance and efficiency.
11.3. Clarifications on Misunderstood Features
The defrost button manually starts the defrost cycle, while energy-saving settings reduce consumption without compromising performance. Door seals require regular inspection to maintain efficiency. These features ensure optimal operation and longevity, addressing common user misconceptions about functionality and maintenance requirements for Magic Chef refrigerators.

Customer Support and Resources
Access online manuals, troubleshooting guides, and FAQs. Contact Magic Chef support for assistance. Join community forums for user discussions and shared experiences with your refrigerator.
12.1. Contacting Magic Chef Support
Contact Magic Chef support via phone, email, or live chat for assistance. Visit their official website for contact details and operational hours. The support team is available to address inquiries, provide troubleshooting, and guide you through repairs or parts replacement efficiently.
12.2. Accessing Online Manuals and Guides
Visit the Magic Chef official website to download PDF user manuals and guides for your small refrigerator. Models like MCBR445B1 and MCBR160B2 are available for free. Ensure to read the manual before first use for proper operation and maintenance, and keep it for future reference.
12.3. Community Forums and User Discussions
Engage with the Magic Chef community forums to discuss your small refrigerator. Share experiences, ask questions, and find solutions. These platforms offer valuable troubleshooting tips, usage advice, and insights from other users. Active participation helps you maximize your appliance’s performance and address any concerns effectively.