Missoula TV Listings Overview (59807, 59801)
Missoula’s 59807 and 59801 zip codes provide a full TV guide․ TVTV․us lists local broadcasts, while Peacock, PLEX, and Pluto TV offer national streaming․ Cable choices include AT&T U‑verse and Charter Spectrum․ Check daily for schedule updates․ View live sports, news, and movies every day Tonight․

Local Broadcast Stations
KXLF Channel 5 delivers local news, weather, and community events, while KXLF Channel 7 offers sports and regional programming․ Both stations broadcast in high definition, providing clear visuals and reliable coverage for Missoula residents․ Tune in for up-to-date local content․ Enjoy local news․!

KXLF Channel 5
KXLF Channel 5, the flagship station of the Missoula area, delivers a comprehensive mix of local news, weather updates, and community‑focused programming that keeps residents informed and connected․ Broadcasting in high‑definition, the channel offers crisp visuals and clear audio for every segment, from breaking news alerts to in‑depth investigative reports․ Viewers can catch the daily morning news at 6 a․m․, followed by a mid‑morning update at 9 a․m․, and an evening roundup at 6 p․m․ The station’s weather team provides real‑time forecasts, storm warnings, and climate insights tailored to the mountainous terrain surrounding Missoula․ In addition to news, KXLF Channel 5 features local sports coverage, including high‑school football, basketball, and community‑league events, ensuring that athletes and fans stay in the loop․ The channel also airs a variety of lifestyle shows, cooking segments, and cultural spotlights that showcase the region’s heritage and contemporary arts scene․ For those who prefer to watch on the go, KXLF Channel 5 offers a live stream through its official website and a mobile app, allowing viewers to stay updated from anywhere in the zip codes 59807 and 59801․ The station’s commitment to community service is evident through its sponsorship of local charities, public service announcements, and educational outreach programs․ By combining reliable news coverage with engaging local content, KXLF Channel 5 remains an essential resource for Missoula residents seeking trustworthy information entertainment․

KXLF Channel 7
KXLF Channel 7, also known as the local CBS affiliate, offers a dynamic lineup that complements the city’s media landscape․ With a focus on regional storytelling, the station broadcasts a mix of national CBS programming and locally produced shows that highlight Missoula’s cultural diversity․ Viewers can tune in for the flagship morning show at 7 a․m․, which features interviews with community leaders, local business spotlights, and live coverage of city council meetings․ The midday slot at 12 p․m․ brings a popular talk show that discusses health, education, and environmental issues pertinent to the surrounding counties․ In the evenings, Channel 7 airs the highly rated CBS Evening News at 6 p․m․, followed by a prime‑time lineup that includes dramas, comedies, and special event coverage such as the Missoula Marathon and the annual Montana State Fair․ The station’s sports department provides comprehensive coverage of local high‑school teams, college athletics, and regional tournaments, ensuring that sports enthusiasts have access to real‑time commentary and post‑game analysis․ KXLF Channel 7 also offers a robust digital presence, with live streaming available on its website and a dedicated mobile app that delivers on‑the‑go access to news alerts, weather updates, and interactive community forums․ By blending national content with a strong local focus, Channel 7 remains a trusted source for Missoula residents seeking reliable information and engaging entertainment throughout the day․ Additionally, the station’s outreach programs, such as the annual ‘Kids in the News’ segment and the ‘Sustainability Spotlight’ series, empower local voices and promote environmental stewardship․ Viewers can also access archived content via the on‑demand portal, ensuring engagement!!
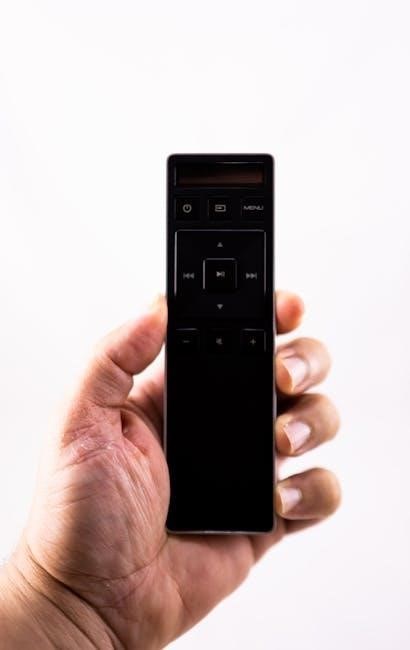
Cable and Satellite Providers
Missoula’s cable and satellite services include AT&T U‑verse and Charter Spectrum․ Both offer HD sports, movies, and premium channels, plus on‑demand libraries and streaming apps․ Packages are customizable, contracts flexible, and options suit local viewers’ preferences․ Bundle deals are available․ now!!
AT&T U‑verse
AT&T U‑verse in Missoula delivers a robust cable‑satellite mix tailored to local viewers․ The service bundles high‑definition channels, on‑demand libraries, and streaming apps, ensuring access to national networks, local sports, and premium movie packages․ Subscribers benefit from a flexible contract structure, with no long‑term commitments and the option to upgrade or downgrade as needs shift․ The U‑verse platform supports HD and 4K content, offering crystal‑clear picture quality for sports, news, and entertainment․ On‑demand features include a full catalog of recent releases, classic titles, and exclusive series, plus the ability to download shows for offline viewing․ Live TV is organized into clear channel groups—news, sports, entertainment, and local stations—making navigation intuitive․ The service also integrates with AT&T’s mobile app, allowing users to stream content on smartphones and tablets, ensuring continuity whether at home or on the go․ Technical support is available 24/7, with online troubleshooting tools and a dedicated helpline․ For households seeking a comprehensive entertainment solution, AT&T U‑verse offers competitive pricing, bundled internet and phone options, and promotional incentives for new customers․ The platform’s user interface is designed for simplicity, featuring customizable channel line‑ups and parental controls to manage viewing for all ages․ Overall, AT&T U‑verse remains a strong choice for Missoula residents who value quality, flexibility, and a wide array of content․ Enjoy․
Charter Spectrum
Charter Spectrum provides Missoula’s 59807 and 59801 residents with a comprehensive cable lineup that blends local news, national networks, and premium entertainment․ The base package includes over 200 channels, covering local affiliates, sports, and movie networks․ Subscribers can add specialty tiers—such as HBO, Showtime, and ESPN for a richer viewing experience․ The “All‑Access” bundle offers unlimited sports and live events, while the high‑definition channel list ensures crisp picture quality for every program․ Spectrum supports 4K on select channels, giving viewers an immersive experience for the latest action movies and sports broadcasts․ On‑demand content is organized into genre‑specific libraries, allowing users to browse and download titles directly to the Spectrum app or set‑top box․ The app features a “watch‑later” queue, parental controls, and multi‑device streaming, ensuring family members can enjoy shows on smartphones, tablets, or laptops․ Spectrum’s cloud DVR records up to 100 hours of programming, with scheduling and storage management via a user‑friendly interface․ Technical support is available 24/7 via phone, live chat, or the Spectrum Community forum․ The company frequently updates its channel lineup to include new streaming services and niche networks, keeping the offering fresh․ Promotional pricing, free installation and bundled internet or phone services help reduce monthly costs․ Spectrum’s local engagement is evident through community sponsorships, local sports coverage, and educational programming that highlights Missoula’s heritage․ Customers can also use Spectrum’s “Smart Home” integration, enabling voice control of TV, streaming apps, and channel selection via Alexa or Google Assistant․ The set‑top box offers quick channel surfing, picture‑in‑picture, and a customizable channel list․ box Today
Streaming Services in Missoula
Missoula residents can stream local and national content via TVTV․us, Peacock, PLEX, and other services․ Each platform offers live TV, on‑demand libraries․ Free tiers include ad‑supported shows, while premium plans unlock sports, movies, and early releases HD4Kads․
TVTV․us
TVTV․us is the primary online platform for Missoula residents seeking a comprehensive TV guide․ By entering the ZIP codes 59807 or 59801, users receive a real‑time schedule that aggregates local broadcasts from KXLF Channel 5 and Channel 7, as well as regional sports, news, and community programming․ The site offers a user‑friendly interface that displays a day‑by‑day lineup, complete with channel logos, program titles, and brief descriptions․ Users can filter by genre—such as drama, comedy, or documentary—and set alerts for favorite shows․ Additionally, TVTV․us provides a “watch now” feature that links directly to streaming options when a program is available on free over‑the‑air services or through partnered cable providers․ For those who prefer a mobile experience, the TVTV․us app is available on iOS and Android, allowing on‑the‑go access to the same up‑to‑date schedule․ The platform also integrates with popular streaming services, offering a consolidated view of where a particular episode can be streamed legally, whether that’s through Peacock, PLEX, or a local cable package․ By consolidating local and national listings, TVTV․us eliminates the need to consult multiple sources, making it a one‑stop solution for Missoula’s diverse viewing preferences․ Whether you’re a sports fan, a news junkie, or simply looking for the next binge‑worthy series, TVTV․us keeps you informed and connected to the latest programming across all available channels․
TVTV alerts for live sports and shows now․
Peacock
Peacock, NBCUniversal’s premium streaming platform, is a key component of Missoula’s modern TV landscape․ Subscribers in the 59807 and 59801 ZIP codes can access a vast library that blends live sports, breaking news, and a curated selection of NBC shows, movies, and original series․ The service offers a free tier with limited content while the Peacock Premium and Premium Plus plans unlock full access to the NBC broadcast schedule, including live coverage of major events such as the Olympics, NFL games, and the annual Missoula Marathon coverage․ For Missoula viewers, Peacock also streams local news segments from KXLF Channel 5 and Channel 7 through its “NBC News Live” feature, ensuring that regional updates are available on demand․ The platform’s interface is optimized for both web and mobile, allowing users to create personalized watchlists, receive push notifications for new episodes, and enjoy ad‑free viewing with a Premium subscription․ Additionally, the service offers a “Watch Now” button that directs users to the live stream of NBC’s flagship programs, such as “The Tonight Show Starring Jimmy Fallon” and “Saturday Night Live․” Peacock’s library also includes classic Missoula sports footage from the local university’s football archives, providing a nostalgic touch for longtime residents․ With a flexible monthly pricing model and the ability to cancel anytime, Peacock remains an attractive option for Missoula residents who want to keep up with national trends while staying connected to local content․ Whether you’re a sports enthusiast, a fan of dramatic storytelling, or simply looking for a reliable source of entertainment, Peacock delivers a comprehensive, user‑friendly experience that complements the local TV guide․
PLEX
Plex has become a staple for Missoula viewers seeking a flexible, on‑demand entertainment hub that complements the traditional TV guide․ By aggregating local broadcasts from KXLF Channel 5 and Channel 7, Plex allows residents in the 59807 and 59801 ZIP codes to stream live news, weather, and community events directly to smart TVs, tablets, and smartphones․ The platform’s “Live TV” feature streams over 200 channels, including NBC, CBS, and local affiliates, while the “On‑Demand” library offers a rotating selection of movies, series, and educational programs that can be downloaded for offline viewing․ Plex’s user interface is designed for simplicity, with a customizable home screen that highlights favorite shows, upcoming sports fixtures, and Missoula‑specific content such as the university’s football highlights and local high‑school games․ The service supports DVR, letting users record broadcasts․ For families, Plex’s parental controls allow parents to set viewing restrictions based on content ratings, ensuring a safe environment for children․ The platform’s free tier provides access to a limited set of channels and on‑demand titles, while the Plex Pass subscription unlocks premium features such as ad‑free streaming, early access to new releases, and 4K HDR streaming․ Plex’s integration with voice assistants like Amazon Alexa and Google Assistant further enhances the user experience, allowing voice‑controlled navigation of the local TV guide and instant playback of Missoula news segments․ Plex offers a comprehensive, cost‑effective solution that adapts to evolving media consumption habits in Missoula․ Enjoy seamless streaming․ Now․

Free Over‑the‑Air Streaming Platforms
Missoula residents can access free live TV via Pluto TV and Tubi TV․ Both offer local news, sports, and entertainment without a subscription․ Stream on TVs, tablets, or phones, and enjoy ad‑s programming that covers Missoula events and national shows․
Pluto TV
Pluto TV offers a robust free streaming experience that complements Missoula’s local TV guide․ With over 250 live channels and 4,000 on‑demand titles, viewers can watch everything from national news to niche sports, movies, and original series—all without a subscription fee․ The platform’s interface is simple, featuring a dedicated “Local” section that pulls in regional news feeds, weather updates, and live coverage of local events․ For Missoula residents, this means instant access to the latest happenings in the 59807 and 59801 zip codes, including community news, high school sports, and local weather alerts․ Pluto TV also partners with local broadcasters, allowing viewers to stream live feeds from KXLF and other regional stations directly on the app․ Users can create personalized channel line‑ups, set reminders for upcoming shows, and even download select content for offline viewing․ The service is available on a wide range of devices—smart TVs, streaming sticks, smartphones, tablets, and web browsers—making it easy to watch from anywhere in the city․ Additionally, Pluto TV’s ad‑supported model ensures that the free content remains accessible, while premium “Pluto Premium” options are available for users who want an ad‑free experience․ Whether you’re catching the latest local news, tuning into a live sports event, or exploring a new movie, Pluto TV provides a convenient, no‑cost solution that fits seamlessly into Missoula’s diverse media landscape․ Stream on your smart TV or tablet for viewing now!
Tubi TV

Tubi TV is a free, ad-supported streaming service that has become a staple for Missoula viewers seeking diverse entertainment without a subscription․ With a catalog boasting over 20,000 movies and 4,000 TV episodes, the platform covers genres from classic cinema and indie gems to contemporary hits and niche documentaries․ The service is available on a wide array of devices—including smart TVs, streaming sticks, smartphones, tablets, and web browsers—making it easy for residents in the 59807 and 59801 zip codes to access their favorite shows on the go or at home․
The interface is user‑friendly, featuring curated collections such as “Must‑See Thrillers,” “Family Favorites,” and “Award‑Winning Dramas,” as well as a robust search function that allows viewers to find titles by keyword, genre, or release year․ Tubi also offers personalized recommendations based on viewing history, ensuring that each user’s experience is tailored to their tastes․ For Missoula’s local audience, the platform provides a convenient way to catch up on the latest releases and timeless classics alike, all without the need for cable or a paid subscription․
Ad breaks are short and infrequent, keeping the viewing experience smooth while maintaining the free model․ Tubi also offers an optional ad‑free subscription for those who prefer uninterrupted streaming․ The service supports multiple languages, subtitles, and audio tracks, making it accessible to a broad demographic․ Whether you’re looking to binge a new series, watch a family movie night, or explore a specific genre, Tubi TV delivers a flexible, accessible solution that fits seamlessly into Missoula’s modern media landscape․ Tubi’s user base in Missoula includes students, families, and retirees, all of whom appreciate the platform’s wide selection and flexible viewing options․ Thaks