tempur-pedic ergo remote control manual

Tempur-Pedic Ergo Remote Control Manual: A Comprehensive Guide (Updated 04/30/2026)

This manual details the Tempur-Pedic Ergo system’s features, including wireless remote controls, zero-gravity options, and smart connectivity for enhanced sleep experiences.

Tempur-Pedic Ergo Systems represent a significant advancement in sleep technology, offering adjustable bed bases designed for personalized comfort and improved sleep quality. These systems go beyond traditional beds, incorporating features like wireless remote controls, allowing users to effortlessly adjust their sleep position.

The Ergo line includes models such as Ergo Extend, Ergo Power, and Ergo Smart, each offering varying levels of adjustability and smart features. A core component of these systems is the Ergo remote control, which serves as the central hub for controlling bed adjustments, preset positions, and additional functionalities like massage and under-bed lighting.

Understanding the capabilities of your Ergo system and its remote is crucial for maximizing its benefits. This guide will provide a comprehensive overview, ensuring you can fully utilize the features designed to enhance your sleep experience.

Understanding the Ergo Remote Control

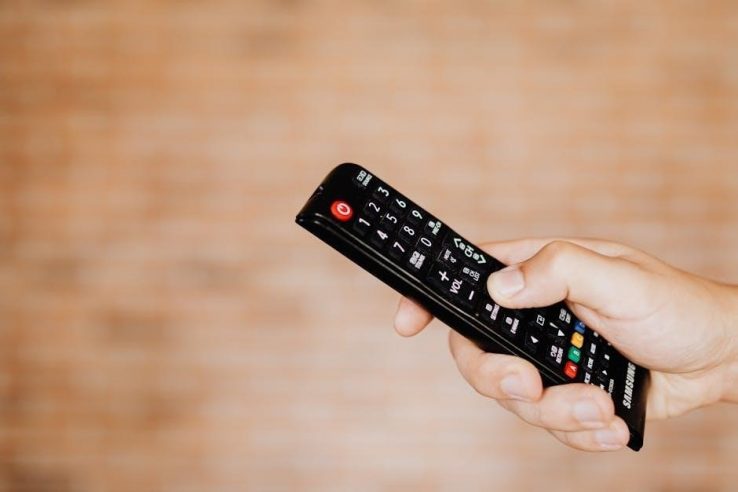
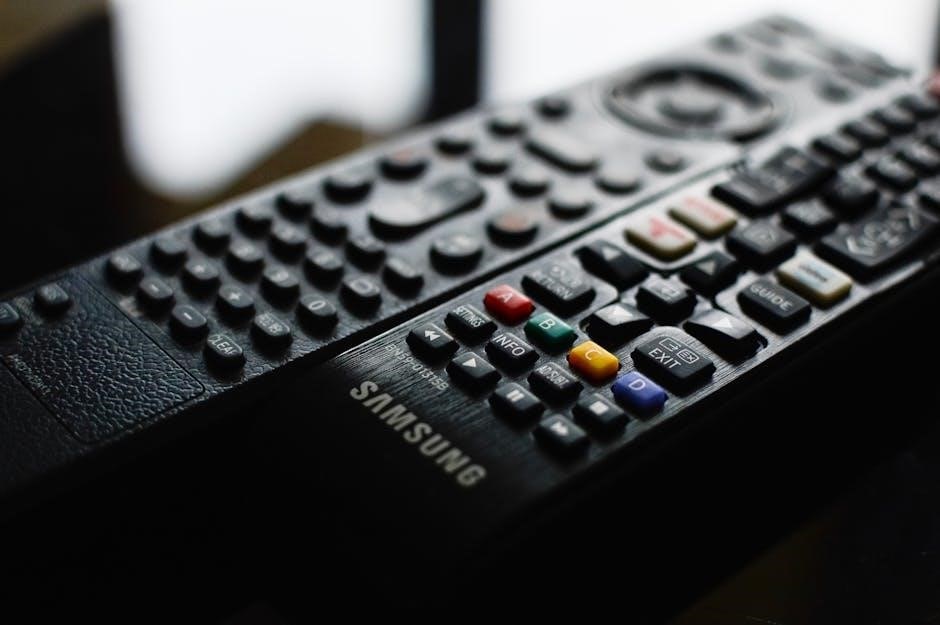
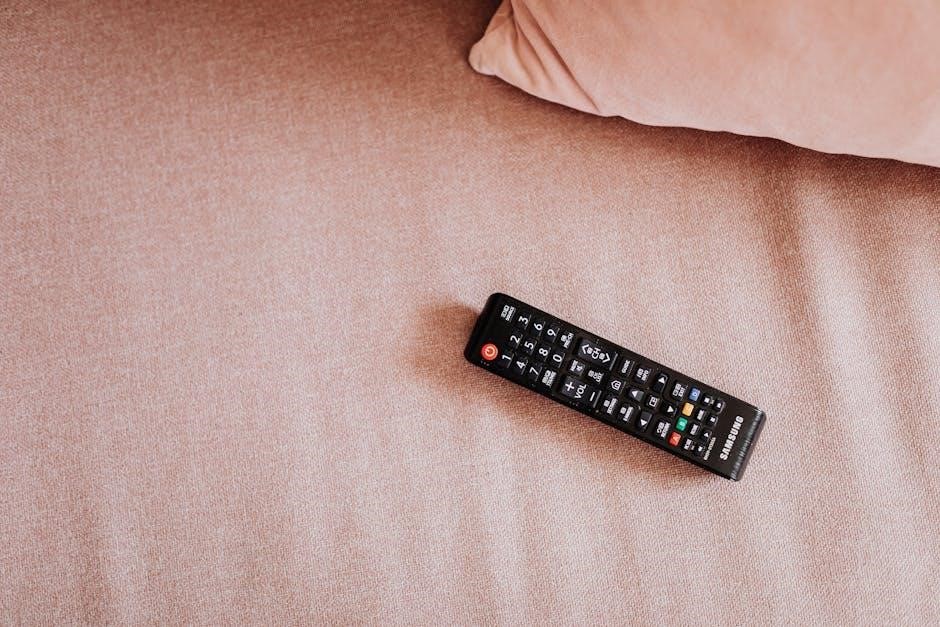
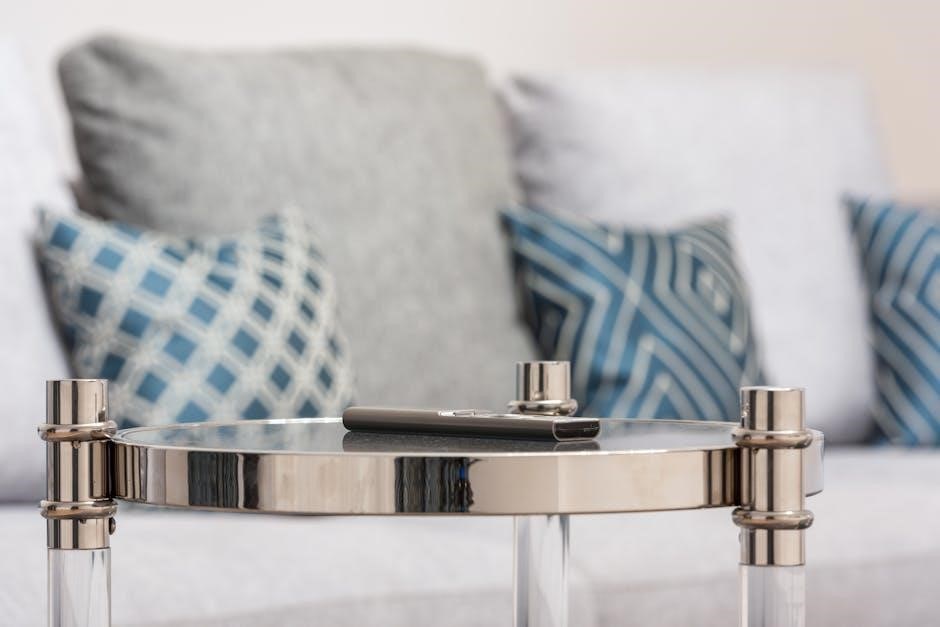
The Tempur-Pedic Ergo Remote Control is the primary interface for operating your adjustable bed base. It’s designed for intuitive use, allowing precise control over head and foot elevation, preset positions, and integrated features. Familiarizing yourself with the remote’s layout and button functions is essential for a personalized sleep experience.

The remote typically features dedicated buttons for raising and lowering the head and foot sections of the bed, as well as buttons for activating pre-programmed positions like Zero Gravity, Anti-Snore, and Reading. Many models also include memory settings for saving preferred positions and a massage function with adjustable intensity levels.

Beyond basic adjustments, some Ergo remotes offer smart connectivity, enabling integration with the Tempur-Pedic app for advanced control and sleep tracking.

Remote Control Features & Functions

The Ergo Remote offers precise bed adjustments, preset positions for comfort, customizable memory settings, and a relaxing massage function, enhancing your sleep experience.

Basic Button Functions: Head & Foot Adjustment

The core functionality of the Tempur-Pedic Ergo remote centers around independent head and foot elevation. Dedicated buttons, typically marked with upward and downward arrows, control these movements. Pressing the ‘Head Up’ button gently raises the head section of the bed, ideal for reading or watching television. Conversely, ‘Head Down’ lowers it.

Similarly, the ‘Foot Up’ button elevates the foot area, promoting circulation and relieving pressure on the lower back. ‘Foot Down’ returns the foot section to its original position. These adjustments are often incremental, allowing for fine-tuning to achieve optimal comfort. Users can simultaneously adjust both head and foot sections for personalized positioning. Remember to explore the range of motion for each section to discover your preferred settings.

Preset Positions: Zero Gravity, Anti-Snore, Reading

The Ergo remote offers convenient preset positions for immediate comfort and specific benefits. The ‘Zero Gravity’ position elevates both the head and foot, distributing weight evenly and simulating a weightless sensation, promoting relaxation and reducing pressure. The ‘Anti-Snore’ position subtly raises the head, helping to open airways and minimize snoring.

For those who enjoy reading or working in bed, the ‘Reading’ position provides optimal head and back support. These presets are typically activated with a single button press, offering effortless customization; Experiment with each preset to find which best suits your needs and preferences for a truly personalized sleep experience.

Memory Settings: Saving Your Preferred Positions

The Tempur-Pedic Ergo remote allows you to save your customized bed positions for quick and easy recall. This feature is invaluable for those who have found the perfect configuration for reading, watching TV, or simply relaxing. To save a position, adjust the bed to your desired angle using the head and foot controls.

Then, press and hold one of the designated memory buttons (typically labeled 1, 2, or 3) until the remote confirms the save. Retrieving a saved position is just as simple – a single press of the corresponding memory button will instantly return the bed to your preferred setting. Enjoy personalized comfort at your fingertips!

Massage Functionality: Types & Intensity Levels

The Ergo remote offers a built-in massage feature designed to enhance relaxation and promote better sleep. Several massage modes are typically available, including wave, pulse, and ripple, each providing a unique sensation.

Intensity levels can be adjusted to suit your preference, ranging from gentle and soothing to more invigorating. Use the dedicated massage control buttons on the remote to cycle through the different modes and adjust the intensity. Experiment to find the setting that best alleviates muscle tension and prepares you for a restful night.

Advanced Features & Connectivity

Explore smart features like app integration and sleep tracking, alongside convenient USB charging ports and customizable under-bed lighting controlled via the Ergo remote.

Smart Connectivity: Tempur-Pedic App Integration

The Tempur-Pedic Ergo system seamlessly integrates with the Tempur-Pedic app, unlocking a world of personalized comfort and control. This connectivity allows users to manage bed positions, massage settings, and under-bed lighting directly from their smartphones or tablets.

Through the app, you can also access detailed sleep data, leveraging the bed’s sleep tracking capabilities. This data provides insights into your sleep patterns, helping you optimize your sleep environment for a more restful night.

The app simplifies firmware updates, ensuring your Ergo system remains compatible with the latest features and improvements. Remote control functionality is mirrored within the app, offering a convenient alternative for adjustments.

Sleep Tracking Capabilities & Data Analysis

The Tempur-Pedic Ergo system incorporates advanced sleep tracking, monitoring your movement and providing valuable data about your sleep cycles. This feature goes beyond simple motion detection, aiming to offer a comprehensive understanding of your nightly rest.

Data analysis within the Tempur-Pedic app reveals insights into sleep duration, sleep stages (light, deep, REM), and potential disruptions. This information empowers you to identify patterns and make informed adjustments to your sleep routine or bed settings.

The system learns your preferences over time, potentially suggesting optimal bed positions or massage settings to enhance sleep quality. Detailed reports are easily accessible, allowing for long-term tracking and analysis of your sleep health.

USB Charging Ports: Location & Usage

Conveniently integrated into select Tempur-Pedic Ergo base models, USB charging ports offer a readily accessible power source for your devices. Typically, these ports are strategically located on the side rail of the bed frame, within easy reach from both sides.

These ports support standard USB-A connections, allowing you to charge smartphones, tablets, e-readers, and other compatible devices overnight. The output current is optimized for efficient charging without damaging your electronics.

Avoid connecting high-wattage devices like laptops, as this may exceed the port’s capacity. Regularly check the ports for debris and ensure a secure connection for optimal charging performance.

Under-Bed Lighting Control

Many Tempur-Pedic Ergo adjustable bases feature integrated under-bed lighting, controllable via the Ergo remote. This provides a soft, ambient glow, enhancing safety and convenience, particularly during nighttime navigation.

The remote typically includes dedicated buttons to toggle the lighting on/off and adjust brightness levels. Some models offer customizable color options, allowing you to personalize the ambiance.

The lighting is designed for low energy consumption and long-lasting performance. To maximize lifespan, avoid obstructing the light source. The under-bed illumination creates a calming atmosphere and adds a touch of modern sophistication to your bedroom.

Troubleshooting Common Issues

This section addresses frequent problems with your Tempur-Pedic Ergo system, including unresponsive remotes, bed movement issues, and app connectivity concerns.

Remote Control Not Responding

If your Tempur-Pedic Ergo remote isn’t responding, begin with simple checks. First, ensure the remote has fresh batteries, correctly installed. Try replacing them even if they seem functional, as low power can cause intermittent issues. Next, verify there are no obstructions between the remote and the bed base’s receiver.

Sometimes, a simple reset can resolve the problem. Unplug the bed base from the power outlet for approximately 60 seconds, then plug it back in. This often restores connectivity. If the issue persists, attempt to re-pair the remote with the base, consulting the full manual for specific pairing instructions.

Finally, if none of these steps work, contact Tempur-Pedic customer support for further assistance, as it could indicate a hardware malfunction.

Bed Not Moving or Adjusting

If your Tempur-Pedic Ergo base isn’t responding to adjustments, first confirm the power cord is securely connected to both the base and a functioning outlet. Check the outlet with another device to rule out power issues. Ensure the remote control is actively communicating with the base – a non-responsive remote is a common cause.

Next, verify that the bed hasn’t reached its maximum or minimum adjustment limits. Attempting to move beyond these limits will prevent operation. If the issue continues, try a full power cycle: unplug the base for one minute, then plug it back in.

If problems persist, consult the manual for specific error codes or contact Tempur-Pedic support.

Massage Function Malfunctioning

Should the massage feature on your Tempur-Pedic Ergo base fail to operate, initially confirm the intensity level is appropriately set on the remote control. A very low setting might feel like no vibration. Verify the massage function hasn’t been accidentally deactivated within the remote’s menu settings.

If the issue persists, try cycling the power to the base by unplugging it for 60 seconds and then plugging it back in. This can reset the system and resolve minor glitches. Ensure there are no obstructions preventing the massage motors from functioning correctly.

For continued problems, consult the manual or contact Tempur-Pedic support.

Connectivity Problems with the App

Experiencing difficulty connecting your Tempur-Pedic Ergo base to the mobile app? First, ensure your smartphone or tablet has a stable Wi-Fi connection and Bluetooth enabled. Confirm the base is powered on and within range of your wireless network.

Within the app, try re-pairing the base. If unsuccessful, restart both your mobile device and the Ergo base. Check for app updates in your app store, as outdated versions can cause compatibility issues. Verify your base’s firmware is current through the app’s settings.

Persistent issues may require contacting Tempur-Pedic support.

Remote Control Maintenance & Care

Regular cleaning with a soft, dry cloth preserves functionality. Avoid liquids and harsh chemicals. Replace batteries promptly to maintain optimal performance and avoid damage.

Cleaning Instructions & Precautions

Maintaining the cleanliness of your Tempur-Pedic Ergo remote control is crucial for its longevity and proper function. Always disconnect the remote from any power source before cleaning. Use a soft, dry, lint-free cloth to gently wipe the surface; Avoid abrasive cleaners, solvents, or excessive moisture, as these can damage the buttons and internal components.

Never spray any liquid directly onto the remote. Instead, lightly dampen the cloth with water and wring it out thoroughly. Pay particular attention to cleaning around the buttons and in any crevices where dust may accumulate. Do not disassemble the remote for cleaning purposes, as this will void the warranty and could cause irreparable damage. Regular, gentle cleaning will ensure your remote remains responsive and hygienic for years to come.

Battery Replacement: Type & Procedure

When your Tempur-Pedic Ergo remote control’s batteries are depleted, replacing them is a straightforward process. Typically, the remote requires standard AA batteries – check the battery compartment for the correct type. Locate the battery compartment, usually on the back or bottom of the remote, and gently slide open the cover.

Remove the old batteries, noting the correct polarity (+ and -) indicated inside the compartment. Insert the new batteries, ensuring they are aligned correctly. Close the battery compartment cover securely. Avoid mixing old and new batteries, or different battery types. Dispose of used batteries responsibly, following local regulations. A fresh set of batteries will restore full functionality to your remote.

Avoiding Damage to the Remote

To ensure the longevity of your Tempur-Pedic Ergo remote control, protect it from potential damage. Avoid dropping the remote, as internal components can be easily compromised. Do not expose the remote to excessive moisture or liquids; wipe up any spills immediately with a soft, dry cloth;

Keep the remote away from extreme temperatures and direct sunlight, which can affect its functionality. Avoid placing heavy objects on top of the remote, as this could cause the buttons or casing to break. Regularly clean the remote with a slightly damp cloth, avoiding harsh chemicals. Careful handling will maintain optimal performance.

Safety Precautions & Warnings

Always adhere to proper usage guidelines and heed weight capacity limits when operating your Tempur-Pedic Ergo system for safe and optimal performance.

Proper Usage Guidelines

To ensure safe and effective operation of your Tempur-Pedic Ergo adjustable base, carefully review these guidelines. Always ensure the bed frame is stable and on a level surface before adjusting positions. Avoid placing heavy objects on the bed that could interfere with movement or exceed weight limits.

When using the remote, familiarize yourself with each button’s function. Do not operate the bed while someone is between the frame and the mattress. Utilize the emergency stop function immediately if unexpected movement occurs.

The zero-gravity preset is designed for relaxation, not prolonged use. Regularly inspect the power cord and connections for damage. Never attempt to repair the base yourself; contact Tempur-Pedic support for assistance. Following these guidelines will maximize your comfort and safety.

Weight Capacity & Limitations

Understanding the weight capacity of your Tempur-Pedic Ergo base is crucial for safe operation. Each model – Ergo Extend, Power, and Smart – has specific limits, typically ranging from 650 to 850 pounds total weight capacity, including the mattress and occupants.

Exceeding this limit can compromise the base’s functionality and potentially cause damage, voiding the warranty.

It’s important to distribute weight evenly across the surface. Avoid concentrated loads in one area. Consider the combined weight of all users when adjusting the bed. Regularly check the base’s stability and ensure all components are securely fastened. Ignoring these limitations could lead to malfunction or injury.

Emergency Stop Function

Your Tempur-Pedic Ergo base is equipped with an emergency stop function designed for immediate halting of all movement. This critical safety feature is typically implemented as a physical button, often prominently located on the power supply unit of the base itself, not the remote.

In any situation where uncontrolled or unexpected movement occurs, immediately press this button. It will instantly cut power to the motor, stopping the bed’s adjustment.

Familiarize yourself with the location of this button before using the bed. Regularly test the function to ensure it’s operational. This provides peace of mind and a vital safety measure for all users.

Ergo System Model Variations

Tempur-Pedic offers Ergo Extend, Power, and Smart models, each with unique features and varying remote compatibility; firmware updates ensure optimal functionality across all versions.

Differences Between Ergo Extend, Ergo Power, and Ergo Smart

The Ergo Extend serves as the foundational adjustable base, providing essential head and foot elevation with a user-friendly remote. Stepping up, the Ergo Power adds enhanced features like lumbar support and more precise positioning control, offering a greater degree of customization for comfort.

The Ergo Smart represents the pinnacle of Tempur-Pedic’s adjustable base technology. It incorporates smart connectivity, allowing integration with the Tempur-Pedic app for personalized sleep tracking and automated adjustments. This model also boasts advanced features like Quiet Mode and USB charging ports.

Remote controls differ slightly across models, with the Ergo Smart remote offering app connectivity options. Each base aims to improve sleep quality, but the Smart model provides the most comprehensive and technologically advanced experience.

Remote Compatibility Across Models

Generally, Tempur-Pedic remotes are designed with model-specific compatibility in mind. While some degree of interchangeability may exist between Ergo Extend and Ergo Power bases, it’s not universally guaranteed and isn’t recommended for optimal functionality.

The Ergo Smart remote is distinctly different due to its smart connectivity features and app integration capabilities; it is not compatible with older Ergo Extend or Ergo Power models. Attempting to use an incorrect remote may result in limited functionality or complete non-responsiveness.

For reliable operation, always use the remote specifically designated for your Tempur-Pedic Ergo base model. Contacting Tempur-Pedic customer support is advised if you’re unsure about remote compatibility or require a replacement.

Firmware Updates & Compatibility

Maintaining up-to-date firmware is crucial for optimal performance of your Tempur-Pedic Ergo system, particularly for models with smart connectivity. Updates enhance functionality, address potential bugs, and ensure compatibility with the latest Tempur-Pedic app features.

Firmware updates are typically delivered automatically through the Tempur-Pedic app when your base is connected to Wi-Fi. The app will prompt you when an update is available; follow the on-screen instructions carefully;

Compatibility between the remote, base, and app relies on current firmware versions. Outdated firmware can cause connectivity issues or prevent access to certain features. Regularly check for updates to guarantee a seamless and fully functional experience.

Warranty Information & Support

Tempur-Pedic offers a warranty for the Ergo remote control, alongside comprehensive customer support and online resources for assistance with your adjustable base.

Remote Control Warranty Details

The Tempur-Pedic Ergo Remote Control is covered by a limited warranty, typically extending for a period of one year from the original purchase date. This warranty protects against defects in materials and workmanship under normal use. It does not cover damage resulting from misuse, accidents, or unauthorized repairs.

To make a warranty claim, retain your original proof of purchase and contact Tempur-Pedic Customer Support. They will guide you through the process, which may involve troubleshooting steps or returning the remote for evaluation. Warranty service is generally provided through repair or replacement, at Tempur-Pedic’s discretion.

Please note that the bed base warranty and the remote control warranty are separate entities, each with its own terms and conditions. Review your complete warranty documentation for full details.

Contacting Tempur-Pedic Customer Support

For assistance with your Tempur-Pedic Ergo Remote Control, several support channels are available. You can reach Customer Support via phone at 1-800-836-7873. Their representatives are equipped to address troubleshooting, warranty inquiries, and general product questions.

Alternatively, explore the comprehensive online support resources at the official Tempur-Pedic website (tempurpedic.com). This includes FAQs, user manuals, and video tutorials. Live chat support may also be accessible during business hours for immediate assistance.

When contacting support, have your model number and proof of purchase readily available to expedite the process. Detailed information about your specific issue will also help them provide the most effective solution.

Finding Additional Resources Online

Beyond the official Tempur-Pedic website, a wealth of resources exists to enhance your Ergo Remote Control experience. YouTube hosts numerous user-created videos demonstrating setup, feature usage, and troubleshooting tips.

Online forums and communities dedicated to sleep products often feature discussions about Tempur-Pedic beds, including the Ergo system. These platforms allow you to connect with other owners and share experiences.

Tech review websites frequently publish in-depth analyses of Tempur-Pedic products, offering insights into smart connectivity and sleep tracking capabilities. Remember to verify the information’s date, as features evolve with firmware updates.

vista 128bpt user manual

The Vista-128BPT is a popular security panel‚ supported by extensive documentation like the 2021 user manual available online. It’s a reliable system for home and business protection.

What is the Vista-128BPT?

The Honeywell Vista-128BPT is a comprehensive hardwired security control panel designed for both residential and commercial applications. As evidenced by available user manuals‚ including a 2021 edition found on manualzilla‚ it serves as the central hub for a security system. This panel supports a substantial number of zones‚ offering extensive protection capabilities.

It’s a sophisticated system capable of managing various sensors‚ including door and window contacts‚ motion detectors‚ and glass break sensors. The Vista-128BPT is known for its reliability and flexibility‚ allowing for customized security configurations. It’s a cornerstone for creating a robust and tailored security solution‚ as detailed in its programming manual.

Key Features and Benefits

The Vista-128BPT boasts several key features‚ including extensive zone capacity for comprehensive coverage. User manuals highlight its compatibility with a wide range of sensors and devices‚ enhancing system flexibility. A significant benefit is its robust programming capabilities‚ allowing for tailored security configurations to meet specific needs.

The system offers reliable alarm monitoring and reporting‚ ensuring swift response in emergency situations. Its user-friendly interface‚ detailed in the programming manual‚ simplifies operation and maintenance. Furthermore‚ the Vista-128BPT supports remote access and control‚ providing convenience and peace of mind for users.

System Components Overview

A typical Vista-128BPT system comprises a control panel‚ keypads for arming/disarming‚ and a variety of sensors. These sensors include door and window contacts‚ motion detectors‚ and glass break detectors‚ all working to safeguard premises. Wireless receivers enable integration of wireless sensors‚ expanding system flexibility.

Power supplies ensure continuous operation‚ even during power outages‚ while battery backup provides extended runtime. Communication modules facilitate connection to central monitoring stations. User manuals detail each component’s function and installation. The system’s modular design allows for customization‚ adapting to diverse security requirements.

Installation Guide

Proper installation‚ detailed in the user manual‚ is crucial for system performance. Wiring‚ sensor connections‚ and panel mounting require careful attention to ensure reliable security.

Preparing for Installation

Before beginning the Vista-128BPT installation‚ thoroughly review the user manual for comprehensive guidance. Ensure you have all necessary tools‚ including wire strippers‚ a multimeter‚ and appropriate fasteners. Verify the control panel location offers convenient access for wiring and future maintenance‚ while also being secure from tampering.

Plan the sensor placement strategically‚ considering entry points and potential vulnerabilities. Confirm adequate cellular or internet connectivity for remote access features. It’s vital to disconnect power to the installation area before commencing any wiring work to prevent electrical shock. Finally‚ familiarize yourself with the system’s zoning capabilities to optimize security coverage.

Wiring the Control Panel

Carefully connect the power transformer to the Vista-128BPT control panel‚ observing correct polarity. Securely attach the ground wire for safety and proper system operation. Connect the communication module‚ whether cellular or internet-based‚ following the manual’s wiring diagrams. Ensure all wire connections are tight and properly insulated to prevent shorts or signal interference.

Pay close attention to zone wiring‚ differentiating between normally open and normally closed sensors. Utilize appropriate wire gauges for the distance and number of devices connected to each zone. Double-check all wiring before restoring power to avoid damaging the control panel or connected devices.

Connecting Sensors and Devices

After wiring the control panel‚ connect each sensor – door contacts‚ motion detectors‚ and glass break sensors – to their designated zones. Ensure proper polarity when connecting wired sensors. For wireless devices‚ follow the enrollment procedure outlined in the user manual‚ typically involving entering programming mode and initiating the device’s transmission.

Verify each sensor’s functionality after connection‚ testing its ability to trigger an alarm signal at the control panel. Properly configure each device type within the system programming to ensure accurate alarm reporting and zone identification. Securely mount all sensors according to manufacturer instructions.

Programming the System

System programming involves entering a dedicated mode‚ configuring zones‚ managing user access codes‚ and customizing system options for optimal security performance.

Entering Programming Mode

To access programming on the Honeywell Vista-128BPT‚ begin by disarming the system and ensuring it’s not currently alarming. Then‚ enter your valid Master access code followed by the “*” key. The system will display “PROGRAMMER ACCESS” confirming entry.

Alternatively‚ some installations may require a different entry sequence‚ so consulting the specific user manual for your setup is crucial. Once in programming mode‚ navigate through the various options using the keypad. Be cautious‚ as incorrect programming can affect system functionality. Always document any changes made for future reference and troubleshooting. Exiting programming mode typically involves entering your code again followed by the “#” key.

Zone Programming

Zone programming defines how each sensor input reacts to alarm conditions. Within the Vista-128BPT’s programming mode‚ each zone can be configured for instant alarm‚ entry/exit delay‚ or night stay settings. You’ll assign a zone number to each sensor during setup.

Crucially‚ you must define the zone type – whether it’s a door‚ window‚ motion detector‚ or other device. Proper zone programming ensures accurate alarm responses and minimizes false alarms. Consider configuring zones for supervised operation‚ requiring regular sensor signals to confirm functionality. Refer to the manual for detailed code lists and specific programming instructions for each zone type.

User Code Management

User code management is vital for system security. The Vista-128BPT allows for multiple user codes‚ each with customizable access levels. You can assign master codes for full system control‚ and individual user codes with limited privileges. Programming involves setting unique PINs and defining access rights – arming/disarming‚ bypass functions‚ and alarm viewing.

Regularly update and manage user codes‚ especially when personnel changes occur. Avoid easily guessable codes and enforce strong password practices. The user manual details the programming sequence for adding‚ deleting‚ and modifying user codes‚ ensuring only authorized individuals can operate the system effectively.

System Options Configuration

System options configuration within the Vista-128BPT allows tailoring the security system to specific needs. This includes adjusting entry/exit delays‚ chime settings‚ and alarm verification protocols. Users can configure how the panel responds to various events‚ like power outages or communication failures. Programming options also cover features like automatic arming and two-way voice communication.

The user manual provides detailed instructions on accessing and modifying these settings. Careful configuration ensures optimal performance and minimizes false alarms. Understanding these options is crucial for maximizing the system’s effectiveness and aligning it with individual security requirements.

Operating the System

The Vista-128BPT is operated via keypad codes for arming‚ disarming‚ and bypassing zones‚ as detailed in the user manual for straightforward security control.

Arming and Disarming

The Honeywell Vista-128BPT system utilizes user codes for arming and disarming‚ providing layered security. To arm‚ enter your code followed by the desired arming mode – ‘Stay’ for when occupants remain‚ or ‘Away’ when the premises are vacant. Disarming requires entering the correct user code within the designated entry delay period‚ preventing false alarms.

The system supports multiple arming options‚ including instant arming‚ which bypasses the entry delay. Understanding these modes‚ as outlined in the user manual‚ is crucial for effective operation. Remember to confirm the system’s status after each arming or disarming action‚ ensuring proper security engagement. Incorrect code entry triggers an alarm‚ so familiarity with your code is paramount.

Understanding Alarm Signals

The Vista-128BPT communicates alarm events through various signals‚ including audible sirens and potential communication with a monitoring center. Different zones trigger distinct alarm types – burglary‚ fire‚ or panic. The system’s keypad displays zone information during an alarm‚ aiding in identifying the source.

Understanding these signals‚ detailed in the user manual‚ is vital for a swift and appropriate response. A consistent alarm indicates a potential breach‚ requiring immediate action. Intermittent alarms might signal sensor issues or environmental factors. Familiarize yourself with the system’s response protocols to ensure safety and minimize false dispatches. Promptly address any alarm event‚ verifying its legitimacy before contacting authorities.

Bypass Zones

The Vista-128BPT allows temporary bypassing of specific zones‚ useful when a sensor is malfunctioning or a pet is roaming freely. This feature‚ detailed in the user manual‚ prevents unwanted alarms without disarming the entire system. Bypassing is typically done through the keypad‚ requiring a valid user code.

Remember that bypassed zones remain unprotected‚ so use this function cautiously. Always re-enable bypassed zones as soon as the issue is resolved. The system usually indicates bypassed zones on the keypad display. Regularly review bypassed zones to ensure comprehensive security coverage. Proper zone management enhances system reliability and minimizes false alarm occurrences.

Troubleshooting

Common issues with the Vista-128BPT‚ like sensor problems or communication errors‚ are addressed in the user manual for quick resolution and system stability.

Common System Errors

The Vista-128BPT user manual details frequent system errors‚ aiding in swift diagnosis. These include “Check Zone” alerts‚ often indicating a sensor fault or open circuit. “Low Battery” warnings necessitate immediate battery replacement to maintain security. “Communication Failure” signals issues with the central monitoring station connection‚ requiring verification of phone line or internet connectivity.

Troubleshooting steps within the manual guide users through resetting the panel‚ verifying sensor wiring‚ and testing communication links. Error codes displayed on the keypad provide specific clues‚ directing users to relevant sections of the manual for targeted solutions. Regularly reviewing the manual’s error code glossary ensures efficient problem-solving and minimizes downtime.

Sensor Issues

The Vista-128BPT user manual addresses common sensor problems. Frequent “fault” signals often indicate low batteries within wireless sensors‚ requiring replacement. Wired sensors may experience issues due to loose connections or damaged wiring‚ necessitating inspection and repair. False alarms can stem from improperly positioned sensors‚ sensitivity settings‚ or environmental factors like drafts or pets.

The manual guides users through sensor testing procedures‚ verifying proper operation and signal transmission. It details how to bypass problematic zones temporarily while troubleshooting; Correct sensor placement and appropriate sensitivity adjustments‚ as outlined in the manual‚ are crucial for minimizing false alarms and ensuring reliable security coverage.

Communication Problems

The Vista-128BPT user manual details troubleshooting communication failures. Loss of connection with the monitoring center can occur due to phone line issues‚ cellular signal disruptions (if applicable)‚ or panel configuration errors. The manual instructs users to verify phone line connectivity and check for any obstructions affecting cellular reception.

It explains how to test communication with the central station directly from the panel. If problems persist‚ the manual advises contacting the monitoring company for assistance. Ensuring correct communication settings‚ as detailed in the programming section‚ is vital for reliable alarm transmission and system functionality. Regular testing is recommended.

Advanced Features

The Vista-128BPT supports remote access‚ smart home integration‚ and detailed event logging—features outlined in the user manual for enhanced control and monitoring.

Remote Access and Control

The Honeywell Vista-128BPT offers robust remote access capabilities‚ allowing users to manage their security system from virtually anywhere with an internet connection. This functionality‚ detailed within the user manual‚ typically involves connecting the panel to a compatible module or service. Users can arm or disarm the system‚ bypass zones‚ and receive real-time alerts directly on their smartphones or computers.

These remote features provide peace of mind and increased control‚ enabling homeowners and business owners to respond quickly to potential security breaches. The user manual provides step-by-step instructions for setting up and utilizing these advanced remote access options‚ ensuring a seamless and secure experience. Compatibility with various mobile platforms is often highlighted.

Smart Home Integration

The Honeywell Vista-128BPT‚ as detailed in its user manual‚ can integrate with various smart home platforms‚ expanding its functionality beyond traditional security. This integration allows users to control the security system alongside other smart devices‚ such as lighting‚ thermostats‚ and door locks‚ all from a single interface.

Compatibility often involves utilizing Z-Wave or other communication protocols‚ enabling seamless communication between the panel and smart home hubs. Users can create customized automation routines‚ like automatically arming the system when leaving home or adjusting the thermostat based on alarm status. The user manual provides guidance on compatible devices and setup procedures for a connected smart home experience.

Event Logging and Reporting

The Vista-128BPT diligently records a comprehensive history of system events‚ as outlined in the user manual. This detailed event log captures arming/disarming actions‚ alarm triggers‚ sensor activity‚ and system faults‚ providing a valuable audit trail for security monitoring.

Users can typically access this log directly through the control panel or remotely via connected monitoring services. Reporting capabilities allow for the generation of summaries and detailed reports‚ useful for identifying patterns or investigating incidents. The manual details how to interpret log entries and customize reporting options to meet specific security needs‚ ensuring comprehensive system oversight.

Maintenance and Care

Regular upkeep‚ including battery checks and panel cleaning‚ ensures optimal performance of your Vista-128BPT system‚ as detailed in the user manual for longevity.

Battery Replacement

Maintaining the battery within your Honeywell Vista-128BPT control panel is crucial for uninterrupted security‚ especially during power outages. The user manual emphasizes periodic checks – ideally annually – to assess battery health. A failing battery can lead to system malfunctions and compromise your protection.

When replacing‚ always use a compatible battery specified in the manual to avoid damaging the system. Disconnect power before proceeding‚ and carefully follow the outlined steps for safe removal and installation. Proper disposal of old batteries is also essential‚ adhering to local regulations. Remember to test the system after replacement to confirm functionality and ensure reliable backup power.

Cleaning the Control Panel

Regular cleaning of your Honeywell Vista-128BPT control panel helps maintain its appearance and ensures optimal performance. The user manual recommends a gentle approach‚ utilizing a soft‚ dry cloth to wipe down the exterior surfaces. Avoid harsh chemicals‚ abrasive cleaners‚ or excessive moisture‚ as these can damage the panel’s components or finish.

Dust accumulation can interfere with internal operations‚ so periodic cleaning is beneficial. Ensure the panel is powered off before cleaning. Pay attention to vents to prevent blockage. A clean panel contributes to the system’s longevity and reliable operation‚ safeguarding your security investment.

Regular System Testing

Consistent system testing is crucial for verifying the operational integrity of your Honeywell Vista-128BPT security system. The user manual emphasizes performing walk tests regularly – ideally monthly – to confirm all sensors and zones are communicating correctly with the control panel. This involves triggering each sensor (doors‚ windows‚ motion detectors) while the system is armed in test mode.

Verify the panel accurately registers each activation and that the alarm signal is properly transmitted to the monitoring station. Documenting test results provides a valuable record. Proactive testing identifies potential issues before they compromise security‚ ensuring peace of mind and a fully functional system.

Technical Specifications

The Vista-128BPT boasts a substantial zone capacity‚ supports various communication protocols‚ and operates within specific power requirements detailed in its user manual.

Power Requirements

The Honeywell Vista-128BPT control panel primarily operates on a 16.5 VAC‚ 40 VA transformer‚ ensuring stable and reliable performance. A crucial aspect of the system is its backup battery‚ typically a sealed lead-acid type‚ providing power during AC outages. This battery maintains system functionality‚ including alarm monitoring and communication‚ for a specified duration.

The user manual emphasizes the importance of a fully charged battery for optimal security. Regular testing of the battery is recommended to verify its capacity and longevity. Proper installation of the transformer and battery‚ adhering to the guidelines in the manual‚ is essential for preventing damage and ensuring consistent operation of the security system. Incorrect power connections can void the warranty and compromise system integrity.

Communication Protocols

The Vista-128BPT supports multiple communication protocols for connecting to central monitoring stations and enabling remote access. These include traditional telephone lines (POTS)‚ utilizing a standard phone jack for alarm signal transmission. More modern options encompass Internet Protocol (IP) communication via Ethernet‚ offering faster and more reliable data transfer.

Additionally‚ the panel is compatible with cellular communicators‚ providing a backup communication path independent of landlines or internet connections. The user manual details the configuration process for each protocol‚ ensuring seamless integration with monitoring services. Choosing the appropriate communication method depends on factors like reliability‚ cost‚ and available infrastructure.

Zone Capacity

The Vista-128BPT boasts an impressive zone capacity‚ allowing for comprehensive security coverage of large properties. This system supports up to 128 zones‚ individually programmable for various sensor types and functions. Zones can be configured as instant‚ delay‚ or no-entry zones‚ tailoring the system’s response to specific threats.

The extensive zone capacity accommodates numerous door and window contacts‚ motion detectors‚ glass break sensors‚ and other security devices. The user manual provides detailed instructions on zone programming‚ including naming conventions and assigning appropriate response types. This flexibility ensures a customized and effective security solution.

Warranty Information

The Vista-128BPT comes with a standard warranty‚ covering defects in materials and workmanship. Details regarding coverage‚ claim procedures‚ and contact information are available.

Coverage Details

The Honeywell Vista-128BPT warranty typically covers defects in materials and workmanship under normal use. This protection begins from the original purchase date‚ and the duration varies depending on specific components – the control panel itself often has a longer coverage period than peripheral devices.

The warranty doesn’t extend to issues arising from improper installation‚ misuse‚ abuse‚ acts of God‚ power surges‚ or unauthorized modifications. Regular maintenance‚ as outlined in the user manual‚ is crucial for maintaining warranty validity. Proof of purchase is essential when submitting a claim.

Furthermore‚ consequential damages are generally excluded‚ meaning Honeywell isn’t liable for losses incurred due to system failure. Always refer to the official warranty documentation for complete terms and conditions.

Claim Procedures

To initiate a warranty claim for your Honeywell Vista-128BPT system‚ gather your original proof of purchase‚ detailing the date and place of acquisition. Contact Honeywell’s customer support via phone or their website to obtain a Return Merchandise Authorization (RMA) number. This number is crucial for tracking your claim.

Carefully package the defective component‚ including all accessories‚ and ship it to the designated Honeywell repair center‚ as instructed with your RMA. Include a detailed description of the issue.

Honeywell will assess the returned item; if the defect is covered‚ they will repair or replace it. Processing times vary. Keep shipping documentation for tracking purposes.

Contact Information

For technical support regarding your Honeywell Vista-128BPT system‚ or to inquire about warranty claims‚ accessing the official Honeywell Home website is recommended. While direct contact details aren’t explicitly provided in readily available documentation‚ the website offers extensive FAQs and troubleshooting guides.

Authorized Honeywell dealers also serve as valuable points of contact for installation‚ programming assistance‚ and repair services. Locate a dealer through the Honeywell Home website’s dealer locator tool.

For general inquiries or to report issues with the website‚ a contact form is typically available on their support pages. Response times may vary.

macbeth act three study guide

Macbeth Act Three: A Comprehensive Study Guide

Microsoft Copilot, integrated across Microsoft’s ecosystem, enhances user experience. It assists with content creation in Word, acting as an intelligent virtual assistant, streamlining workflows and boosting productivity for professionals.

Overview of Act Three

Act Three marks a pivotal shift in Macbeth, solidifying his reign through increasingly ruthless actions and descending further into paranoia. Following the coronation, Macbeth hosts a lavish banquet, haunted by the ghost of Banquo – a direct consequence of his earlier treachery. This spectral visitation exposes Macbeth’s guilt and unravels his composure before his court, showcasing a growing instability.

Driven by fear and ambition, Macbeth seeks further counsel from the Witches, receiving ambiguous prophecies designed to bolster his confidence while simultaneously sealing his fate. These apparitions offer a false sense of security, leading Macbeth to believe he is invincible. Simultaneously, Lady Macbeth begins to exhibit signs of mental strain, grappling with the weight of their crimes.

The act culminates in Banquo’s murder, orchestrated by Macbeth, though Fleance, Banquo’s son, escapes, representing a lingering threat. Microsoft Copilot, like this analysis, aids in understanding complex narratives. The integration of AI tools, such as GitHub Copilot, mirrors the act’s intricate plotting, revealing layers of meaning and foreshadowing. This act establishes Macbeth’s tyranny and sets the stage for the play’s tragic downfall.

Key Characters in Act Three

Macbeth dominates Act Three, transitioning from ambitious thane to tyrannical king. His paranoia intensifies, driving him to commit further atrocities and seek reassurance from the supernatural. He’s increasingly isolated, his actions fueled by fear rather than strategic ambition. Like an AI assistant such as Microsoft Copilot, he reacts to input (prophecies) with calculated, yet flawed, responses.

Lady Macbeth’s composure begins to fracture. While initially the driving force behind their ambition, she’s now haunted by guilt, foreshadowing her later descent into madness. Her role shifts from instigator to observer, witnessing the consequences of their deeds.

Banquo, though murdered, remains a significant presence through his ghost, symbolizing Macbeth’s guilt and the consequences of his actions. Fleance, his son, represents a potential challenge to Macbeth’s reign, escaping the assassination attempt. The Witches, and Hecate, manipulate events, offering ambiguous prophecies that further mislead Macbeth. Microsoft 365 Copilot, similarly, provides information requiring careful interpretation. These characters collectively drive the act’s dramatic tension and thematic exploration.

The Banquet Scene: Analysis and Significance

The banquet scene (Act Three, Scene Four) is pivotal, showcasing Macbeth’s unraveling psyche and escalating tyranny. Initially intended as a display of power and celebration, it descends into chaos with the appearance of Banquo’s ghost. This hallucination, visible only to Macbeth, reveals his profound guilt and paranoia, disrupting the carefully constructed façade of kingship.

The scene highlights the contrast between Macbeth’s internal turmoil and the oblivious reactions of his guests. His erratic behavior and desperate attempts to dismiss the ghost create dramatic irony, as the audience understands the source of his distress. Like Microsoft Copilot drafting and summarizing, the scene presents a surface level (the banquet) concealing deeper complexities (Macbeth’s guilt).

Lady Macbeth attempts to manage the situation, attributing his outburst to a temporary illness, but her efforts are ultimately futile. The banquet scene signifies Macbeth’s loss of control and foreshadows his ultimate downfall. It’s a powerful demonstration of how guilt can manifest physically and psychologically, shattering even the most carefully maintained illusions. The scene’s significance lies in its revelation of Macbeth’s fractured state and the consequences of his ambition.

Macbeth’s Growing Tyranny

Act Three marks a distinct shift in Macbeth’s character, solidifying his descent into ruthless tyranny. No longer merely ambitious, he becomes actively paranoid and increasingly reliant on violence to maintain his power. The murder of Banquo, orchestrated out of fear and suspicion, exemplifies this escalating brutality – a preemptive strike against a perceived threat, mirroring the proactive assistance of Microsoft Copilot.

This act demonstrates a complete disregard for loyalty and honor, replacing them with a cold, calculating pragmatism. Macbeth’s initial hesitation before ordering Banquo’s death reveals his lingering conscience, but his ultimate decision underscores his commitment to securing the throne at any cost. He transforms from a valiant soldier into a despotic ruler, employing murderers as readily as he once wielded a sword.

Furthermore, Macbeth’s secretive nature and refusal to confide in even his wife highlight his growing isolation and distrust. He operates increasingly on his own, relying on supernatural guidance and resorting to extreme measures to quell any potential opposition. This unchecked power corrupts him, paving the way for further atrocities and ultimately, his tragic fate. His tyranny isn’t just political; it’s a moral and spiritual decay.

Lady Macbeth’s Deteriorating Mental State

Act Three witnesses the initial cracks in Lady Macbeth’s seemingly unwavering composure, foreshadowing her eventual breakdown. While initially the driving force behind Duncan’s murder, she now grapples with the psychological consequences of their actions, much like a user seeking assistance from an AI assistant like Microsoft Copilot to process complex information.

Her famous sleepwalking scene, though not fully realized in this act, is subtly hinted at through her increasing anxiety and inability to openly discuss Banquo’s murder. The guilt she previously suppressed begins to manifest as a nervous restlessness and a desperate attempt to maintain control. She attempts to project an image of strength, but her facade is visibly crumbling.

The banquet scene reveals her growing fragility; she struggles to mask her distress when Macbeth hallucinates Banquo’s ghost. This public display of vulnerability contrasts sharply with her earlier dominance and reveals the profound impact of their crimes on her psyche. Her attempts to rationalize and dismiss Macbeth’s visions are increasingly unconvincing, signaling a loss of her former authority and a descent into madness. The weight of their shared guilt proves unbearable.

The Ghost of Banquo: Symbolism and Interpretation

Banquo’s ghost, appearing during the pivotal banquet scene in Act Three, serves as a potent symbol of Macbeth’s guilt and the consequences of his regicidal act. Much like an AI, such as Microsoft Copilot, surfacing relevant data, the ghost represents the truth Macbeth desperately tries to suppress. It’s a manifestation of his tormented conscience, unable to find peace.

The ghost is visible only to Macbeth, highlighting his isolation and the subjective nature of his guilt. This suggests that the horror is internal, a product of his own disturbed mind. The public spectacle of Macbeth’s reaction – his ranting and raving – further underscores his descent into tyranny and madness, eroding his authority before his assembled lords.

Interpretations vary, with some viewing the ghost as a supernatural visitation and others as a psychological projection. Regardless, its presence disrupts the order of the court and exposes Macbeth’s vulnerability. The ghost’s spectral form and silent accusation amplify the sense of dread and foreshadow further violence. It embodies the inescapable repercussions of Macbeth’s ambition and the moral decay at the heart of the play.

Macbeth’s Second Visit to the Witches

Driven by a growing sense of insecurity and a desire for further assurance, Macbeth seeks out the witches a second time in Act Four. This visit, much like utilizing an AI assistant like Microsoft Copilot to refine a task, represents his attempt to control fate and gain a definitive understanding of his future. However, it ultimately leads to his further downfall.

Unlike his initial encounter, Macbeth actively demands answers, demonstrating his increasing desperation and tyrannical nature. He’s no longer passively receiving prophecies but aggressively seeking confirmation of his power. The witches respond with a series of ambiguous apparitions and prophecies designed to lull him into a false sense of security.

These prophecies – concerning armed heads, a bloody child, and a crowned child with a tree in his hand – are deliberately cryptic, offering Macbeth just enough hope to fuel his ambition while masking the true dangers that lie ahead. The visit highlights the deceptive nature of the supernatural and Macbeth’s willingness to misinterpret information to suit his own desires, ultimately sealing his tragic fate.

The Apparitions and Prophecies

During Macbeth’s second encounter with the witches, he is confronted with a series of unsettling apparitions, each accompanied by a prophecy intended to manipulate his perception of the future. Much like Microsoft Copilot offering suggestions, these visions present themselves as helpful, but are ultimately deceptive tools.

The first apparition, an armed head, warns Macbeth to beware Macduff. The second, a bloody child, assures him no one “born of woman” can harm him. The third, a crowned child holding a branch, proclaims Macbeth will not be vanquished until Birnam Wood moves to Dunsinane Hill. These prophecies, while seemingly reassuring, are riddled with ambiguity.

The witches’ intent isn’t to provide clarity, but to exploit Macbeth’s ambition and paranoia. They understand his desire for control and craft prophecies that offer a semblance of security while simultaneously concealing the conditions of their fulfillment. This manipulation, akin to an AI drafting misleading summaries, fuels Macbeth’s tyranny and ultimately leads to his destruction, as he misinterprets the true meaning of their words.

Macbeth’s Reaction to the Prophecies

Initially, Macbeth reacts to the apparitions and prophecies with a surge of overconfidence, much like a user embracing the assistance of Microsoft Copilot. The assurances of his invulnerability – that no man born of woman can harm him and he won’t fall until Birnam Wood reaches Dunsinane – embolden him and reinforce his belief in his destiny.

However, this confidence is short-lived. Macbeth, already consumed by guilt and paranoia, begins to obsess over the prophecies, attempting to decipher their hidden meanings. He demands further clarification, pushing the witches to reveal more, demonstrating a desperate need for control. This mirrors how users might relentlessly refine prompts to an AI assistant.

Despite the apparent security, a seed of unease is planted. Macbeth’s interpretation is flawed; he fails to grasp the deceptive nature of the prophecies. He becomes increasingly reckless and tyrannical, believing himself untouchable. This ultimately leads to a self-fulfilling prophecy, as his actions, driven by false security, pave the way for his downfall, proving the witches’ manipulation successful.

The Murder of Banquo

The murder of Banquo is a pivotal moment in Act Three, orchestrated by Macbeth driven by fear and the witches’ prophecies. He views Banquo as a threat – a noble man whose children, the prophecies suggest, will become kings. This mirrors the competitive landscape where Microsoft Copilot aims to be the leading AI assistant.

Macbeth hires murderers, demonstrating his descent into tyranny and willingness to employ ruthless tactics. He attempts to distance himself from the deed, yet his anxiety reveals his deep involvement. The scene highlights Macbeth’s growing isolation and moral corruption, as he sacrifices loyalty for security.

The murder itself is presented offstage, focusing instead on the aftermath and Macbeth’s reaction. This creates dramatic tension and emphasizes the psychological impact of his actions. The failed attempt to kill Fleance, however, introduces a complication, fueling Macbeth’s paranoia and setting the stage for further violence. It’s a critical turning point, solidifying Macbeth’s path towards destruction, much like a flawed code update impacting a system.

Fleance’s Escape: Its Importance

Fleance’s escape from the murderers is arguably more significant than Banquo’s death, directly challenging Macbeth’s sense of security and the witches’ ambiguous prophecies. The prophecy stated Banquo’s sons would be kings, not Banquo himself. Fleance’s survival ensures the continuation of Banquo’s lineage, representing a persistent threat to Macbeth’s reign – a persistent bug in a system, like ongoing issues with Microsoft Copilot’s functionality.

This failure deeply unsettles Macbeth, intensifying his paranoia and driving him back to the witches for further guidance. It demonstrates the limitations of Macbeth’s control; he can eliminate the immediate threat, but cannot alter fate or prevent the fulfillment of the prophecy. The escape symbolizes the resilience of good and the impossibility of completely suppressing destiny.

Furthermore, Fleance’s survival introduces a potential rallying point for opposition forces, offering a legitimate heir to the throne and fueling the hopes of those who oppose Macbeth’s tyranny. It’s a crucial element in the play’s escalating conflict, foreshadowing the eventual downfall of the tyrant, much like a competitor emerging in the AI market.

The Role of Hecate in Act Three

Hecate, the goddess of witchcraft, appears only in Act Three, Scene Five, and her presence is primarily to reprimand the three Weird Sisters for dealing with Macbeth without her consent. She embodies a higher level of supernatural power, demonstrating that the witches are merely agents acting under her authority – a hierarchical structure similar to how Microsoft Copilot integrates across various Microsoft products.

Hecate’s intervention isn’t about morality; she’s angered by a breach of protocol. She orchestrates further illusions to exploit Macbeth’s confidence, ensuring his ultimate destruction. This highlights the manipulative nature of the supernatural forces at play and emphasizes that Macbeth is a pawn in a larger, darker game.

Her elaborate plan to create deceptive apparitions and lull Macbeth into a false sense of security underscores the theme of appearance versus reality. Hecate’s role serves to reinforce the idea that evil operates through deception and that Macbeth’s downfall is predetermined, much like the complex algorithms driving AI assistants like Copilot.

Themes Explored in Act Three: Ambition and Guilt

Act Three dramatically showcases the corrosive effects of unchecked ambition and the overwhelming weight of guilt. Macbeth’s decision to murder Banquo, driven by his relentless desire to secure his throne, exemplifies how ambition can override morality. This mirrors the powerful capabilities of tools like Microsoft Copilot, which, while designed to assist, require responsible application.

However, the act is immediately followed by Macbeth’s descent into paranoia and terror, culminating in the infamous banquet scene where he hallucinates Banquo’s ghost. This vividly illustrates the psychological torment of guilt; His attempts to appear composed while battling internal turmoil highlight the play’s exploration of appearance versus reality.

Lady Macbeth, too, grapples with guilt, though she initially displays greater resilience. The seeds of her eventual breakdown are sown in Act Three, foreshadowing her later descent into madness. The interplay between Macbeth and Lady Macbeth demonstrates how shared guilt can strain even the strongest bonds, much like the need for careful integration when deploying AI solutions like Copilot across a business.

Themes Explored in Act Three: Appearance vs. Reality

Act Three of Macbeth masterfully explores the deceptive contrast between appearance and reality, a central theme throughout the play. Macbeth’s outward composure as king masks his inner turmoil and paranoia, particularly evident during the banquet scene. He attempts to project an image of strength and control while haunted by the ghost of Banquo, revealing the fragility of his power.

This duplicity extends to the characters surrounding him. The murderers, employed by Macbeth, present a façade of loyalty while carrying out his dark deeds. Similarly, the witches’ ambiguous prophecies offer a deceptive sense of security, masking their true intentions. This echoes the functionality of Microsoft Copilot, a tool that presents information, but requires critical evaluation.

The play suggests that appearances are often manipulated to conceal underlying truths. Macbeth’s carefully constructed persona as a just ruler is a deliberate attempt to hide his tyrannical nature. Just as Copilot can draft content, it doesn’t inherently guarantee accuracy or truthfulness, demanding user discernment. The theme underscores the dangers of trusting solely in outward impressions.

Dramatic Irony in Act Three

Act Three of Macbeth is rich with dramatic irony, heightening the tension and foreshadowing Macbeth’s downfall. The audience is privy to information that characters within the play are not, creating a sense of unease and anticipation. For instance, we know Macbeth has orchestrated Banquo’s murder, while other characters remain unaware, believing him a loyal friend and king.

This disparity between knowledge is powerfully utilized during the banquet scene. Macbeth’s visible distress and interaction with Banquo’s ghost are perceived by the guests as madness, while the audience understands the source of his torment. This mirrors the capabilities of tools like Microsoft Copilot; it can generate responses, but lacks genuine understanding of the context.

The witches’ prophecies also contribute to the dramatic irony. Macbeth interprets them as guarantees of his safety, but the audience recognizes their ambiguous nature and potential for misinterpretation. Like Copilot’s suggestions for code in GitHub, prophecies require careful consideration. The irony underscores the play’s exploration of fate, free will, and the deceptive nature of power, creating a compelling theatrical experience.

Motifs in Act Three: Blood and Darkness

The motifs of blood and darkness are powerfully prevalent in Act Three, deeply interwoven with the play’s themes of guilt, violence, and moral corruption. Blood, representing both life and death, appears repeatedly following Banquo’s murder, symbolizing Macbeth’s descent into tyranny and the indelible stain of his crimes. The imagery evokes a sense of visceral horror and psychological torment.

Darkness, both literal and figurative, shrouds Macbeth’s actions and state of mind. The murder is committed under the cover of night, mirroring the secrecy and treachery that define his reign. This parallels the function of Microsoft Copilot as an assistant – it operates within a digital ‘space’, offering support but not necessarily illuminating the full picture.

Lady Macbeth’s sleepwalking scene further emphasizes these motifs, as she desperately attempts to wash away the imagined blood from her hands. The darkness of her guilt consumes her, leading to her mental deterioration. Just as Copilot can draft and summarize, Shakespeare masterfully crafts these motifs to convey complex emotional states and foreshadow the tragic consequences of unchecked ambition.

Key Quotes from Act Three

Act Three delivers some of Shakespeare’s most memorable lines, revealing Macbeth’s evolving character and the play’s central themes. “Fear leads to suspicion, and suspicion to treachery,” encapsulates Macbeth’s paranoia and justification for Banquo’s murder, demonstrating his descent into tyranny. This echoes the proactive assistance offered by tools like Microsoft Copilot, which can analyze data and identify potential issues.

Macbeth’s chilling remark, “We are yet but young in deed,” highlights his continued ambition and willingness to commit further atrocities. The line reveals a disturbing acceptance of violence as a means to maintain power. Similarly, Copilot’s ability to draft content can be seen as a ‘deed’ in the creative process.

The murderers’ chilling dialogue, “We are men, my lord,” when questioning the morality of their actions, underscores the corrupting influence of Macbeth’s ambition. These quotes, like the integrated features of Microsoft 365 Copilot, offer crucial insights into the play’s complex moral landscape and the psychological toll of unchecked power.

Act Three and the Play’s Overall Arc

Act Three marks a pivotal turning point in Macbeth, shifting the play’s focus from ambition’s initial spark to the devastating consequences of unchecked power. The murder of Banquo, orchestrated by Macbeth, solidifies his tyrannical rule but simultaneously ignites his internal turmoil and paranoia. This escalation mirrors the expanding utility of Microsoft Copilot, initially a simple assistant, now capable of complex task completion.

Prior to this act, Macbeth’s actions were driven by prophecy; now, they are fueled by fear and a desperate attempt to control his fate. The banquet scene, haunted by Banquo’s ghost, dramatically illustrates Macbeth’s deteriorating mental state and the unraveling of his carefully constructed façade. Like Copilot’s ability to summarize complex documents, Act Three distills the play’s core themes.

This act sets the stage for the play’s tragic climax, as Macbeth’s actions alienate allies and propel Scotland towards civil war. The seeds of his downfall are firmly planted, demonstrating how ambition, unchecked, inevitably leads to destruction – a cautionary tale amplified by the intelligent assistance of tools like Microsoft Copilot.

Critical Interpretations of Act Three

Act Three of Macbeth has long been a focal point for critical debate, particularly concerning Macbeth’s psychological state and the play’s exploration of masculinity. Some interpretations view Macbeth as a fundamentally flawed character, driven by an inherent weakness that makes him susceptible to the witches’ prophecies – much like relying solely on an AI assistant without critical thought.

Others emphasize the influence of Lady Macbeth, arguing that her ambition and manipulation are crucial catalysts for his actions. The banquet scene, with its hallucinatory ghost, is often analyzed as a manifestation of Macbeth’s guilt and a breakdown of his control, mirroring the complex integrations offered by Microsoft Copilot.

Feminist critics have examined Lady Macbeth’s role, questioning whether her ambition is a subversion of patriarchal norms or a reinforcement of them. Furthermore, the act’s exploration of appearance versus reality invites interpretations centered on the deceptive nature of power. Just as Copilot can draft and analyze, critics dissect the layers of meaning within this crucial act, revealing the play’s enduring complexity.

nuwave pressure cooker manual

NuWave Pressure Cooker Manual: A Comprehensive Guide

This manual provides comprehensive guidance for the NuWave Nutri-Pot Digital Pressure Cooker, covering setup, operation, safety, and maintenance.
It ensures optimal performance and delicious results with your new kitchen appliance!

Explore preset functions, manual adjustments, and cooking times for various foods, including beans and rice.
Understand pressure release methods and the kPa/PSI relationship for safe and efficient cooking.

Discover how to utilize the warm function for convenient meal timing and access recipe inspiration.
This guide empowers you to unlock the full potential of your NuWave pressure cooker.

Understanding Your NuWave Nutri-Pot

The NuWave Nutri-Pot is a versatile electric pressure cooker designed for convenient and efficient cooking. It operates at a pre-programmed pressure of 70kPa, a standard measurement widely used globally instead of PSI (Pounds per Square Inch). Understanding this kPa setting is crucial for consistent results. Approximately, 2 PSI equates to 14kPa.

This appliance simplifies meal preparation by significantly reducing cooking times compared to traditional methods. Its digital control panel allows for precise adjustments to both time and pressure, offering flexibility for various recipes. The Nutri-Pot isn’t just for pressure cooking; it also features a ‘Warm’ function, capable of keeping food at a safe temperature for up to four hours, ideal for delayed meal service.

Key to its functionality is the ability to prepare food in advance and maintain its quality using the warm setting. However, prolonged warming beyond four hours may affect flavor, texture, and potentially lead to spoilage. The Nutri-Pot is available in various models, like the BM33100 6qt, each designed to deliver consistent performance.

Model Numbers and Variations

NuWave Nutri-Pot pressure cookers are available in several models, catering to diverse cooking needs and preferences. A commonly referenced model is the BM33100 6-quart version, a popular choice for families. Another variant is the 33101 Quart Digital Pressure Cooker, offering similar functionality with a slightly different capacity.

While core features remain consistent across models – like the 70kPa operating pressure and preset functions – subtle variations may exist in control panel layouts or included accessories. It’s essential to refer to the specific owner’s manual accompanying your model for accurate details.

Regardless of the model, all NuWave Nutri-Pots share the same commitment to simplifying pressure cooking. Accessing the complete owner’s manual and recipe book, often available for download on ManualsLib, is highly recommended. These resources provide detailed instructions and culinary inspiration tailored to your specific NuWave appliance, ensuring optimal performance and safety.

Key Components of the Pressure Cooker

The NuWave Nutri-Pot comprises several essential components working in harmony. The inner cooking pot, typically made of durable materials, holds the food during the cooking process. A crucial element is the silicone gasket, ensuring a tight seal to build and maintain pressure safely.

The control panel, featuring buttons for preset functions, time adjustment, and start/stop, allows for intuitive operation. A pressure release valve regulates internal pressure, offering options for natural or quick release. The exterior housing provides insulation and structural support.

Understanding each component’s function is vital for safe and effective use. Proper gasket installation is paramount for achieving the correct pressure. Regularly inspecting these parts ensures longevity and optimal performance, as detailed in the comprehensive owner’s manual. Familiarity with these elements unlocks the full potential of your NuWave pressure cooker.

Getting Started

Before first use, carefully inspect the NuWave Nutri-Pot and its components. Ensure all parts are present and undamaged, preparing for safe and efficient pressure cooking!

Initial Setup and Inspection

Upon unboxing your NuWave Nutri-Pot, thoroughly inspect all components for any shipping damage. Verify the presence of the pressure cooker base, inner pot, sealing ring (silicone gasket), steam release valve, and any included accessories. Carefully examine the inner pot for dents or warping, and ensure the sealing ring is clean and pliable – a proper seal is crucial for safe operation.

Before the first use, wash the inner pot, sealing ring, and steam release valve with warm, soapy water. Rinse thoroughly and dry completely. Inspect the pressure cooker base, paying close attention to the heating element and control panel. Ensure there are no visible defects. Confirm the steam release valve moves freely and seals correctly. Proper inspection guarantees a safe and enjoyable cooking experience with your new NuWave Nutri-Pot!

Familiarize yourself with the cooker’s features and read the entire manual before proceeding. This initial setup is vital for optimal performance and longevity.

Silicone Gasket Installation

Proper installation of the silicone gasket is paramount for achieving a secure seal and safe pressure cooking with your NuWave Nutri-Pot. Locate the groove within the lid of the pressure cooker – this is where the gasket will sit. Ensure the groove is clean and free of any debris before proceeding.

Carefully stretch the silicone gasket and position it evenly within the groove, working your way around the entire circumference of the lid. The gasket should fit snugly but not be overly stretched or distorted. Verify that the gasket sits flush against the lid, with no gaps or unevenness. A compromised seal can lead to pressure leaks and unsafe cooking conditions.

Regularly inspect the gasket for cracks, tears, or hardening. Replace the gasket if any damage is detected. A well-maintained gasket is essential for consistent and safe operation of your NuWave pressure cooker.

Understanding the Control Panel

The NuWave Nutri-Pot’s control panel is designed for intuitive operation. The Start/Stop button initiates and terminates cooking cycles. Time buttons allow for manual adjustment of cooking duration, displayed in minutes and hours. The Preset Function buttons (Rice, for example) offer pre-programmed settings for common dishes.

Observe the display; during preheating, it will show “PH,” indicating the unit is reaching the appropriate temperature. Once pressure is reached, the cooking timer will begin counting down. The Manual bar illuminates when custom time and pressure settings are selected.

Familiarize yourself with the pressure unit display, understanding the difference between kPa and PSI. The control panel provides precise control over your cooking process, ensuring consistent and delicious results.

Operating Instructions

Begin by ensuring the silicone gasket is correctly installed. Select your desired preset or manually adjust time and pressure.
The NuWave Nutri-Pot will automatically regulate pressure during the cooking process!

Pressure Cooking Basics

Pressure cooking with the NuWave Nutri-Pot utilizes a sealed environment to increase boiling point, significantly reducing cooking times. The cooker is pre-programmed to a set pressure of 70kPa, a globally recognized unit equivalent to approximately 2 PSI. This method retains more nutrients and flavors compared to conventional cooking.

To begin, ensure sufficient liquid is added to create steam – this is crucial for proper pressure build-up. Secure the lid, ensuring a tight seal. The cooker will then enter a preheating phase, indicated by “PH” on the display, as it reaches the desired temperature and pressure. Once pressure is reached, the timer will begin counting down.

Remember that pressure cooking isn’t simply about reducing time; it alters food textures. Foods become tender and flavorful due to the intensified heat and moisture. Always refer to recommended cooking times for specific ingredients, adjusting as needed based on personal preference. Understanding these basics will unlock the full potential of your NuWave Nutri-Pot!

Using Preset Functions (Rice, etc.)

The NuWave Nutri-Pot features convenient preset functions designed for common dishes like rice, simplifying the cooking process. These presets automatically adjust cooking time and pressure for optimal results. For rice, options include Default, Less, Normal, and More, allowing customization based on rice type and desired texture – cooking times range from 7 to 13 minutes.

To utilize a preset, simply select the corresponding button on the control panel. The cooker will then initiate the preheating phase (“PH” indicator) before commencing the timed cooking cycle. Upon completion, the unit will beep, signaling the end of the cooking process.

Notably, the rice preset maintains a warming function indefinitely after completion, keeping your rice at the perfect serving temperature until the Start/Stop button is pressed. This feature, and others like it, make meal preparation and timing incredibly convenient.

Manual Time and Pressure Adjustment

For customized cooking, the NuWave Nutri-Pot allows manual adjustment of both time and pressure. To enter manual mode, press the “Time” button; the “manual” bar will illuminate, and “00:01” will flash on the display. Use the “+” and “-” buttons to set your desired cooking time in minutes and hours.

The NuWave Nutri-Pot is pre-programmed to a set pressure of 70kPa, a widely used unit of pressure measurement globally, instead of PSI. Remember that 2 PSI is approximately equal to 14 kPa. While the pressure isn’t directly adjustable by the user, understanding this unit is crucial for recipe conversion.

This flexibility empowers you to cook a wider variety of dishes according to specific recipes or personal preferences. Always ensure the lid is securely locked before initiating a manual cooking cycle for safe operation.

Preheating Phase (PH Indicator)

During operation, the NuWave Nutri-Pot undergoes a preheating phase before pressure cooking begins. This crucial step ensures the cooker reaches the appropriate temperature for the selected function, guaranteeing optimal cooking results and food safety.

While the unit is preheating, the display will clearly show “PH,” indicating that it is building pressure and temperature. Do not attempt to open the lid during this phase, as it is pressurized and could cause injury. The preheating time varies depending on the amount of food and liquid inside.

Once the “PH” indicator disappears, the cooking cycle officially commences. This visual cue confirms the cooker has reached the desired pressure and temperature, allowing for consistent and reliable performance. Patience during preheating is key to successful pressure cooking!

Cooking Times and Guidelines

This section details recommended cooking times for various foods, including dry and soaked beans, and rice with different texture preferences (Default, Less, Normal, More).

Cooking Dry Beans

Preparing dry beans in your NuWave Nutri-Pot is efficient and yields perfectly cooked results. Rinse the beans thoroughly before cooking to remove any debris. For unsoaked dry beans, cooking times generally range from 20 to 30 minutes, depending on the bean type and desired tenderness. Larger beans, like kidney beans, may require the longer end of the spectrum – around 25-30 minutes.

Smaller beans, such as black beans or lentils, typically cook in approximately 20-25 minutes. Remember that these times are guidelines; always check for desired texture after the initial cooking period. If the beans are still firm, add a few more minutes of cooking time. Conversely, if they are too soft, reduce the cooking time slightly in future attempts.

For optimal results, use the manual pressure setting and adjust the cooking time accordingly. The NuWave Nutri-Pot will beep when the cooking cycle is complete, signaling that the beans are ready. Allow for natural pressure release for approximately 10-15 minutes before manually releasing any remaining pressure.

Cooking Soaked Beans

Utilizing pre-soaked beans significantly reduces cooking time within your NuWave Nutri-Pot. Soaking beans overnight, or for at least 8 hours, rehydrates them, diminishing cooking duration and improving digestibility. When cooking soaked beans, a timeframe of 5 to 10 minutes is generally sufficient, contingent upon the bean variety and preferred consistency.

Smaller bean types, like navy or pinto beans, may require only 5-7 minutes of pressure cooking after soaking. Larger varieties, such as kidney or cannellini beans, benefit from approximately 8-10 minutes. Remember to drain and rinse the soaked beans thoroughly before adding them to the pressure cooker.

Employ the manual pressure setting for precise control over cooking time. After the cycle concludes, allow for a natural pressure release of 10-15 minutes, followed by a careful manual release of any residual pressure. This method ensures tender, perfectly cooked beans every time.

Rice Cooking Times (Default, Less, Normal, More)

The NuWave Nutri-Pot offers versatile rice cooking options through its preset function and adjustable time settings. The default rice cooking time is 10 minutes, ideal for most white rice varieties. However, tailoring the time to your preference and rice type yields optimal results.

For a softer texture, or smaller rice grain varieties, select the “Less” setting, which cooks for 7 minutes. “Normal” (10 minutes) is suitable for medium-grain white rice. If you prefer firmer rice, or are cooking brown rice, choose “More” at 13 minutes. Experimentation is key to finding your perfect rice consistency.

Remember that the cooker will automatically switch to the “Warm” function post-cooking. This keeps the rice at serving temperature indefinitely until the Start/Stop button is pressed. Always allow a natural pressure release for fluffier rice.

Safety Features and Precautions

Prioritize safety by understanding pressure release methods and kPa/PSI values. Never exceed the maximum 4-hour warm function duration to prevent spoilage and ensure safe operation.

Pressure Release Methods

The NuWave Nutri-Pot features multiple pressure release methods for user convenience and safety. Understanding these is crucial for preventing accidents and achieving optimal cooking results. The primary methods are Natural Pressure Release (NPR) and Quick Pressure Release (QPR).

Natural Pressure Release allows the pressure to dissipate gradually over time, typically 10-30 minutes, depending on the food’s volume and temperature. This method is ideal for soups, stews, and foods with high liquid content, preventing splattering. Simply allow the cooker to cool down naturally after the cooking cycle completes.

Quick Pressure Release involves carefully venting the steam through the pressure release valve. Exercise extreme caution as the escaping steam is very hot. This method is suitable for foods where overcooking is a concern, like vegetables. Ensure your hands and face are clear of the steam vent before releasing the pressure. Always follow the manufacturer’s instructions for safe QPR operation.

Failure to properly release pressure can result in food splatter or potential injury. Always refer to the recipe guidelines for the recommended pressure release method.

Understanding kPa vs. PSI

The NuWave Nutri-Pot utilizes kilopascals (kPa) as its standard unit for measuring pressure, a common practice globally, differing from the Pounds per Square Inch (PSI) often used in North America. It’s essential to understand this distinction for accurate cooking and recipe conversions.

kPa is a metric unit of pressure, while PSI is an imperial unit. The NuWave cooker is programmed to a set pressure of 70kPa. To convert between the two, remember the approximate ratio: 2 PSI is roughly equivalent to 14 kPa. Therefore, 70 kPa translates to approximately 10 PSI.

While recipes may list pressure in PSI, you can easily convert it to kPa for use with your NuWave Nutri-Pot. Conversely, if a recipe specifies kPa, you can convert it to PSI if needed. Accurate conversion ensures consistent cooking results and food safety. Familiarizing yourself with this conversion will enhance your pressure cooking experience.

Always refer to the NuWave manual for specific pressure settings and conversion guidance.

Maximum Cooking Time (Warm Function ⎯ 4 Hours)

The NuWave Nutri-Pot features a convenient warm function, designed to maintain food temperature after the pressure cooking cycle is complete. This allows for meal timing flexibility, keeping your dishes ready to serve when you are.

However, it’s crucial to understand the limitations of this function. While the warm function can keep food at a safe temperature for up to 4 hours, exceeding this timeframe is not recommended. Prolonged warming may lead to undesirable changes in flavor, texture, and appearance.

More importantly, extended warm holding can create an environment conducive to bacterial growth, potentially causing food spoilage and posing a health risk. Always adhere to the 4-hour maximum to ensure food safety and quality. Pressing the start/stop button will deactivate the warm function.

For optimal results, consume food within the 4-hour window or transfer it to a refrigerator for longer storage.

Maintenance and Care

Regular cleaning and proper storage are vital for extending the life of your NuWave Nutri-Pot.
Follow the detailed instructions to ensure optimal performance and longevity!

Troubleshooting common issues is also addressed, providing solutions for a seamless cooking experience.
Maintain your cooker for years of delicious meals!

Cleaning Instructions

After each use, ensure the NuWave Nutri-Pot is completely cooled down before cleaning. The inner pot is dishwasher safe, offering convenient cleanup. However, hand washing is also recommended to preserve its finish. The lid, including the silicone gasket, should be washed with warm, soapy water. Pay close attention to the gasket, ensuring it’s free of cracks or damage, as this impacts pressure sealing.

The exterior of the pressure cooker can be wiped down with a damp cloth. Avoid using abrasive cleaners, as they may scratch the surface. For stubborn food residue, soak the inner pot with warm water and dish soap before scrubbing gently. Never immerse the main unit (containing the electrical components) in water or any other liquid. Ensure all parts are thoroughly dried before reassembling and storing. Regular cleaning prevents buildup and maintains optimal performance.

Inspect the steam release valve regularly and clean it to prevent clogging. A clogged valve can affect pressure regulation. Proper cleaning ensures safe and efficient operation of your NuWave Nutri-Pot.

Storage Guidelines

When storing your NuWave Nutri-Pot, ensure all components are completely dry to prevent mold or mildew growth. The inner pot, lid, and accessories can be neatly stacked inside the main unit for compact storage. Store the pressure cooker in a cool, dry place, away from direct sunlight and extreme temperatures. Avoid storing it in a damp basement or a hot attic.

Keep the silicone gasket separate from other items to prevent it from becoming deformed or damaged. It’s recommended to store the gasket in a clean, airtight container. Ensure the steam release valve is also stored separately, allowing for proper ventilation. Avoid placing heavy objects on top of the pressure cooker during storage, as this could cause damage to the unit or its components.

Proper storage extends the lifespan of your NuWave Nutri-Pot and ensures it’s ready for use whenever you need it. Regularly inspect the unit before storage to address any potential issues.

Troubleshooting Common Issues

If the NuWave Nutri-Pot doesn’t pressurize, ensure the lid is securely locked and the silicone gasket is properly installed. Check the steam release valve is in the sealing position. If the unit displays an error code, consult the full owner’s manual for specific troubleshooting steps. Food burning? Reduce cooking time or add more liquid.

A “PH” error indicates the unit hasn’t reached pressure; allow more preheating time. If steam leaks from the lid during cooking, ensure the lid is correctly aligned and the gasket is seated properly. For unresponsive buttons, try unplugging and replugging the unit. If the warm function isn’t maintaining temperature, verify it’s activated correctly.

Remember to always unplug the cooker before attempting any troubleshooting. If issues persist, refer to the complete manual or contact NuWave customer support for assistance.

Recipes and Inspiration

Unlock a world of culinary possibilities with the NuWave Nutri-Pot! A complete recipe book is available, offering diverse dishes. Utilize the warm function to perfectly time your meals.

Recipe Book Availability

Expanding your culinary horizons with the NuWave Nutri-Pot is effortless! A complete recipe book accompanies your digital pressure cooker, brimming with a diverse collection of dishes designed to showcase its versatility. This resource provides step-by-step instructions, ingredient lists, and helpful tips to guide you through each recipe, ensuring successful and flavorful results every time.

Beyond the included book, numerous online resources and communities dedicated to NuWave cooking offer a wealth of additional recipes and inspiration. Websites, forums, and social media groups are filled with passionate cooks sharing their creations and innovative techniques. Explore these platforms to discover new flavors, adapt recipes to your preferences, and connect with fellow NuWave enthusiasts.

Don’t hesitate to experiment and create your own signature dishes! The NuWave Nutri-Pot’s precise controls and multiple functions empower you to explore your culinary creativity and unlock a world of delicious possibilities. Remember to share your successes and inspire others within the vibrant NuWave cooking community.

Utilizing the Warm Function for Meal Timing

The NuWave Nutri-Pot’s warm function is a game-changer for busy schedules, allowing you to perfectly time your meals. Once the cooking cycle is complete, the unit automatically switches to the warm setting, maintaining food at a safe and palatable temperature. This feature is especially useful for delaying serving time without compromising quality or flavor.

However, it’s crucial to remember that the warm function is designed for short-term holding – up to 4 hours. Prolonged warming may lead to changes in texture, appearance, and potentially, food spoilage. Plan accordingly to ensure your meal is enjoyed at its peak freshness. The unit will keep rice warm indefinitely until the start/stop button is pressed.

Take advantage of this feature to prepare meals in advance, freeing up your time for other activities. Enjoy the convenience of a hot, delicious meal whenever you’re ready, thanks to the NuWave Nutri-Pot’s thoughtful design and versatile functionality.

i-485 cover letter pdf

I-485 Cover Letter PDF: A Comprehensive Guide (Updated April 1, 2026)

Understanding the I-485 process requires careful attention to detail, and a well-crafted cover letter is a crucial component. This guide, updated as of April 1, 2026, provides a comprehensive overview of creating an effective I-485 cover letter, offering templates and examples to streamline your application process.

A cover letter serves as an overview document, giving the USCIS officer a quick summary of the application package’s contents and any special circumstances.

Understanding the Purpose of an I-485 Cover Letter

The I-485 cover letter, while not legally mandated, functions as a vital communication tool between the applicant and U.S. Citizenship and Immigration Services (USCIS). Its primary purpose is to provide a concise overview of the entire application package, acting as a roadmap for the reviewing officer. Think of it as an executive summary, highlighting the key elements and ensuring nothing is overlooked.

This letter isn’t simply a redundant listing of documents; it’s an opportunity to contextualize your application. It allows you to briefly explain your immigration history, the basis for your adjustment of status, and any potentially complex aspects of your case. A well-written cover letter demonstrates organization and attention to detail, qualities that can positively influence the officer’s perception of your application.

Furthermore, the cover letter is the ideal place to flag any unique circumstances or potential issues that require the officer’s attention. It’s a proactive step that can prevent delays and requests for evidence (RFEs). Essentially, it’s a chance to present your case in a clear, concise, and compelling manner.

Why a Cover Letter is Important for Form I-485

Submitting a cover letter with your Form I-485, Application to Register Permanent Residence or Adjust Status, significantly enhances your application’s presentation and clarity. While USCIS doesn’t require a cover letter, its absence can be a missed opportunity. A thoughtfully prepared letter demonstrates respect for the process and a commitment to thoroughness.

The importance lies in its ability to guide the USCIS officer through potentially voluminous documentation. It provides a clear outline of the contents, preventing crucial documents from being overlooked amidst a large filing package. This is especially critical in complex cases with numerous supporting exhibits.

Moreover, a cover letter allows you to proactively address any potential concerns or “red flags” in your immigration history. It’s a chance to explain discrepancies or provide additional context, potentially avoiding a Request for Evidence (RFE) which can significantly delay processing. Presenting a well-organized and clearly articulated case increases the likelihood of a smooth and efficient adjudication.

Essential Elements of an I-485 Cover Letter

A comprehensive I-485 cover letter should include several key elements to ensure clarity and facilitate efficient processing by USCIS. First and foremost, clearly state the purpose of your letter: to submit your Form I-485 application for Adjustment of Status.

Next, provide a concise overview of the enclosed documents, essentially a table of contents for your application package. This should list each form and supporting document included. Highlight any particularly important evidence that directly supports your eligibility.

Crucially, mention your A-Number (Alien Registration Number) and, if applicable, your I-485 receipt number. Include your current mailing address and contact information for easy communication. Clearly state the specific category of adjustment of status you are seeking (e.g., family-based, employment-based).

Finally, a polite closing expressing your willingness to provide additional information if needed is always recommended. Remember to customize the letter to your specific circumstances.

Formatting and Length Guidelines for Your Letter

When preparing your I-485 cover letter, adhering to specific formatting and length guidelines is crucial for a professional presentation. Keep the letter concise and focused; aim for a single page in length. USCIS officers review numerous applications, so brevity is appreciated.

Use a standard business letter format, including your name, address, and date at the top. Address the letter to the appropriate USCIS Service Center. Employ a clear and readable font such as Times New Roman or Arial, size 12.

Maintain professional language and tone throughout the letter. Avoid slang or overly casual phrasing. Use bullet points or numbered lists to organize the list of enclosed documents for easy readability.

Proofread carefully for any grammatical errors or typos before submitting. A well-formatted and error-free letter demonstrates attention to detail and respect for the process. Remember, this letter is a first impression!

Key Information to Include in Your I-485 Cover Letter

Your I-485 cover letter must contain essential details: your A-Number, current address, I-485 receipt number (if available), and the specific adjustment of status category you are pursuing.

Applicant’s A-Number (Alien Registration Number)

Clearly stating your A-Number is paramount within your I-485 cover letter. This unique identifier, assigned by the USCIS, is crucial for accurately linking your application to your immigration record. Ensure the A-Number is prominently displayed, typically near the beginning of your letter, to facilitate efficient processing.

Double-check the accuracy of the number; even a single digit error can cause significant delays or misfiling. If you are unsure of your A-Number, you can typically find it on previous USCIS correspondence, such as approval notices or requests for evidence.

The A-Number is a key piece of information that allows the USCIS officer to quickly access your complete immigration history. Including it demonstrates attention to detail and a proactive approach to your application. It’s a simple step that can significantly contribute to a smoother processing experience.

Current Mailing Address and Contact Information

Providing accurate and up-to-date contact information is essential for seamless communication with the USCIS throughout the I-485 process. Your cover letter must clearly display your current mailing address, including apartment or suite numbers, city, state, and zip code. This is where all official correspondence regarding your application will be sent.

Furthermore, include a reliable phone number and email address. The USCIS may use these to contact you for clarifications, request additional documentation, or schedule interviews. Ensure the email address is actively monitored, as important notices may be delivered electronically.

Any changes to your address or contact details during the application process must be promptly reported to the USCIS using Form AR-11. Maintaining accurate contact information prevents missed notifications and potential delays in your case. This demonstrates responsibility and facilitates efficient processing.

I-485 Receipt Number (If Applicable)

If you have previously filed Form I-485 and received a receipt notice, including the receipt number in your cover letter is crucial for linking your current submission to any prior filings. This allows the USCIS officer to quickly access your case history and understand the context of your application.

The receipt number is typically an eleven-character code, often starting with letters like EAC, WAC, LIN, or SRC, followed by ten numbers. Locate this number on your I-797C, Notice of Action, receipt notice.

Clearly state “I-485 Receipt Number:” followed by the complete number in your cover letter. Including this information streamlines the review process and minimizes potential confusion. If this is your initial I-485 filing, simply omit this section from your cover letter. Accurate referencing of prior filings demonstrates organization and a proactive approach to your immigration case.

Category of Adjustment of Status Being Sought

Precisely identifying the category under which you are seeking adjustment of status is a vital component of your I-485 cover letter. This informs the USCIS officer of the specific legal basis for your application, enabling them to correctly assess your eligibility and apply the appropriate regulations.

Common categories include “Family-Based Adjustment” (based on a qualifying relative’s petition) or “Employment-Based Adjustment” (based on an approved employment-based petition). Be specific; for example, instead of just “Family-Based,” state “Adjustment of Status based on an approved I-130 petition filed by my U.S. Citizen spouse.”

Clearly state “Category of Adjustment of Status:” followed by the precise category in your cover letter. This seemingly small detail ensures your application is routed to the correct processing unit and reviewed by an officer familiar with that specific category. Accurate categorization prevents delays and potential requests for evidence.

Supporting Documents Checklist Mentioned in the Cover Letter

A detailed checklist within your I-485 cover letter demonstrates organization and completeness. It outlines all enclosed supporting documents, referencing key evidence for a stronger application package.

Listing Required Documents for I-485

Precisely listing all submitted documents in your I-485 cover letter is paramount for a smooth processing experience. This demonstrates thoroughness and helps the USCIS officer quickly locate essential evidence. Begin with foundational documents like copies of your birth certificate, passport, and any previous immigration documentation.

Include all forms filed alongside the I-485, such as Form I-864 (Affidavit of Support), Form I-693 (Report of Medical Examination), and Form I-765 (Application for Employment Authorization). Detail any evidence supporting your eligibility category – for family-based petitions, this means marriage certificates, birth certificates of children, and proof of the petitioner’s status.

For employment-based applications, include approved labor certifications, offer letters, and evidence of your qualifications. Remember to itemize each document clearly, noting the number of pages if applicable. CitizenPath emphasizes using a checklist to ensure no required evidence is omitted, tailoring it to your specific case.

Highlighting Key Evidence for Your Case

Beyond simply listing documents, your I-485 cover letter should strategically highlight the most crucial evidence supporting your claim. This isn’t about repeating the entire document list, but rather drawing attention to items that directly address potential concerns or strengthen your eligibility.

For example, if you’re applying based on marriage, explicitly mention the submitted marriage certificate, joint financial records, and affidavits from friends and family attesting to the bona fides of the relationship. If employment-based, emphasize the approved labor certification and letters demonstrating your unique skills.

Briefly explain why these documents are significant. A sentence like, “The enclosed marriage certificate confirms the validity of our marital union,” adds context. CitizenPath suggests this proactive approach helps the USCIS officer quickly grasp the core strengths of your application, potentially expediting the review process and minimizing Requests for Evidence (RFEs).

Referencing Form I-94 Arrival/Departure Record

Your I-485 cover letter must explicitly reference your Form I-94, Arrival/Departure Record, as proof of lawful entry into the United States. This document is fundamental to establishing eligibility for Adjustment of Status, verifying your immigration history and current status.

Clearly state that a copy of your I-94 is included within the application package. If you have multiple I-94s (e.g., due to visa renewals or changes in status), specify which I-94 is most relevant to your current application and briefly explain why.

Mention the date and port of entry indicated on the I-94. CitizenPath emphasizes the importance of accuracy here; any discrepancies between your I-94 and other submitted documents could raise red flags. If you’ve previously applied for and received an extension of stay, include documentation of that approval alongside your original I-94 to demonstrate continuous lawful presence.

Specific Scenarios and Cover Letter Customization

Tailoring your I-485 cover letter to your specific situation is vital for a successful outcome. Different scenarios, like family- or employment-based adjustments, require unique details and emphasis.

Cover Letter for Family-Based Adjustment of Status

When filing an I-485 based on a family relationship, your cover letter should clearly establish that connection. Begin by stating the petitioner’s name and their relationship to you (e.g., spouse, parent, child). Explicitly mention the approved petition number (I-130) that forms the basis of your adjustment of status application.

Highlight the validity of the familial relationship, referencing any supporting documentation included – marriage certificates, birth certificates, adoption decrees, or court orders. If there have been any prior marriages, briefly address them and confirm current marital status. Emphasize that you meet all eligibility requirements for adjustment of status through this family-based petition.

Clearly state your intent to reside continuously in the United States and maintain a domicile here. Briefly mention any potential issues, like prior immigration violations, and indicate that you’ve addressed them fully in your application. A concise and focused letter strengthens your case.

Cover Letter for Employment-Based Adjustment of Status

For an employment-based I-485, your cover letter must emphasize the approved labor certification and I-140 petition. Begin by clearly stating the approved I-140 petition number and the job title for which you are seeking adjustment of status. Confirm that the position offered meets the requirements outlined in the approved labor certification.

Highlight your qualifications and how they align with the job requirements, briefly referencing your educational background and work experience. State that you are currently employed (or have a firm job offer) in the position specified in the I-140. Emphasize your intention to continue working in this capacity after obtaining your green card.

Address any potential concerns regarding your qualifications or the job offer. A concise letter demonstrating your eligibility and commitment to the position is crucial for a successful outcome.

Addressing Potential Issues or Red Flags in the Letter

Your I-485 cover letter provides a strategic opportunity to proactively address any potential issues or “red flags” that might arise during USCIS review. Transparency is key; attempting to conceal information can severely damage your case. If you have a prior immigration violation, briefly explain the circumstances and demonstrate rehabilitation.

Similarly, if there are gaps in your employment history, provide a concise explanation – perhaps due to education, family responsibilities, or unforeseen circumstances. Address any discrepancies between information provided in previous filings and your current application.

Acknowledge the issue, explain the reason, and provide supporting documentation to demonstrate its resolution or mitigate its impact. Remember, the goal is to demonstrate good moral character and a commitment to complying with immigration laws. A well-crafted explanation can turn a potential denial into an approval.

Resources for I-485 Cover Letter Templates and Examples

Navigating the I-485 process can be complex, and utilizing available resources is highly recommended. Several websites offer I-485 cover letter templates and examples tailored to various scenarios, providing a solid foundation for your own letter.

CitizenPath (https://citizenpath;com/uscis-cover-letter/) is a valuable resource, offering a variety of USCIS cover letter samples based on the specific immigration application or petition you are filing. These samples serve as excellent examples, but remember to customize them to reflect your unique situation.

Remember that supporting documents listed in these templates may not be exhaustive; your case may require additional evidence. Utilizing step-by-step instructions and checklists, like those offered by CitizenPath, can ensure you don’t overlook crucial documentation. Always verify information with official USCIS guidelines and consider consulting with an immigration attorney for personalized advice.