instructions for krups espresso machine

Krups espresso machines are renowned for blending lifestyle, performance, and superior coffee quality. Designed for coffee enthusiasts, they offer a seamless combination of style, functionality, and precision, ensuring a perfect espresso experience every time.

Key Features of Krups Espresso Machines

Krups espresso machines offer a removable drip tray for easy cleaning, steam functionality for cappuccinos, and the ability to brew up to four cups of espresso at once, ensuring convenience and versatility for coffee lovers;

Removable Drip Tray

The removable drip tray is one of the most convenient features of Krups espresso machines, designed to simplify cleaning and maintenance. This tray collects excess water and coffee grounds, preventing messes and spills on your countertop. Its easy-to-remove design allows for quick disposal of waste, while the smooth surface ensures effortless wipedowns. The drip tray is also dishwasher-safe, further enhancing its practicality. Additionally, it is spacious enough to accommodate multiple cups, making it ideal for entertaining guests or preparing large batches of coffee. Regular emptying and cleaning of the drip tray are essential to maintain hygiene and prevent bacterial growth. By incorporating this feature, Krups ensures that users can enjoy a hassle-free espresso experience without compromising on cleanliness. The removable drip tray is a testament to Krups’ focus on user-friendly design, catering to both convenience and efficiency.

Steam Functionality

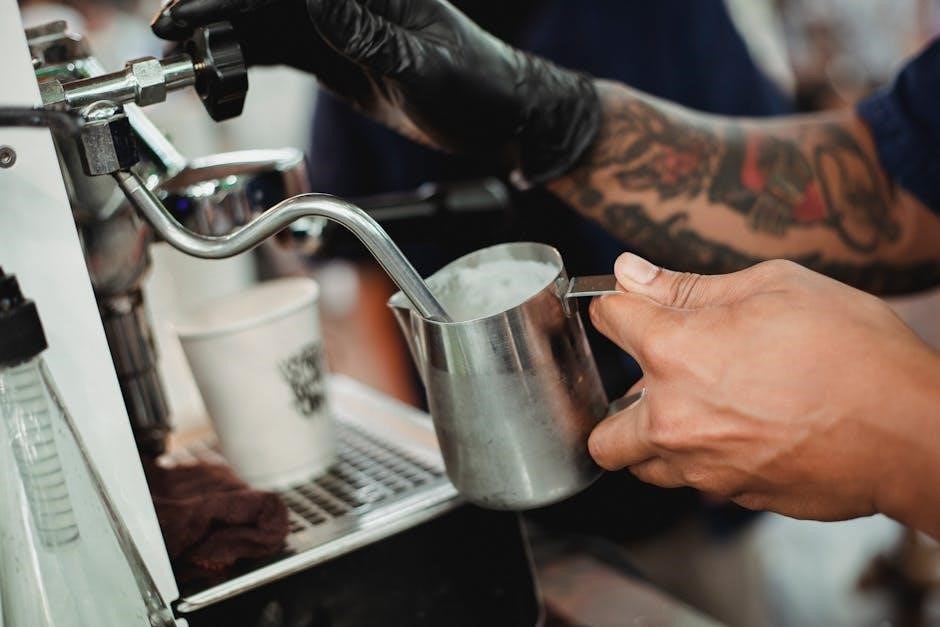
Krups espresso machines feature advanced steam functionality, allowing users to craft creamy lattes and cappuccinos effortlessly. The steam wand enables precise control over milk frothing, ensuring the perfect texture and temperature. With models like the Krups Arabica EA817840, you can achieve professional-grade results at home. The steam function operates under pressure, requiring careful handling as outlined in the user manual. Descaling is crucial to maintain steam performance and prevent mineral buildup. Regular maintenance ensures optimal steam output and longevity of the machine. Users can froth milk to the desired consistency, whether for a silky microfoam or a velvety steamed milk. The steam wand’s design prioritizes ease of use, making it accessible for both beginners and experienced baristas. By following the instructions, you can unlock the full potential of your Krups espresso machine’s steam capabilities, elevating your coffee experience to new heights. Always refer to the provided manual for specific guidance on steam operation and maintenance to ensure flawless performance;

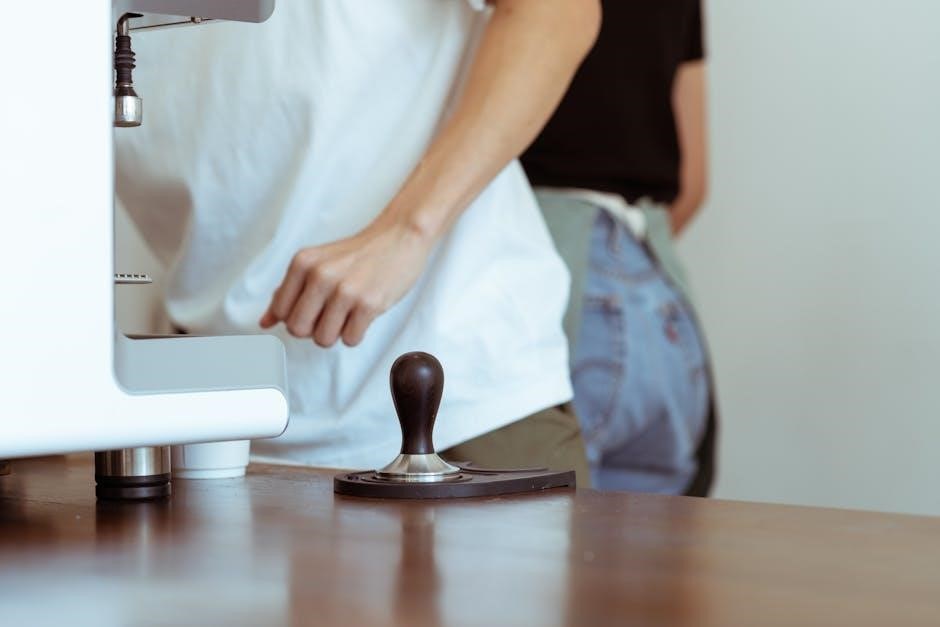
Step-by-Step Usage Guide

Place the machine on a flat surface, add water to the tank, and attach the filter holder. Insert the coffee grounds, tamp evenly, and secure the holder. Select your brew settings, press start, and enjoy your espresso.

Selecting Brew Settings

Selecting brew settings on your Krups espresso machine is a straightforward process designed to cater to your coffee preferences. Most Krups models allow you to choose between different brew options, such as espresso, strong espresso, coffee, or long coffee. These settings are typically accessed via a user-friendly control panel or buttons, making it easy to customize your beverage.

For instance, the Krups EA82 model offers a convenient interface where you can select the type of coffee you desire with a single button press. Some machines also allow you to adjust the volume of coffee, with capacities ranging up to 240 ml for a more generous serving. Additionally, certain models feature temperature control, ensuring your espresso is brewed at the optimal temperature for a perfect extraction.

To make the most of these settings, refer to the user manual for specific instructions tailored to your machine. Experimenting with different options will help you find your ideal cup, whether you prefer a rich, bold espresso or a longer, more relaxed coffee experience. This customization ensures that every brew meets your unique taste preferences.

Using the Steam Wand

Mastering the steam wand on your Krups espresso machine is key to crafting delicious cappuccinos and lattes at home. Begin by locating the steam wand, typically found on the side or front of the machine. Before use, purge the wand by releasing a small amount of steam to ensure cleanliness and readiness.

To froth milk, submerge the wand just below the milk’s surface in a chilled pitcher. Hold the pitcher at an angle to create a whirlpool effect, which helps incorporate air evenly. Adjust the steam pressure and angle of the wand to achieve the desired froth texture. For optimal results, froth until the milk reaches a smooth, creamy consistency without excessive bubbles.

Clean the steam wand immediately after use by purging it again and wiping it with a damp cloth to remove any milk residue. Regular descaling is crucial to maintain performance and prevent mineral buildup. Experiment with different types of milk to find your preference, as fat content can affect frothing quality.

For safety, handle the steam wand carefully to avoid burns from hot steam. Aim for a milk temperature between 140°F and 160°F for ideal frothing. Consider using a thermometer to monitor temperature accurately. Practice makes perfect, so don’t be discouraged if it takes a few tries to achieve your desired froth consistency.

Importance of Descaling

Descaling is a critical maintenance step for Krups espresso machines to ensure optimal performance and longevity. Over time, mineral deposits from water, known as limescale, can build up inside the machine, leading to clogged internal components and reduced efficiency. If left unchecked, this can cause permanent damage to the machine and even void the warranty.

Regular descaling helps maintain the machine’s ability to regulate water temperature, which is essential for brewing perfect espresso; It also prevents corrosion and ensures that the steam wand functions properly. Additionally, descaling contributes to better-tasting coffee by eliminating any off-flavors caused by mineral buildup.

Krups recommends descaling every 3 to 6 months, depending on usage and water hardness. Use a compatible descaling solution, as specified in the user manual, to avoid damaging the machine. Neglecting this step can lead to costly repairs and even render the machine inoperable. Keep your Krups espresso machine in prime condition by making descaling a routine part of its care.

Troubleshooting and FAQs

Common issues include faulty espresso production or error messages. Ensure proper use of the machine by referring to the user manual. For detailed solutions, visit the Krups website or consult the FAQ section for specific models.

Common Issues

Some users of Krups espresso machines may encounter common issues such as faulty operation due to improper descaling, which can void the warranty. Another issue is the steam wand malfunctioning, often caused by mineral buildup. Additionally, the filter holder may not lock properly if not aligned correctly. Many problems arise from not following the user manual instructions, such as using tap water without proper filtration or failing to clean the machine regularly. The machine may also produce inconsistent espresso if the brew settings are not adjusted correctly. Some users report issues with the drip tray overflowing if not emptied regularly. To avoid these problems, it is essential to follow the descaling process as outlined in the manual and ensure all parts are cleaned and maintained properly. Regularly checking and replacing worn-out parts, like seals or filters, can also prevent unexpected issues. By adhering to the guidelines and performing routine maintenance, users can enjoy optimal performance from their Krups espresso machine.

Tips for Perfect Espresso

Achieving a perfect espresso with your Krups machine requires attention to detail and proper technique. First, ensure the machine is preheated for optimal temperature control. Use freshly roasted and finely ground coffee beans, as this directly impacts flavor quality. The portafilter should be securely locked to maintain pressure, and the tamping of the grounds should be even to prevent channeling. Adjusting the brew settings, such as the volume and strength, allows customization to suit your taste preferences. Regularly descaling the machine prevents mineral buildup, which can affect performance and taste. Cleaning the steam wand after each use is crucial to avoid milk residue and bacterial growth. Experimenting with different coffee-to-water ratios and grind sizes can help refine your espresso. Lastly, follow the user manual guidelines for maintenance and troubleshooting to ensure longevity and consistent results. By adhering to these tips, you can elevate your espresso-making skills and enjoy a professional-quality brew at home.

optibond solo plus instructions

OptiBond Solo Plus is a versatile dental adhesive designed for various restorative procedures. This guide provides step-by-step instructions for its proper use‚ ensuring optimal bonding outcomes.

Overview of OptiBond Solo Plus

OptiBond Solo Plus is a total-etch‚ single-component dental adhesive designed for bonding restorative materials to enamel and dentin. Its ethanol-based formula with barium glass fillers ensures strong‚ durable bonds. Suitable for various clinical applications‚ it simplifies restorative procedures with a straightforward application process. The adhesive is widely used in dental practices due to its reliability and versatility‚ making it a preferred choice for clinicians. Its unique composition and easy-to-follow instructions ensure optimal results in both direct and indirect restorative techniques. OptiBond Solo Plus is a trusted solution for achieving long-lasting dental restorations.

Importance of Following Instructions

Following the instructions for OptiBond Solo Plus is crucial for achieving optimal bonding outcomes. Proper preparation‚ application‚ and curing ensure the adhesive performs as intended‚ providing strong and durable bonds. Deviating from the recommended steps can lead to compromised bond strength‚ potentially causing restorations to fail prematurely. Adhering to the guidelines ensures patient safety and satisfaction‚ as well as the longevity of the dental work. Clinicians must carefully follow each step‚ from surface etching to curing‚ to maximize the adhesive’s effectiveness and maintain high standards of care.

Key Features of OptiBond Solo Plus

OptiBond Solo Plus features total-etch technology‚ a single-component adhesive system‚ and an ethanol-based formula with barium glass fillers‚ ensuring strong‚ durable bonds for various clinical applications.

Total-Etch Technology

OptiBond Solo Plus employs total-etch technology‚ ensuring a strong bond between dental surfaces and restorative materials. This method involves etching both enamel and dentin with a 37.5% phosphoric acid gel‚ such as Kerr Gel Etchant‚ for 15 seconds. The etching process creates microretentive surfaces‚ enhancing mechanical retention and promoting a durable bond. After etching‚ OptiBond Solo Plus is applied in a thin‚ even layer‚ followed by air-thinning to remove excess solvent. This step ensures proper infiltration of the adhesive into the etched surface‚ resulting in a reliable and long-lasting bond. The total-etch approach is versatile and suitable for various clinical applications‚ including restorative procedures and post fixation.

Single-Component Adhesive System

OptiBond Solo Plus is a single-component adhesive system‚ simplifying the bonding process by eliminating the need for multiple steps or components. Its ethanol-based formula ensures easy application and rapid evaporation‚ creating a thin‚ uniform layer. The system contains barium glass fillers‚ which enhance its durability and bonding strength. This design allows for efficient use in various clinical applications‚ including restorative procedures and core materials. The single-component nature reduces chair time and minimizes the risk of errors‚ making it a reliable choice for dental professionals. Its streamlined application process ensures consistent results‚ adhering to the tooth structure effectively.

Ethanol-Based Formula with Barium Glass Fillers

OptiBond Solo Plus features an ethanol-based formula that ensures rapid evaporation‚ creating a thin‚ uniform layer for optimal bonding. The inclusion of barium glass fillers enhances the adhesive’s strength and durability‚ providing a reliable bond between the tooth and restoration. These fillers‚ measuring 0.4 microns‚ contribute to a strong mechanical bond and are also found in Kerr’s Point 4 composite‚ ensuring compatibility and consistency. This unique combination of ethanol and barium glass fillers makes OptiBond Solo Plus highly effective in various clinical applications‚ offering both ease of use and long-lasting results. The formula is designed to adhere well to enamel and dentin‚ ensuring a secure bond.

Preparation for Application

Ensure the tooth surface is clean and dry. Use Kerr Gel Etchant for etching enamel and dentin. Handle the adhesive bottle carefully‚ shaking it gently before use.

Surface Etching with Kerr Gel Etchant

Surface etching is a critical step before applying OptiBond Solo Plus. Use Kerr Gel Etchant (37.5% orthophosphoric acid) to etch both enamel and dentin for 15 seconds. This process creates a microretentive surface‚ enhancing the bond between the tooth structure and the adhesive. After etching‚ thoroughly rinse the surface with water to remove any residual acid. Gently dry the area with compressed air to ensure a clean‚ moisture-free surface for optimal adhesion. Proper etching ensures the adhesive penetrates evenly‚ promoting a strong and durable bond. Avoid over-etching‚ as it may compromise enamel integrity. This step is essential for achieving reliable results with OptiBond Solo Plus.

Handling the Adhesive Bottle

Before use‚ gently shake the OptiBond Solo Plus bottle to ensure uniform consistency. Apply a few drops on a disposable mixing pad. Use a light brushing motion to spread the adhesive evenly across the prepared surface. Avoid pooling or over-application‚ as this can compromise bond strength. Store the bottle at room temperature‚ away from direct sunlight‚ to maintain its effectiveness. Ensure the cap is tightly sealed after use to prevent contamination or evaporation. Proper handling ensures the adhesive remains effective and ready for use in various clinical applications‚ from restorative procedures to post fixation.

Application Process

Gently shake OptiBond Solo Plus‚ apply drops on a mixing pad‚ and brush evenly onto prepared surfaces. Air-thin for 3 seconds‚ then cure with light for optimal bonding.

Shaking and Mixing OptiBond Solo Plus

Begin by gently shaking the OptiBond Solo Plus bottle for 5-10 seconds to ensure uniform distribution of components. Place one drop each of OptiBond Solo Plus and its activator on a disposable mixing pad. Mix thoroughly with a clean applicator for 10-15 seconds‚ ensuring a smooth‚ even consistency. Avoid over-mixing‚ as this may introduce air bubbles. Proper mixing is critical for achieving optimal bonding performance and ensuring the adhesive’s effectiveness in clinical applications. Mixing pads should be replaced after each use to maintain hygiene and prevent cross-contamination.

Applying the Adhesive

After mixing‚ apply OptiBond Solo Plus to the prepared tooth surface using light brushing motions. Cover the entire area evenly‚ ensuring complete coverage of the enamel and dentin. Apply for 15 seconds to allow proper penetration and bonding. Avoid pooling or over-application‚ as this can compromise the bond strength. Use a clean applicator to spread the adhesive thinly and uniformly. Once applied‚ proceed to the next step of air-thinning to remove excess material and create a uniform layer. Proper application ensures optimal adhesion and durability of the restoration. Follow the manufacturer’s guidelines for consistent results.

Air-Thinning the Layer

Air-thinning is a critical step after applying OptiBond Solo Plus. Use compressed air to gently thin the adhesive layer‚ ensuring even coverage without pooling. Hold the air syringe at a 45-degree angle‚ 10-15 cm away from the surface. Air-thin for 3 seconds to remove excess material and create a uniform film. Avoid over-thinning‚ as this may reduce bond strength. This step ensures the adhesive layer is optimal for bonding‚ promoting durability and longevity of the restoration. Proper air-thinning is essential for achieving a strong‚ reliable bond between the tooth and restoration material. Follow this step carefully to ensure the best clinical outcomes.

Curing Process

OptiBond Solo Plus requires proper curing for optimal bonding. Use a high-intensity curing light at 450-480 nm for 10-20 seconds. Ensure complete polymerization for durability;

Light Curing Techniques

Light curing is essential for polymerizing OptiBond Solo Plus. Use a high-intensity curing light with a wavelength of 450-480 nm. Hold the light at a 45-degree angle‚ 10-15 mm away from the surface. Cure for 10-20 seconds‚ ensuring complete coverage. Avoid direct light exposure to the adhesive before curing. For optimal results‚ cure in a well-ventilated area to prevent overheating. Proper technique ensures a strong‚ durable bond. Always follow the manufacturer’s guidelines for light curing to achieve the best outcomes in clinical applications. This step is critical for the long-term success of the restoration or bonding procedure.

Recommended Curing Time

The recommended curing time for OptiBond Solo Plus is 10-20 seconds for the adhesive layer. For restorative materials applied afterward‚ cure each layer for at least 40 seconds. Ensure the light intensity is sufficient‚ typically between 1‚000-2‚000 mW/cm²; Proper curing ensures optimal polymerization and bond strength. Exceeding the recommended time does not enhance results but may over-cure the material. Follow the manufacturer’s guidelines to achieve the best outcomes. Consistent curing times are critical for the durability and success of the restoration. Always monitor the curing process to maintain consistency and avoid under- or over-curing the adhesive or restorative material.

Clinical Applications

OptiBond Solo Plus is ideal for restorative procedures‚ post fixation‚ and core materials. It is also suitable for amalgam sealing‚ ensuring durable and reliable dental restorations;

Restorative Procedures

OptiBond Solo Plus is widely used in restorative procedures for bonding composite resins‚ ceramics‚ and other materials. It ensures a strong‚ durable bond between the tooth structure and restoration. After etching the enamel and dentin with Kerr Gel Etchant‚ apply OptiBond Solo Plus gently for 15 seconds. Air-thin the layer for 3 seconds to prevent pooling. Light-cure according to the manufacturer’s instructions. This adhesive is ideal for direct restorations‚ veneers‚ and crowns‚ offering excellent compatibility with various restorative materials. Its ethanol-based formula with barium glass fillers enhances bond strength and durability‚ making it a reliable choice for clinical applications.

Post Fixation and Core Materials

OptiBond Solo Plus is effective for post fixation and core material applications‚ ensuring a strong bond between the tooth and restoration. After etching with Kerr Gel Etchant‚ apply OptiBond Solo Plus in a thin‚ even layer. Allow the adhesive to air-thin for 3 seconds before light-curing. This step enhances bonding efficiency and prevents pooling; For post fixation‚ apply the adhesive to both the post and preparation space‚ curing afterward. Core materials benefit from its barium glass fillers‚ which improve durability. OptiBond Solo Plus is ideal for such procedures‚ providing long-lasting stability and compatibility with various dental materials‚ making it a trusted choice for clinicians in complex restorative cases.

Safety Precautions

Handle OptiBond Solo Plus carefully to avoid skin and eye contact. Store in a cool‚ dry place‚ away from direct sunlight. Dispose of waste properly.

Handling and Storage Guidelines

OptiBond Solo Plus should be stored in a cool‚ dry place away from direct sunlight and heat sources. Keep the bottle tightly closed when not in use to prevent contamination. Avoid exposing the adhesive to extreme temperatures or moisture‚ as this may alter its properties. Handle the product with clean‚ dry gloves to prevent skin contact. Ensure the bottle is upright during storage to avoid leakage. Do not use expired products‚ as this can compromise bonding effectiveness. Proper disposal of unused material and packaging should follow local regulations. Always refer to the product label for specific storage instructions.

Following the instructions for OptiBond Solo Plus ensures successful outcomes in dental procedures. Proper preparation‚ application‚ and curing techniques are essential for achieving reliable bonds. The product’s unique features‚ such as its ethanol-based formula and barium glass fillers‚ make it versatile for various clinical applications. Adhering to handling and storage guidelines maintains its effectiveness. By following these steps‚ dental professionals can consistently achieve high-quality results. OptiBond Solo Plus is a trusted solution for restorative procedures‚ offering durability and efficiency. Mastering its application enhances patient care and satisfaction‚ making it a valuable tool in modern dentistry.

rp 5217 instructions

Overview of RP-5217 Instructions

The RP-5217 form is a bar-coded, legal-sized document essential for real property transfers in New York. It requires precise buyer/seller information and property details to ensure compliance with state regulations. Following the guidelines is crucial to avoid filing issues, as incorrect submissions may lead to delays or rejection. Always use the latest version to maintain accuracy and adherence to updated policies.

1.1 Importance of Following Guidelines

Adhering to the RP-5217 instructions is crucial to ensure accurate documentation and compliance with legal requirements. Failure to follow guidelines may result in delays, rejection of submissions, or additional fees. Proper completion ensures seamless processing of property transfers and maintains the integrity of records. The bar-coded format requires precise data entry to function correctly. Always review the latest instructions to avoid errors, as non-compliance can lead to legal or financial consequences. Timely updates to the form reflect regulatory changes, making adherence essential for successful filing.

1.2 Effective Date of Updated Instructions

The updated RP-5217 instructions became effective on May 24, 2023. These changes ensure compliance with current regulations and improve the efficiency of property transfer processes. It is essential to use the latest version of the form and instructions to avoid filing issues. The bar-coded format requires accurate data entry, and non-compliance may result in delays or rejection. Always verify the effective date on official sources to ensure adherence to the most recent guidelines and avoid potential penalties or legal complications.

Where to Find RP-5217 Form and Instructions

The RP-5217 form and its instructions are available on official websites, including the Nassau County Clerk’s office and the New York State Department of Taxation and Finance.

2.1 Official Websites for Download

The RP-5217 form and instructions can be downloaded from official government websites, such as the New York State Department of Taxation and Finance and the Nassau County Clerk’s website. These platforms provide the most up-to-date versions of the form. Ensure you access the form directly from these sources to avoid outdated or incorrect versions. Additionally, the form is available on other county clerk websites, such as Genesee County Clerk, ensuring widespread accessibility for all filers.

2.2 Required Software for Viewing the Form

To view and complete the RP-5217 form, you must use Adobe Reader 8 or a newer version. The form is bar-coded and legal-sized, requiring compatible software for proper display and functionality. Ensure your device has the latest Adobe Reader installed to avoid formatting issues. Additionally, the form is designed to be filled out electronically, so using the “PREP” option is recommended for accurate data entry and compliance with submission requirements.

Key Sections of the RP-5217 Form

The form includes sections for buyer/seller information, property details, and legal descriptions. These sections ensure accurate documentation of ownership transfers and compliance with state regulations.

3.1 Buyer and Seller Information

The RP-5217 form requires detailed information about both the buyer (grantee) and seller (grantor). The buyer’s name should be entered with the last name first, and if there are multiple buyers, all names must be listed. Similarly, the seller’s full name or company name is mandatory. Addresses for both parties are also needed to ensure proper documentation. This section is critical for maintaining accurate records and facilitating smooth legal processes. Any errors in this section can lead to delays or rejection of the form, emphasizing the importance of precision. Additional sheets can be attached if space is insufficient.

3.2 Property Description and Details

The RP-5217 form requires a detailed description of the property being transferred. This includes the legal description, street address, and parcel identifiers. The property type, such as residential or commercial, must also be specified. Accurate details about the property’s location and characteristics are essential to ensure proper recording and tax assessment. Any errors in this section can lead to filing issues or delays. Ensuring the information aligns with official records is critical for a smooth transfer process. This section is vital for maintaining accurate property records and compliance with legal requirements.

Filing Requirements for RP-5217

Filing requires submitting the original RP-5217 form with all deeds and correction deeds. Ensure the form is bar-coded and completed accurately to avoid rejection. Mandatory documents include properly executed deeds and any applicable correction deeds. The form must be filed with the County Clerk or City Register, and it is essential to follow all submission guidelines to ensure acceptance and compliance with legal standards.

4.1 Mandatory Accompanying Documents

The RP-5217 form must be accompanied by the original deed and any correction deeds. Additional required documents include properly executed legal papers, such as transfer tax forms (e.g., TP-584) and other relevant supporting materials. All submissions must comply with county-specific filing requirements to ensure acceptance. Failure to include these documents may result in processing delays or rejection. It is essential to verify the completeness of the submission package before filing to meet all regulatory standards effectively.

4.2 Bar-code Requirements and Acceptance Criteria

The RP-5217 form must include a valid bar-code to ensure proper processing. Handwritten or typewriter-entry documents are not accepted, as the bar-code is essential for automated data extraction. The bar-code must be generated from the official downloadable form to guarantee accuracy. County-specific bar-codes are required to meet local filing standards. Failure to include a valid bar-code will result in rejection of the submission. Always ensure the bar-code is correctly aligned and printed to prevent scanning issues during filing.

Step-by-Step Instructions for Completing RP-5217

Download the latest RP-5217 form and ensure Adobe Reader 8+ is installed. Open the form, fill in each section step-by-step, and save regularly. Visit official resources for detailed line-by-line guidance and troubleshooting tips to ensure accurate completion.

5.1 Downloading the Latest Version of the Form

To ensure accuracy, download the latest RP-5217 form from official sources like the Nassau County Clerk’s website or the New York State Department of Taxation and Finance. Always use the most recent version to comply with updated regulations. The form is bar-coded and requires Adobe Reader 8 or higher for proper viewing and completion. Visit the designated webpage, locate the download link, and save the form. For additional guidance, refer to the line-by-line instruction sheet or video demonstrations available online.

5.2 Line-by-Line Filling Guidelines

Complete each section of the RP-5217 form meticulously. Start with the buyer and seller information, ensuring names and addresses are accurate. Next, provide detailed property descriptions, including the location and type of property. Legal descriptions, such as lot numbers and block references, must be precise. Attach additional sheets if necessary for lengthy details. Review the form for any errors or omissions before submission, as inaccuracies may delay processing. Use the latest version to ensure compliance with current regulations.

Common Mistakes to Avoid

Ensure accuracy in buyer/seller information and property descriptions. Avoid using outdated versions or handwritten forms, as bar-coded submissions are mandatory. Double-check all details before filing.

6.1 Errors in Buyer or Seller Information

One of the most common mistakes is providing incorrect or incomplete buyer or seller information. Names must be entered accurately, with last names or company names first; Additional sheets should be attached if necessary. Ensure all details match legal documents to prevent filing delays or rejections. Always verify the spelling and formatting of names, as even minor errors can lead to processing issues. Proper attention to this section is crucial for smooth form acceptance and recording.

6.2 Incorrect Property Descriptions

Incorrect or incomplete property descriptions are a frequent issue. Ensure the legal description, district number, and parcel ID are accurate and match official records. Errors in property details can lead to filing delays or rejection. Always cross-reference with legal documents or tax records to verify accuracy. Incomplete or mismatched information may result in processing issues, so double-check all entries before submission. Correct property descriptions are essential for proper form acceptance and accurate recording of the transfer.

Additional Resources for RP-5217

The RP-5217 form and instructions can be downloaded from official websites like the New York State Department of Taxation and Finance or county clerk sites. Additional resources include FAQs, video demonstrations, and line-by-line guides to ensure accurate completion. Adobe Reader 8 or higher is required to view and fill the form. For assistance, refer to the provided support channels or contact the county clerk’s office directly.

7.1 Frequently Asked Questions (FAQs)

  • Where can I find the latest version of the RP-5217 form?
  • What software is required to view and complete the form?
  • Why are bar-codes important for acceptance?
  • Can I submit a handwritten or typed version of the form?
  • What documents must accompany the RP-5217 during filing?
  • How do I ensure my form is filled out correctly?
  • What are the consequences of not following the guidelines?
  • Where can I find line-by-line instructions for completion?

7.2 Video Demonstrations for Form Completion

Video guides are available to assist with completing the RP-5217 form. These demonstrations provide step-by-step instructions for downloading and filling out the form correctly. Tutorials are available for different browsers, such as Microsoft Edge and Safari, to ensure compatibility. Additionally, a user manual for the SDG RP-5217 PDF IMO Plug-In can be downloaded for further guidance. These resources help ensure accuracy and compliance with formatting and submission requirements. Visit the official website for access to these helpful tools.

Contact Information for Assistance

For assistance with RP-5217, contact the County Clerk’s office or visit the New York State Department of Taxation and Finance website for support and inquiries.

8.1 County Clerk Contact Details

The County Clerk’s office provides direct assistance with RP-5217 inquiries. Contact them via phone at (123) 456-7890 or email at countyclerk@county.gov. Office hours are Monday-Friday, 9 AM to 5 PM. Visit their website at countyclerk.county.gov for additional resources, including downloadable forms and filing guides. For specific county-related questions, reach out to their support team for personalized help.

8.2 Tax Department Support Channels

The New York State Department of Taxation and Finance offers multiple support channels for RP-5217 inquiries. Visit their official website at www;tax.ny.gov for detailed resources, including FAQs and instructional guides. For direct assistance, call their helpline at (518) 457-5181 or email taxinfo@tax.ny.gov. Additionally, video demonstrations and step-by-step guides are available to help with form completion. Their support team is available Monday-Friday, 8:30 AM to 4:30 PM, to address any concerns or clarify filing requirements.

Completing the RP-5217 form accurately is essential for a smooth real property transfer process. Adhering to the guidelines ensures compliance with state regulations and avoids filing delays or rejections. By carefully following the instructions, gathering all required documents, and ensuring bar-code acceptance, filers can streamline their submission. Utilize the provided resources, such as FAQs and video demonstrations, for assistance. Should questions arise, contact the County Clerk or Tax Department for support. Proper compliance with these instructions is vital to avoid issues and ensure a successful transaction.

omron hem-780 instructions what does e mean

Understanding the ‘E’ Error Code on the Omron HEM-780 Blood Pressure Monitor

The Omron HEM-780 is a reliable blood pressure monitor, but users may encounter an ‘E’ error code. This indicates a measurement issue, often due to movement during use, incorrect cuff placement, or low battery power. To resolve it, ensure the cuff is properly fitted, remain still during measurement, and check the power source. If issues persist, refer to the manual or contact support.

The Omron HEM-780 is a highly regarded automatic blood pressure monitor celebrated for its accuracy and user-friendly design. It boasts advanced features such as IntelliSense technology, which ensures precise blood pressure readings by detecting the movement of blood through the brachial artery. This monitor is capable of storing up to 90 measurement memories, complete with date and time, making it an excellent tool for tracking health metrics over time. Additionally, the HEM-780 comes with a 3-year warranty from Omron, highlighting its reliability and durability.

The device is designed for home use, emphasizing ease of operation and providing detailed instructions in its manual to guide users through its functions. Its ComFit cuff is a notable feature, offering a comfortable and secure fit during measurements. Furthermore, the monitor supports two user modes, allowing separate memory storage for two individuals, along with a guest mode for occasional use. These features make the Omron HEM-780 a versatile and practical choice for monitoring blood pressure effectively.

Despite its robust design, users may occasionally encounter error codes, such as the ‘E’ error, which signals a potential issue during measurement. Understanding these errors is crucial for maintaining accurate readings and ensuring the longevity of the device. Fortunately, Omron provides comprehensive support, including downloadable user manuals and customer service, to address any concerns that may arise.

What Does the ‘E’ Error Code Indicate?

The ‘E’ error code on the Omron HEM-780 blood pressure monitor typically indicates a measurement error. This error can occur due to several factors, including movement during the measurement process, incorrect placement or sizing of the cuff, or issues with the power supply. It is essential to address this error promptly to ensure accurate readings and maintain the device’s functionality.

One common cause of the ‘E’ error is improper cuff placement. Ensuring the cuff is wrapped correctly around the arm, at the correct tightness, and positioned properly on the brachial artery is crucial for accurate measurements. Additionally, using the correct cuff size, as specified in the manual, is vital. The Omron HEM-780 is designed to work exclusively with the Omron M7 cuff, and using any other cuff may lead to errors.

Another potential cause is low battery power or improper battery installation. If the batteries are dead or not inserted correctly, the monitor may display the ‘E’ error. Ensuring the device is powered on correctly and replacing batteries when necessary can resolve this issue. It is also important to turn the device off before replacing batteries to avoid any glitches.

In some cases, the ‘E’ error may indicate a need for recalibration. If the device has not been calibrated recently, it may not provide accurate readings. Referencing the user manual for calibration instructions or contacting Omron support can help resolve this issue.

Lastly, ensuring the monitor is set to the correct date and time is essential, especially after changing batteries or experiencing a power interruption. This ensures that all measurements are accurately logged and tracked over time.

By addressing these potential causes, users can troubleshoot and resolve the ‘E’ error effectively, ensuring their Omron HEM-780 continues to function reliably.

Troubleshooting the ‘E’ Error Code

Troubleshooting the ‘E’ error code on the Omron HEM-780 involves a systematic approach to identify and resolve the underlying issue. Below are the steps to help you address this error effectively:

Check for Movement During Measurement

Movement during the measurement process is a common cause of the ‘E’ error. Ensure you remain still and avoid talking while the monitor is in use. The device is sensitive to movement, which can disrupt the oscillometric technology used to detect blood flow.

Verify Cuff Placement and Tightness

Ensure the cuff is wrapped correctly around your arm. The cuff should be snug but not overly tight. If the cuff is too loose or improperly positioned, it may fail to detect your blood flow accurately. Consult the user manual for proper placement instructions.

Use the Correct Cuff Size

The Omron HEM-780 is designed to work exclusively with the Omron M7 cuff. Using a different cuff may result in the ‘E’ error. If you suspect the cuff is damaged or the wrong size, contact Omron support for assistance.

Check Battery Power

Low battery power or improper installation of batteries can trigger the ‘E’ error. Replace the batteries with new ones and ensure they are inserted correctly. Turn the unit off before replacing the batteries to avoid any glitches.

Reset the Device

If the error persists, reset the device by turning it off and waiting for a few minutes before turning it back on. This can resolve any temporary glitches affecting the measurement process.

Calibrate the Device

If the device has not been calibrated recently, it may require recalibration. Refer to the user manual for specific instructions on how to reset or calibrate the Omron HEM-780.

Ensure Proper Date and Time Settings

After replacing batteries or experiencing a power interruption, ensure the date and time are set correctly. This ensures accurate tracking of your measurements.

By following these troubleshooting steps, you can resolve the ‘E’ error and restore your Omron HEM-780 to proper functioning. If the issue persists, consider consulting the user manual or contacting Omron customer support for further assistance.

Additional Solutions

After attempting the basic troubleshooting steps, there are additional solutions you can explore to resolve the ‘E’ error code on your Omron HEM-780 blood pressure monitor:

Clean the Monitor

Dust or dirt on the monitor or cuff may interfere with its performance. Gently clean the device using a soft, dry cloth. Avoid using abrasive cleaners or immersing the monitor in water, as this could damage the internal components.

Use the Correct Cuff

Ensure you are using the Omron M7 cuff, which is specifically designed for the HEM-780. Using a different cuff can lead to inaccurate readings or error codes. If your cuff is damaged, consider purchasing a replacement from an authorized Omron dealer.

Check for Software Updates

Omron occasionally releases software updates to improve device performance. Visit the Omron website or consult the user manual to see if an update is available for your HEM-780 model.

Ensure Proper Setup

After replacing batteries or resetting the device, ensure the date and time are correctly set. This is crucial for accurate measurement tracking. Refer to the manual for instructions on setting the date and time.

Use Guest Mode Sparingly

If you frequently switch between user profiles or use guest mode, ensure the device is properly reset between uses. This can help prevent errors caused by conflicting data or improper switching.

Consult the User Manual

The Omron HEM-780 instruction manual provides detailed guidance for resolving errors. If you haven’t already, download the manual from the Omron website or refer to the physical copy provided with your device.

Contact Omron Support

If none of the above solutions resolve the ‘E’ error, contact Omron customer support for further assistance. Provide details about the issue, including any recent changes or maintenance performed on the device.

By exploring these additional solutions, you can address the ‘E’ error code more comprehensively and restore your Omron HEM-780 to optimal performance.

Seeking Professional Assistance

If the ‘E’ error code persists despite trying all the troubleshooting and additional solutions, it may be necessary to seek professional assistance. This ensures your Omron HEM-780 is properly diagnosed and repaired by experts.

Contact Omron Customer Support

Reach out to Omron’s customer service team for guidance; Provide details about the error, including when it first occurred and any steps you’ve already taken. They can offer tailored solutions or advise if the device needs servicing.

Visit an Authorized Service Center

If the issue is hardware-related, take your monitor to an Omron-authorized service center. Technicians will assess and repair any internal faults, ensuring the device functions correctly without voiding the warranty.

Consult a Healthcare Professional

Your doctor or pharmacist can also assist. They may verify your blood pressure using professional equipment to ensure accuracy and rule out any underlying health issues that might be affecting measurements.

Avoid DIY Repairs

Never attempt to open or repair the device yourself, as this can cause further damage and void the warranty. Always rely on authorized personnel for repairs.

Prepare for Assistance

Before contacting support, reset the device, ensure batteries are fresh, and have the user manual ready. This helps technicians quickly identify and resolve the issue.

Seeking professional assistance is a reliable way to address persistent errors and ensure your Omron HEM-780 continues to provide accurate readings. Don’t hesitate to reach out for help when needed.

For persistent errors, additional solutions such as resetting the device or consulting the user manual can be effective. If these steps fail, seeking professional assistance from Omron support or authorized service centers is recommended to ensure accurate readings and maintain the device’s functionality.

By understanding and resolving the ‘E’ error code, users can continue to rely on the Omron HEM-780 for accurate blood pressure monitoring, supporting their health management effectively.

tyson savory campfire pork chops cooking instructions

Tyson Savory Campfire Pork Chops offer a delicious blend of spices and herbs, providing a mouthwatering, convenient meal option for home cooks․ Perfect for air fryers, skillets, or ovens, these pre-seasoned chops deliver an authentic campfire flavor with minimal effort, making them an ideal choice for quick and tasty dinners․

Overview of the Product and Its Features

Tyson Savory Campfire Pork Chops are pre-seasoned, boneless pork chops designed to deliver an authentic campfire flavor․ Each pack contains two chops, offering 30 grams of protein per serving․ These chops are versatile, suitable for cooking in an air fryer, skillet, or oven․ The seasoning blend includes a mix of spices and herbs that enhance the natural flavor of the pork․ With a focus on convenience, these chops are ready to cook straight from the package, making them a great option for quick, flavorful meals․ They cater to various cooking preferences and dietary needs, ensuring a satisfying dining experience․

Ingredients and Tools Needed

Essential ingredients include Tyson Savory Campfire Pork Chops, cooking oil, and optional seasonings․ Tools needed are an air fryer, skillet, oven, tongs, and a meat thermometer for precise cooking․

Essential Ingredients for Cooking

The primary ingredient is Tyson Savory Campfire Pork Chops, which come pre-seasoned with a blend of spices and herbs․ Cooking oil or non-stick spray is recommended to prevent sticking․ Optional additions include garlic, onions, or marinades for extra flavor․ For enhanced tenderness, a brine solution or a light coating of flour can be used․ Ensure the pork chops are at room temperature before cooking for even results․ These chops are high in protein, making them a nutritious and satisfying meal option․

Recommended Cooking Tools and Equipment

For cooking Tyson Savory Campfire Pork Chops, essential tools include an air fryer, skillet, or oven․ A pair of tongs or a spatula is useful for flipping the chops․ A meat thermometer ensures proper internal temperature․ A cutting board is handy for prepping․ Optional tools include a brine container for marinating and aluminum foil for oven cooking․ These tools help achieve a juicy, flavorful result․ Proper equipment ensures even cooking and enhances the overall dining experience․

Cooking Instructions

Tyson Savory Campfire Pork Chops are pre-seasoned for convenience․ Cook in an air fryer, skillet, or oven for a crispy exterior and juicy interior․ Ensure internal temperature reaches 145°F for safety․

Preparation Steps for Tyson Savory Campfire Pork Chops

Start by preheating your cooking appliance to 375°F․ Pat the pork chops dry with a paper towel to ensure even seasoning․ Lightly brush with cooking oil for crispiness․ Sprinkle additional seasoning if desired․ Place the chops in the air fryer basket, skillet, or oven tray, leaving space for even cooking․ Cook for 25-30 minutes, flipping halfway․ Use a meat thermometer to ensure the internal temperature reaches 145°F․ Let the chops rest for 5 minutes before serving to retain juiciness․ This preparation ensures tender, flavorful results every time․

Cooking in an Air Fryer

Preheat the air fryer to 375°F․ Lightly coat Tyson Savory Campfire Pork Chops with cooking oil for crispiness․ Place the chops in a single layer in the air fryer basket, avoiding overcrowding․ Cook for 25-30 minutes, flipping halfway through․ Use a meat thermometer to ensure the internal temperature reaches 145°F․ For even cooking, shake the basket gently during cooking․ This method ensures a crispy exterior and juicy interior, delivering the authentic campfire flavor in a convenient way․ Perfect for a quick and delicious meal with minimal cleanup․

Cooking in a Skillet or Pan

Heat a skillet or pan over medium-high heat and add a small amount of oil․ Place Tyson Savory Campfire Pork Chops in the pan, ensuring they are not overcrowded․ Cook for 4-5 minutes per side, or until the internal temperature reaches 145°F․ Use a meat thermometer to verify doneness․ Reduce heat if the chops brown too quickly․ Let the pork chops rest for a few minutes before serving to retain juiciness․ This method achieves a crispy crust while maintaining the savory campfire flavor, perfect for a quick and flavorful meal any day of the week․

Cooking in the Oven

Preheat your oven to 375°F (190°C)․ Place Tyson Savory Campfire Pork Chops on a baking sheet lined with parchment paper․ Bake for 15-20 minutes, flipping halfway through․ Use a meat thermometer to ensure the internal temperature reaches 145°F (63°C)․ Let the chops rest for 3-5 minutes before serving to retain juiciness․ This method ensures evenly cooked, flavorful pork chops with a tender texture, perfect for a hassle-free dinner․

Enhancing the Flavor

Elevate Tyson Savory Campfire Pork Chops by marinating them in a brine solution for added moisture or sprinkling with extra spices for a smoky, savory twist․

Additional Seasonings and Marinades

Enhance Tyson Savory Campfire Pork Chops with a brine solution for moisture and flavor․ Mix water, salt, brown sugar, and spices, then marinate for 30 minutes to an hour․ For a smoky touch, add a garlic herb butter rub or a BBQ glaze during the last few minutes of cooking․ Experiment with a sweet and tangy marinade by combining honey, soy sauce, and apple cider vinegar․ These additions complement the chops’ pre-seasoned flavor, creating a richer, more complex taste profile while keeping the meat tender and juicy․

Serving Suggestions

Pair Tyson Savory Campfire Pork Chops with mashed potatoes, roasted vegetables, or a fresh salad for a balanced meal․ Hearty sides like coleslaw or baked beans complement the smoky flavor, while garlic bread adds a satisfying crunch․ These options enhance the overall dining experience, offering variety and texture to your plate․

Side Dishes That Pair Well with Pork Chops

For a well-rounded meal, serve Tyson Savory Campfire Pork Chops with sides like mashed potatoes, roasted vegetables, or a fresh green salad․ Garlic bread or cornbread adds a satisfying crunch, while coleslaw provides a refreshing contrast․ Baked beans or grilled asparagus also complement the smoky flavor of the pork chops․ These options create a balanced and flavorful meal that enhances the overall dining experience․ Pairing the chops with a variety of textures and tastes ensures a delicious and satisfying dinner for everyone․

Cooking Safety Tips

Always ensure Tyson Savory Campfire Pork Chops reach an internal temperature of 145°F for food safety․ Use a food thermometer to avoid undercooking․ Handle raw meat safely to prevent illness․

Ensuring Proper Food Safety

When cooking Tyson Savory Campfire Pork Chops, always prioritize food safety to avoid illness․ Ensure the pork reaches an internal temperature of 145°F using a food thermometer․ Wash hands thoroughly before and after handling raw meat․ Prevent cross-contamination by keeping raw pork separate from ready-to-eat foods․ Use clean utensils and cutting boards․ After cooking, refrigerate leftovers promptly within two hours and store at 40°F or below․ Following these steps ensures a safe and enjoyable dining experience with your Tyson Savory Campfire Pork Chops․

Nutritional Information

Tyson Savory Campfire Pork Chops provide 30g of protein per 4 oz serving, with 11g of fat and 0g of carbs, making them a lean, protein-rich option․

Macronutrients and Dietary Benefits

Tyson Savory Campfire Pork Chops are a nutrient-rich option, offering 30 grams of protein per 4 oz serving, making them ideal for muscle repair and growth․ With 11 grams of fat and 0 grams of carbs, they cater to low-carb and keto diets․ The high protein content supports weight management and satiety, while the absence of carbs makes them a great choice for those monitoring their carbohydrate intake․ Additionally, the lean pork provides essential vitamins like B12 and minerals such as selenium and zinc, promoting overall health and immune function․ This makes them a versatile and healthy addition to various meal plans․

Tyson Savory Campfire Pork Chops offer a flavorful and convenient meal solution, perfect for various cooking methods․ Their robust taste and ease of preparation make them a delightful choice for any meal․

Final Thoughts and Cooking Variations

Tyson Savory Campfire Pork Chops are a versatile and flavorful option for any meal․ For added variety, try pairing them with a tangy BBQ sauce or a zesty marinade․ Experiment with different cooking times and temperatures to achieve your desired level of crispiness․ You can also incorporate them into hearty dishes like chili or casseroles for a burst of savory goodness․ Whether you’re cooking for a quick dinner or a special occasion, these pork chops offer endless possibilities to elevate your culinary creations․

hamburger helper cooking instructions

Hamburger Helper offers a quick, easy, and delicious meal solution, combining ground beef, pasta, and seasonings. Perfect for busy households, it provides a hearty, satisfying dish with minimal effort.

What is Hamburger Helper?

Hamburger Helper is a boxed meal mix containing pasta, seasonings, and sauce. Designed for quick meals, it combines with ground beef to create a hearty, one-pot dish. The box includes everything needed except meat and milk, offering a convenient solution for busy households. It typically requires browning the beef, adding the mix, and simmering until the pasta is tender. This iconic product has been a staple in many kitchens for decades, providing a simple and satisfying meal with minimal effort. Its versatility allows for customization, making it a favorite for families and individuals alike.

Why Choose Hamburger Helper for Quick Meals?

Hamburger Helper is a go-to for quick meals due to its simplicity and speed. It requires minimal ingredients and time, making it ideal for busy days. The boxed mix includes everything needed, ensuring a balanced meal without effort. It’s versatile, accommodating ground beef, turkey, or chicken, and can be customized with added vegetables or cheese. Perfect for families, it delivers a hearty, satisfying dish in about 30 minutes. Its convenience and adaptability make it a reliable choice for home cooks seeking a stress-free, delicious meal solution that’s easy to prepare and pleases everyone.

Basic Ingredients and Tools Needed

Ground beef, pasta, seasonings, milk, and water are essential. A large skillet, utensils, and stove are required for cooking, ensuring a smooth preparation process every time.

Pantry Staples: Pasta, Seasonings, and Sauce Mix

Pantry staples form the foundation of Hamburger Helper meals. The box typically includes pasta, a sauce mix, and seasonings. Elbow macaroni is common, but other short pastas like penne or shells work too. The sauce mix adds flavor, often combining spices, herbs, and sometimes dried ingredients. These staples ensure a consistent taste and simplify the cooking process. For added variety, you can supplement with fresh spices or herbs, enhancing the dish to your liking. Having these basics on hand makes meal prep quick and effortless, perfect for busy days.

Meat and Dairy: Ground Beef, Milk, and Cheese

Ground beef is the centerpiece of Hamburger Helper, typically requiring 1 pound of 85% lean beef for optimal flavor. Browning the beef is essential, followed by draining excess fat. Milk or water is added to create the sauce, with milk enhancing creaminess. Cheese, such as cheddar or American, is optional but adds richness. For a creamier texture, heavy cream or half-and-half can substitute milk. Ground turkey or chicken can also be used for variety. These ingredients combine to create a hearty, flavorful dish tailored to your taste preferences.

Cooking Essentials: Skillet, Water, and Optional Vegetables

A large skillet or Dutch oven is essential for cooking Hamburger Helper, as it allows for even browning and simmering. Water is a key component, though milk can be substituted for added creaminess. Optional vegetables like onions, garlic, and bell peppers can be sautéed with the ground beef for extra flavor and nutrients. These additions enhance the dish without complicating the process. Simply chop and cook the vegetables before incorporating the Hamburger Helper mix. This step adds texture and freshness, making the meal more satisfying and customizable to your preferences.

Step-by-Step Cooking Guide

Brown the beef, add optional veggies, mix in Hamburger Helper contents, and simmer until the pasta is tender. Optional enhancements like cheese can be added at the end.

Browning the Ground Beef: A Crucial First Step

Browning the ground beef is the foundation of a flavorful Hamburger Helper dish. Heat a large skillet over medium-high heat and add the ground beef, breaking it into small pieces. Cook for 6-8 minutes, stirring occasionally, until the beef is fully browned and cooked through. Drain excess fat if desired. This step enhances the texture and flavor, ensuring a rich base for the meal. Season with salt, pepper, or additional spices for extra taste. A well-browned beef sets the tone for a delicious, satisfying meal.

Cooking Vegetables: Onions, Garlic, and Beyond

Sautéing onions and garlic adds depth and freshness to your Hamburger Helper. After browning the beef, add diced onions to the skillet and cook until translucent, about 3-4 minutes. Minced garlic can be added toward the end to prevent burning, cooking for 1-2 minutes until fragrant. Optional vegetables like bell peppers, mushrooms, or peas can also be included for added texture and flavor. Stir well to combine, ensuring the vegetables are evenly distributed. This step enhances the overall taste and creates a balanced meal. Customize with your favorite veggies for extra nutrition and variety.

Mixing in the Hamburger Helper Contents

After browning the beef and cooking the vegetables, it’s time to incorporate the Hamburger Helper mix. Open the box and pour the pasta, seasonings, and sauce mix into the skillet. Stir thoroughly to combine with the beef and vegetables, ensuring even distribution. If using, add the recommended water or milk as specified on the box. This step brings all the flavors together, creating a harmonious blend. Allow the mixture to simmer, letting the pasta cook and the sauce thicken. Proper mixing ensures the dish develops its signature taste and texture, making it a satisfying and cohesive meal for the family.

Simmering to Perfection: The Final Step

Once all ingredients are combined, reduce the heat to low, cover the skillet, and let the mixture simmer. Allow the pasta to cook and the sauce to thicken, stirring occasionally to prevent sticking. This step typically takes 15-20 minutes, or until the pasta is tender and the liquid is absorbed. If the mixture becomes too thick, a splash of water or milk can be added. Simmering ensures the flavors meld together, creating a rich, savory dish. Once the pasta is cooked and the sauce is creamy, the Hamburger Helper is ready to serve, delivering a hearty, satisfying meal for the whole family.

Optional Enhancements: Cheese, Herbs, and More

Elevate your Hamburger Helper by adding personal touches. Stir in shredded cheese, such as cheddar or American, for a creamier texture, or add diced tomatoes for a burst of freshness. Fresh herbs like parsley or green onions can add brightness to the dish. For extra flavor, consider adding cooked bacon, diced bell peppers, or a sprinkle of paprika. A splash of hot sauce or a pinch of cumin can also enhance the seasoning. These optional additions allow you to customize the meal to your family’s taste preferences, making it a versatile and satisfying option for any dinner table.

Cooking Methods and Variations

Hamburger Helper can be made in various ways, including stovetop, oven, or microwave for convenience. Each method ensures a flavorful meal tailored to your cooking preferences and schedule flexibility.

Oven Cooking: A Hands-Off Approach

Oven cooking offers a convenient, hands-off way to prepare Hamburger Helper. Preheat your oven to 350°F (180°C). Combine ground beef, Hamburger Helper mix, water or milk, and optional vegetables in a large mixing bowl. Transfer the mixture to a greased 9×13-inch baking dish, cover with foil, and bake for 25-30 minutes. Remove foil and continue baking for an additional 5-10 minutes to allow the top to brown slightly. This method ensures even cooking and frees you up to prepare sides or relax while dinner cooks to perfection. It’s ideal for those who prefer minimal monitoring during meal preparation.

Microwave Instructions for a Quick Fix

Microwave cooking provides an ultra-fast way to prepare Hamburger Helper. Crumble 1 pound of ground beef into a 3-quart microwavable casserole or bowl. Add the Hamburger Helper mix, water or milk, and any optional vegetables; Cover the dish with a microwave-safe lid or plastic wrap. Cook on high for 5-7 minutes, breaking up the beef after 3 minutes. Stir well and continue cooking for an additional 2-3 minutes until the pasta is tender and the sauce thickens. This method is perfect for a rapid meal solution, ensuring a hot, satisfying dinner with minimal effort and time.

Storage and Reheating Tips

Store leftovers in an airtight container in the fridge for up to 3 days. Reheat on the stovetop, in the microwave, or oven until warmed through.

Fridge and Freezer Storage: Keeping It Fresh

For optimal freshness, store cooked Hamburger Helper in an airtight container in the fridge for up to 3 days. For longer storage, transfer to a freezer-safe container or bag and keep for up to 3 months. Label containers with dates for easy tracking. When reheating, thaw frozen portions overnight in the fridge or reheat directly from frozen using low heat. Ensure leftovers are heated to an internal temperature of 165°F (74°C) for food safety. Proper storage helps maintain flavor and texture, keeping your meal fresh and ready for quick reheating whenever needed.

Reheating: Stovetop, Microwave, and Oven Methods

Reheating Hamburger Helper is simple and convenient. For stovetop reheating, add a splash of water or milk to the dish, cover, and warm over low heat, stirring occasionally until heated through. In the microwave, place portions in a microwave-safe dish, add a tablespoon of water, cover with a paper towel, and heat on high for 1-2 minutes. For oven reheating, transfer to a covered dish, add a bit of water, and warm at 300°F (150°C) for 10-15 minutes. Each method ensures a tasty, hot meal without compromising flavor or texture.

Frequently Asked Questions

Common questions about Hamburger Helper include substitution options, storage tips, and variations. Users also ask about making it healthier and the best pasta shapes to use.

Can I Use Alternative Proteins or Pastas?

Yes, alternative proteins like ground turkey or chicken can be used. For pasta, elbow macaroni is classic, but penne, rotini, or shells also work well. Customize to your taste!

How to Make It Healthier: Tips and Tricks

Enhance your Hamburger Helper’s health benefits by adding vegetables like onions, garlic, or bell peppers. Using leaner meats or plant-based alternatives reduces fat content. Opt for whole-grain pasta and low-sodium seasonings for a nutritious meal.

Why Make It from Scratch?

Creating Hamburger Helper from scratch offers richer flavors, fresher ingredients, and better nutrition. Customize seasonings and ingredients to suit your dietary preferences and enhance the meal’s quality.

Flavor and Nutrition: The Homemade Advantage

Homemade Hamburger Helper delivers superior flavor and nutrition compared to boxed mixes. Fresh ingredients like garlic, onion, and herbs add depth, while using lean meats and whole pasta boosts nutritional value. By controlling salt and preservatives, you create a healthier, tastier dish tailored to your preferences. This method ensures vibrant flavors and better-quality ingredients, making it a satisfying and wholesome option for family meals. The ability to customize also allows for dietary adjustments, ensuring everyone enjoys a delicious, balanced meal.