minka aire remote control manual

Welcome to the Minka Aire Remote Control Manual, your comprehensive guide to understanding and utilizing the advanced features of your ceiling fan remote control system․

1․1 Overview of the Minka Aire Remote Control System

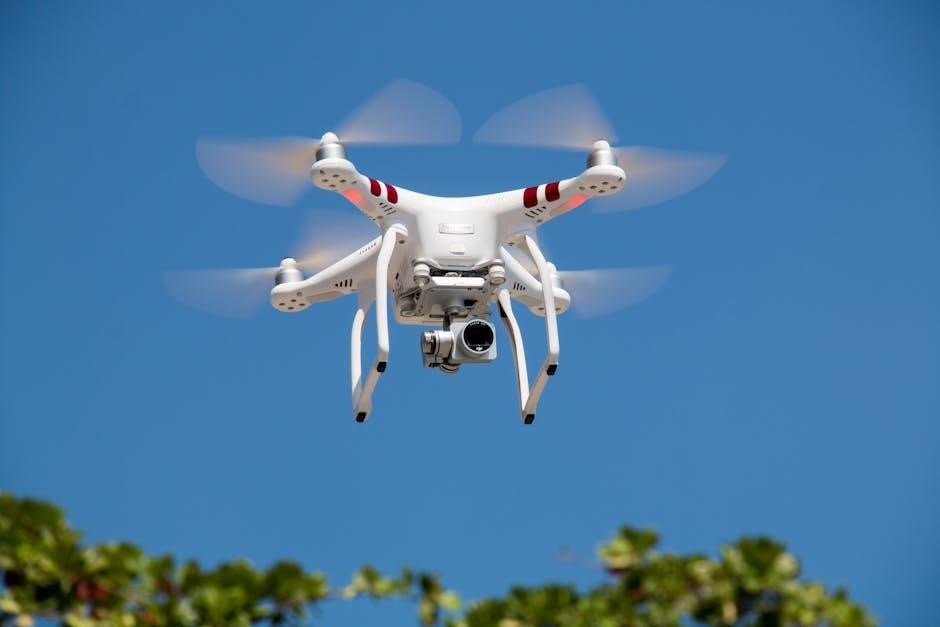
The Minka Aire Remote Control System is a sophisticated solution designed to enhance your ceiling fan experience․ It features advanced functions like speed control, light dimming, and a learning frequency option to minimize interference․ With 1024 code combinations, it ensures reliable operation and compatibility with DC motor fans․ The system is user-friendly, offering seamless control and customization for optimal comfort and convenience in your home․

1․2 Importance of Reading the Manual

Reading the Minka Aire Remote Control Manual is essential for understanding proper installation, operation, and troubleshooting․ It ensures you utilize all features effectively, such as speed control and light settings, while avoiding potential damage from incorrect usage․ The manual also highlights warranty terms and compatibility details, ensuring your system functions optimally and remains under warranty․ Following the guidelines helps prevent issues and prolongs the lifespan of your remote control system․

Installation of the Minka Aire Remote Control

Install the Minka Aire Remote Control by first ensuring compatibility with your ceiling fan․ Follow the step-by-step process, including syncing the remote with the fan for proper functionality․

2․1 Pre-Installation Checks

Before installing the Minka Aire Remote Control, ensure the system is compatible with your ceiling fan, especially for DC motor models․ Verify that the remote and receiver are properly paired at the factory․ Install the batteries correctly, and check that all components are included․ Ensure the fan’s wiring is compatible with the remote control system․ Confirm the remote’s frequency matches the receiver to avoid interference issues during operation․

2․2 Step-by-Step Installation Process

Begin by unpacking all components and ensuring compatibility with your ceiling fan․ Install the receiver unit near the fan, ensuring proper wiring connections․ Insert batteries into the remote control and pair it with the receiver by syncing their frequencies․ Mount the receiver securely and connect it to the fan’s motor and light․ Test the remote to ensure all functions operate smoothly before finalizing the installation․

2․3 Syncing the Remote with the Ceiling Fan

To sync the remote, ensure the ceiling fan is powered on․ Press and hold the pairing button on the receiver until the indicator light flashes․ Then, press and hold the remote’s sync button until the light stabilizes․ This establishes a secure connection․ Repeat if necessary․ Once synced, the remote will control the fan seamlessly, ensuring smooth operation and preventing interference from other devices․

Operating the Minka Aire Remote Control

Mastering the operation of your Minka Aire remote control is straightforward․ Use the numbered buttons to adjust fan speed, with button 1 for minimum and button 6 for maximum․ The remote features a learning frequency function with 256 code combinations to minimize interference․ Press and hold the light button to adjust brightness levels, providing precise control over your ceiling fan’s lighting;

3․1 Understanding the Remote Control Buttons

The Minka Aire remote control features intuitive buttons designed for easy operation․ Buttons 1-6 control fan speed, with 1 being the lowest and 6 the highest․ The light button toggles the light on/off, while pressing and holding it adjusts brightness․ The remote also includes a learning frequency function with 256 code combinations to prevent interference, ensuring smooth and reliable control of your ceiling fan․ Proper use enhances functionality and user experience․

3․2 Adjusting Fan Speed and Light Settings

Use buttons 1-6 to adjust fan speed, with 1 being the lowest and 6 the highest․ The light button toggles the light on/off, while holding it adjusts brightness․ Pressing the light button once turns it on/off, and holding it cycles through dimming levels․ This feature allows precise control over both fan and light settings, ensuring optimal comfort and ambiance in your space․ Proper adjustment enhances energy efficiency and user satisfaction․

3․3 Using the Learning Frequency Function

The Learning Frequency Function allows the remote to sync with your ceiling fan, ensuring interference-free operation․ Press and hold the button on both the transmitter and receiver simultaneously to activate this feature․ The system offers 256 code combinations, minimizing potential interference from other devices․ This function ensures a stable connection and smooth operation of your Minka Aire ceiling fan, enhancing overall performance and user experience with precise control․

Troubleshooting Common Issues

This section addresses common problems like remote non-response, interference, or syncing issues․ Check batteries, signal strength, and ensure proper syncing for optimal performance and quick resolution․

4․1 Remote Control Not Responding

If your Minka Aire remote control stops working, check the batteries first․ Ensure they are installed correctly and not depleted․ Verify that the remote is synced properly with the ceiling fan․ Check for any physical obstructions or interference from other devices․ Reset the remote by removing the batteries, waiting 30 seconds, and reinstalling them․ If issues persist, refer to the syncing process outlined in the manual or contact Minka Aire support for assistance․

4․2 Interference with Other Devices

Interference with other devices can occur if they operate on the same frequency as your Minka Aire remote control․ To minimize this, the remote is equipped with a learning frequency function and multiple code combinations․ Change the frequency during installation or reset the remote to avoid conflicts․ Ensure no other devices are using the same frequency band to maintain smooth operation of your ceiling fan remote control system․

4․3 Resetting the Remote Control

To reset the Minka Aire remote control, press and hold the SET or LEARN button for 10-15 seconds․ Release the button and wait for the indicator light to flash, confirming the reset․ This process restores the remote to its default settings․ After resetting, sync the remote with your ceiling fan by turning the power off and on again, then test the remote to ensure proper functionality․ Resetting helps resolve connectivity issues and ensures smooth operation of your ceiling fan remote control system․

Maintenance and Care

Regular maintenance ensures optimal performance․ Clean the remote with a soft cloth and mild detergent․ Replace batteries as needed․ Check for firmware updates and follow manufacturer instructions․

5․1 Cleaning the Remote Control

To maintain your Minka Aire remote control, clean it regularly using a soft cloth and mild detergent․ Avoid harsh chemicals or excessive moisture, which can damage the buttons or internal components․ Gently wipe the surface, paying attention to button areas prone to dirt accumulation․ For crevices, use compressed air to remove debris․ Ensure the remote is dry before use to prevent electrical issues․ Regular cleaning prevents malfunction and ensures optimal performance․

5․2 Replacing Batteries

To ensure uninterrupted operation of your Minka Aire remote control, replace the batteries when they weaken․ Use high-quality alkaline batteries (AA or AAA, depending on the model)․ Open the battery compartment, located on the back, by sliding it off or using a small screwdriver․ Remove the old batteries, insert the new ones ensuring correct polarity, and close the compartment securely․ Avoid mixing old and new batteries for optimal performance․

5․3 Updating Firmware (If Applicable)

Periodically, Minka Aire may release firmware updates to enhance remote control functionality․ To update, visit the official Minka Aire website and download the latest firmware version compatible with your remote model․ Connect the remote to your computer using the provided cable or wireless adapter, then run the update tool․ Follow on-screen instructions to complete the process․ Ensure the update is uninterrupted to avoid system errors․ Updated firmware improves performance and compatibility․

Warranty Information

Minka Aire provides a comprehensive warranty covering the motor for the lifetime of the ceiling fan․ Remote controls and electrical components are warranted for one year from purchase․ Ensure all products are installed correctly and used as intended to maintain warranty validity․

6․1 Coverage and Duration

Minka Aire’s warranty program ensures extensive coverage for your ceiling fan and remote control system․ The motor is warranted for the lifetime of the fan, while remote controls, electrical components, and lighting elements are covered for one year from the date of purchase․ This warranty applies to products purchased from authorized dealers and is void if non-Minka Aire parts are used․ Proper installation and usage are essential to maintain warranty validity․

6․2 Conditions for Warranty Validity

The warranty is valid only for products purchased from authorized Minka Aire dealers and registered within 30 days of purchase․ Proper installation, as outlined in the manual, is required․ Use of non-Minka Aire parts voids the warranty․ The warranty is non-transferable and applies only to the original purchaser․ Regular maintenance, as specified, must be performed․ Warranty coverage is limited to the country of purchase and excludes damage caused by misuse or external factors․

6․3 Contacting Minka Aire Support

For assistance, visit the official Minka Aire website at www․minkagroup․net and navigate to the FAQ section․ Registered product owners can contact support directly through the website or by phone․ Ensure you have your product serial number and purchase details ready for efficient service․ Minka Aire support is available to address warranty claims, troubleshooting, and compatibility inquiries․ Contacting authorized dealers is also recommended for localized assistance․

Compatibility with Minka Aire Ceiling Fans

Ensure your remote control is compatible with your ceiling fan model․ DC motor fans require specific remotes, like the RC1000 Aire Control System․ Always verify compatibility before purchase to guarantee proper functionality and avoid issues․ Contact Minka Aire support or authorized dealers for confirmation․

7․1 Identifying Compatible Models

To ensure proper functionality, verify compatibility of your Minka Aire remote control with your ceiling fan model․ DC motor fans require specific remotes, such as the RC1000 Aire Control System․ Check the product label or Minka Aire’s official website for compatible models․ Contact Minka Aire support or authorized dealers to confirm compatibility before purchase․ Using an incompatible remote may result in malfunctions or reduced performance․

7․2 Checking for Compatibility Before Purchase

Before purchasing a Minka Aire remote control, ensure it is compatible with your ceiling fan model․ Visit the Minka Aire website or consult the product manual to verify compatibility․ DC motor fans require specific remote systems, such as the RC1000 Aire Control․ Contact Minka Aire customer support or authorized dealers for confirmation․ Proper compatibility ensures optimal performance and avoids potential malfunctions or reduced functionality․

7․3 Special Considerations for DC Motor Fans

DC motor fans require specific remote control systems, such as the RC1000 Aire Control, which is designed exclusively for DC motors․ This system features a learning frequency function with 1024 code combinations to minimize interference․ Ensure the remote is compatible with your fan’s motor type, as using incorrect systems may void the warranty․ Always follow Minka Aire’s guidelines for optimal performance and to avoid potential issues with functionality or interference from other devices․

Frequently Asked Questions

Here, we address common inquiries about the Minka Aire remote control system, ensuring optimal functionality and troubleshooting for a seamless user experience․

8․1 Can I Use the Remote Control with Multiple Fans?

The Minka Aire remote control is designed to operate with one ceiling fan at a time․ While it is possible to sync the remote with multiple fans, this may require resetting the frequency and ensuring compatibility․ For optimal performance, use the remote with a single fan or consult the manual for pairing instructions․ Ensure all fans are compatible with the remote’s frequency to avoid interference or malfunctions․

8․2 How Do I Prevent Interference from Other Remotes?

To prevent interference, ensure the remote control and receiver are set to the same frequency․ Use the learning frequency function to sync the remote with your fan․ Change the frequency during installation if needed․ Keep other remotes away and avoid using devices on the same frequency band․ Regularly update the remote’s firmware and replace batteries to maintain optimal performance and minimize interference issues․

8․3 What If My Remote Control Stops Working Suddenly?

If your remote stops working, first check the batteries and replace them if weak․ Ensure no interference from other devices․ Reset the remote by pressing the light button for 5 seconds․ Sync the remote with the fan using the learning frequency function․ If issues persist, contact Minka Aire support for assistance or potential hardware repair․ Always ensure the remote is compatible with your fan model for proper functionality․

This manual provides essential guidance for optimal use of your Minka Aire remote control․ Regular maintenance, proper installation, and understanding remote functions ensure seamless operation and longevity of your system․

9․1 Summary of Key Points

This manual provides a detailed guide for installing, operating, and maintaining your Minka Aire remote control system․ Key features include the learning frequency function, compatibility with DC motor fans, and troubleshooting tips․ Regular maintenance, such as cleaning and replacing batteries, ensures optimal performance․ Warranty information and compatibility checks are also covered to help you make informed decisions․ Refer to this manual for any questions or issues regarding your remote control system․

9․2 Final Tips for Optimal Use

For the best experience with your Minka Aire remote control, ensure proper syncing and regular battery checks․ Use the learning frequency function to minimize interference․ Avoid using unauthorized parts to maintain warranty validity․ Clean the remote regularly and update firmware if applicable․ Always refer to this manual for troubleshooting and maintenance tips․ By following these guidelines, you can enjoy seamless operation and extend the lifespan of your remote control system․

year 10 science test papers with answers pdf

Year 10 Science test papers with answers PDF are essential resources for students to assess their understanding and retention of key concepts. These papers include multiple-choice questions, short answers, and long answers, covering Chemistry, Physics, and Biology. The PDF format ensures accessibility and convenience, allowing students to practice and review anywhere. Regular practice with these papers helps build confidence and exam readiness.

1.1 Importance of Practicing with Test Papers

Practicing with Year 10 Science test papers is crucial for exam preparation. It helps students understand question patterns, manage time effectively, and identify weak areas. Regular practice builds confidence, improves problem-solving skills, and familiarizes students with the exam format. Solving test papers also enhances retention of key concepts and reduces anxiety, ensuring better performance in the actual examination.

1.2 Benefits of Using PDF Formats for Test Papers

PDF formats for Year 10 Science test papers offer numerous advantages. They are easily accessible, printable, and compatible with all devices. PDFs maintain consistent formatting, ensuring clarity and readability. Additionally, they provide answer keys and solutions, enabling self-assessment. The portability of PDFs allows students to practice anytime, making them a convenient and efficient study resource for exam preparation and revision.

Where to Find Year 10 Science Test Papers with Answers

Year 10 Science test papers with answers are available on official education board websites, educational platforms, and school resources. These sources provide accessible and reliable materials for exam preparation.

2.1 Official Education Board Websites

Official education board websites are reliable sources for Year 10 Science test papers with answers. Platforms like CBSE, NCERT, and state boards provide free PDF downloads of previous years’ question papers. These resources include solved papers, marking schemes, and exam patterns, helping students prepare effectively. Regularly updated, they ensure access to the latest exam materials, making them indispensable for focused study and improved performance.

2.2 Educational Platforms and Forums

Educational platforms and forums offer a wealth of resources for Year 10 Science test papers with answers. Websites like Vedantu and educational forums provide access to PDFs of previous years’ papers, sample questions, and study materials. These platforms often include video tutorials, interactive quizzes, and discussion sections forclarifying doubts. They are ideal for students seeking additional practice and in-depth understanding of Science concepts, enhancing their exam preparation effectively.

2.3 School and Teacher Resources

Schools and teachers often provide Year 10 Science test papers with answers as part of their curriculum support. These resources are typically available on school websites or through educational platforms like Deeksha Learning. They include model question papers, solved examples, and detailed explanations, ensuring students can practice and understand concepts effectively. These resources are tailored to the syllabus and are highly reliable for exam preparation.

Structure of Year 10 Science Test Papers

Year 10 Science test papers are typically divided into four sections, containing multiple-choice, short-answer, and long-answer questions. All questions are compulsory, ensuring comprehensive assessment of knowledge and skills.

3.1 Types of Questions Included

Year 10 Science test papers include multiple-choice questions, short-answer questions, and long-answer questions. These cover Chemistry, Physics, and Biology, with a focus on critical thinking and practical application. Diagram-based questions also feature, testing students’ ability to interpret and analyze visual data. The variety of question types ensures comprehensive assessment of knowledge, understanding, and problem-solving skills, preparing students for exam conditions effectively.

3.2 Marking Scheme and Grading Criteria

The marking scheme for Year 10 Science test papers allocates marks based on accuracy, completeness, and adherence to question requirements. Short-answer questions typically carry 2-4 marks, while long-answer questions may carry up to 5-6 marks. Partial marks are awarded for correct steps or partially correct answers. The grading criteria emphasize understanding, application, and analytical skills, ensuring a fair evaluation of students’ performance.

How to Download Year 10 Science Test Papers with Answers

Visit official education board websites or educational platforms to find and download Year 10 Science test papers with answers in PDF format; Follow the provided links, select the desired papers, and save them for easy access. Ensure the source is reliable to avoid incorrect or outdated materials.

4.1 Step-by-Step Download Process

To download Year 10 Science test papers with answers in PDF format, visit official education websites or trusted educational platforms. Navigate to the relevant section, select the desired papers, and click the download link. Ensure the files are saved in an accessible location for easy access. Verify the source for authenticity to avoid incorrect materials.

4.2 Tips for Organizing Downloaded Papers

Organize downloaded Year 10 Science test papers by creating folders for each subject or topic. Label files clearly with year and chapter for easy access. Store them in cloud storage for backup and sync across devices. Regularly review and categorize papers to maintain a structured study routine, ensuring efficient use of resources and focused preparation.

Key Topics Covered in Year 10 Science Test Papers

Year 10 Science test papers cover core concepts in Chemistry and Physics, focusing on reactions and energies, while Biology emphasizes ecosystems and environmental interactions.

5.1 Chemistry and Physics Core Concepts

Chemistry focuses on chemical reactions, acids, bases, and salts, while Physics covers motion, forces, energy, and electricity. These topics are foundational for Year 10 Science, ensuring students grasp key principles through practical applications and problem-solving exercises in test papers.

5.2 Biology and Environmental Science Focus Areas

Biology and Environmental Science test papers emphasize life processes, ecosystems, and conservation. Questions cover cell biology, genetics, and environmental impacts, fostering critical thinking and practical understanding. These focus areas prepare students to address real-world challenges through comprehensive problem-solving and analytical skills.

Strategies for Effective Preparation Using Test Papers

Effective preparation involves timed practice, focused study on weak areas, and regular review of answers. Simulate exam conditions to enhance time management and reduce exam anxiety.

6.1 Time Management Techniques

Practicing with timed test papers helps students allocate specific minutes to each section, ensuring they complete the exam within the allotted time. Allocate 20 minutes to multiple-choice questions and 40 minutes to long answers. This strategy improves speed and accuracy, reducing exam stress. Regular practice under timed conditions builds confidence and familiarity with the exam format.

After completing a paper, review the answers to identify mistakes and improve time allocation for future attempts. This method ensures efficient use of time during actual exams, allowing students to tackle all questions effectively. Consistent practice with timed papers enhances overall performance and readiness for the final assessment.

6.2 Focused Study on Weak Areas

Year 10 Science test papers reveal weak areas through incorrect answers. Students should prioritize these topics, using NCERT solutions for clarity. Regular practice on weak areas ensures steady improvement and boosts exam scores.

Common Mistakes to Avoid While Solving Test Papers

Common mistakes include misreading questions and poor time management, leading to incomplete or incorrect answers. Practicing with test papers helps students identify and avoid these errors effectively.

7.1 Understanding Question Patterns

Understanding question patterns is crucial for effective test preparation. Familiarize yourself with the types of questions, such as multiple-choice, short-answer, and long-answer questions. Recognize recurring themes and formats to improve time management and accuracy. Practicing with past papers helps identify common question structures, allowing students to allocate time wisely and reduce exam anxiety. This strategic approach enhances performance and ensures better preparedness for the actual test.

7.2 Avoiding Common Pitfalls in Answering

Common pitfalls include rushing through questions without reading them carefully, poor time management, and failing to review answers. Students often misinterpret question requirements or overlook key details. To avoid these errors, practice reading instructions thoroughly, allocate time wisely, and review your work. Ensure answers are concise and relevant, adhering to marking schemes. Using answer keys to identify and correct mistakes enhances accuracy and understanding, fostering improved results.

Year 10 Science Test Papers with Answers for Revision

Year 10 Science test papers with answers PDF are essential for revision, providing students with a comprehensive way to assess their understanding and retention of key concepts.

8.1 Chapter-Wise Revision Strategies

Chapter-wise revision strategies using Year 10 Science test papers with answers PDF help students focus on specific topics. Each chapter is covered with targeted questions, allowing students to identify weak areas and improve understanding. Regular practice with these papers enhances retention and familiarity with exam patterns, ensuring comprehensive preparation for all subjects, including Chemistry, Physics, and Biology;

8.2 Full-Length Practice Tests for Exam Readiness

Full-length practice tests simulate real exam conditions, helping students adapt to time constraints and question patterns. These tests cover the entire syllabus, allowing students to assess their readiness. Solving these papers in an exam-like environment reduces anxiety and improves problem-solving speed. Answers provided enable self-assessment, highlighting areas for improvement and ensuring thorough preparation for the actual exam.

Additional Resources to Supplement Test Papers

NCERT solutions, exemplar problems, and online mock tests provide comprehensive support. Video tutorials and chapter-wise study materials enhance understanding and reinforce concepts effectively for better exam preparation.

9.1 NCERT Solutions and Exemplar Problems

NCERT solutions and exemplar problems are invaluable for Class 10 Science students. These resources provide detailed explanations for textbook questions, focusing on core concepts like chemical reactions, acids, and motion. Exemplar problems offer additional practice, covering a wide range of topics and difficulty levels. Students can use these to clarify doubts and master challenging areas, ensuring a strong foundation for exam success.

9.2 Online Mock Tests and Video Tutorials

Online mock tests and video tutorials are excellent supplementary tools for Year 10 Science preparation. Mock tests simulate exam conditions, helping students practice time management and question-solving strategies. Video tutorials provide visual explanations of complex topics like chemical reactions and motion, making learning interactive and engaging. These resources are particularly useful for clarifying doubts and reinforcing concepts in a structured, accessible manner.

Consistent practice with Year 10 Science test papers builds confidence and exam readiness. Focus on understanding core concepts, managing time effectively, and reviewing weak areas regularly for success.

10.1 Summarizing Key Takeaways

Practicing with Year 10 Science test papers enhances exam readiness by familiarizing students with question patterns and time management. Focusing on core concepts like Chemistry, Physics, and Biology ensures a strong foundation. Regular review of weak areas and avoiding common mistakes boosts confidence. Utilizing PDFs for convenience and accessibility makes preparation seamless. Consistent practice with these papers is key to achieving success in the final exam.

10.2 Encouragement for Consistent Practice

Consistent practice with Year 10 Science test papers is vital for mastering concepts and improving problem-solving skills. Regular use of PDF resources builds confidence and familiarity with exam formats. Students are encouraged to dedication time daily to solve papers, focusing on Chemistry, Physics, and Biology. Persistent effort ensures better retention and readiness, helping students achieve their academic goals effectively.

patio cover plans pdf

Welcome to our guide on patio cover plans! Discover comprehensive designs, materials, and construction steps to create the perfect shaded outdoor space for relaxation and entertainment.

What Are Patio Cover Plans?

Patio cover plans are detailed blueprints or instructions designed to guide the construction of patio covers. These plans are created by architects, designers, and construction experts to ensure durability and aesthetic appeal. They typically include measurements, materials, and step-by-step building techniques. Patio covers are one-story structures, usually attached to a house, open on at least two sides, and no taller than 12 feet. These plans cater to both DIY enthusiasts and professionals, offering customizable designs to suit various styles and preferences. Available in PDF format, they provide a clear roadmap for creating a shaded outdoor space, whether for relaxation or entertainment.

Design Factors to Consider

When designing a patio cover, consider roof load, materials, size, style, and local building codes to ensure durability and structural integrity for your outdoor space.

Roof Design and Load

Road Design and Load are critical for ensuring structural integrity. The roof must support both dead loads (e.g., framing materials) and live loads (e.g., snow or rain). According to the International Building Code and local regulations, the design load is the sum of these weights. A lean-to roof with a 2:12 pitch is ideal for shedding water and snow, while a gabled roof offers a traditional aesthetic. Proper planning ensures safety and longevity, preventing collapse or damage. Always consult local building codes to determine the required load-bearing capacity for your area.

Materials and Durability

Materials and durability play a significant role in the longevity of your patio cover. Wood, such as cedar or pressure-treated pine, is a popular choice for its aesthetic appeal and durability. Cedar, when properly sealed, can last up to 30 years, while pressure-treated pine may last 10-15 years if maintained. Metal and fabric covers offer modern alternatives, with metal providing long-lasting strength and fabric offering portability and style. Each material has its benefits and drawbacks, so selecting the right one depends on your budget, climate, and desired appearance. Proper maintenance, like staining and sealing, ensures your patio cover withstands the elements and remains functional for years.

Size and Style

Size and style are crucial elements in patio cover design. The size should complement your outdoor space, ensuring functionality while maintaining aesthetic balance. Popular sizes include 12×16 and 10×12 feet, offering ample coverage for gatherings. Styles range from modern lean-to designs with angled roofs to traditional gabled or flat roofs. Wooden covers often feature classic looks, while metal and fabric options provide contemporary flair. The pitch of the roof, such as 2:12 or 1.5:12, affects both drainage and visual appeal. Additionally, decorative elements like hardware and trim can enhance the overall design. Choosing the right size and style ensures your patio cover blends seamlessly with your home and meets your lifestyle needs. Proper planning guarantees a functional and visually appealing structure.

Types of Patio Covers

Patio covers come in various styles, including attached, free-standing, and wooden designs; Metal and fabric options offer durability and modern aesthetics, while traditional wood provides timeless charm and strength.

Attached vs. Free-Standing

Attached patio covers are connected to your house, offering shade and protection while enhancing outdoor living spaces. Free-standing covers, however, can be placed anywhere in your yard. Attached designs often require proper integration with your home’s structure, ensuring stability and seamless aesthetics. Free-standing options provide flexibility, allowing you to create shaded areas away from your house. Both types are available in various materials, such as wood or metal, and can be customized to match your home’s style. When choosing between them, consider factors like space, budget, and desired functionality. PDF plans for both styles are widely available, offering detailed instructions for DIY projects or professional installations.

Wooden Patio Covers

Wooden patio covers are a popular choice for their natural beauty and durability. Made from materials like cedar, pine, or redwood, these structures blend seamlessly with outdoor environments. They offer excellent protection from the sun and rain while adding a rustic charm to your backyard. Properly sealed and stained, wooden patio covers can last for 20 to 30 years, though they require regular maintenance to prevent rot and warping. Designs range from simple lean-to styles to intricate pergolas, allowing for customization to match your home’s aesthetic. Free PDF plans are available online, providing detailed instructions for building wooden patio covers as a DIY project.

Metal and Fabric Patio Covers

Metal and fabric patio covers offer modern and versatile solutions for outdoor shading. Metal covers are durable, low-maintenance, and fire-resistant, making them ideal for long-lasting protection. They come in sleek designs and can withstand heavy loads like snow. Fabric covers, on the other hand, provide a stylish and flexible option, available in various colors and patterns. They are often less expensive and easier to install than metal or wood. However, fabric covers may require more frequent maintenance due to weather exposure. Both options can be customized to fit your patio’s size and style, with free PDF plans available for DIY enthusiasts to explore these designs.

Free Patio Cover Plans PDF

Download free patio cover plans PDF for DIY projects, including detailed blueprints for wooden, metal, and fabric designs. Perfect for creating shade with ease and style.

Popular Free Plans

Explore a variety of popular free patio cover plans designed for DIY enthusiasts. These plans include detailed blueprints for 12×16 attached patio covers, 16×20 lean-to designs, and 14×14 sloped patio covers. Many feature a 2:12 or 1.5:12 roof pitch, suitable for both shade and weather protection. Downloadable PDFs often include foundation plans, roof details, and material lists. Whether you prefer wooden structures with hidden connectors or metal designs, these plans cater to diverse styles and budgets. Perfect for homeowners seeking to enhance their outdoor spaces, these free resources provide step-by-step guidance for a professional finish. Start your project today with these easy-to-follow layouts.

DIY Projects

Engage in exciting DIY projects with our selection of patio cover plans. These projects are designed for homeowners of all skill levels, offering step-by-step instructions for constructing wooden patio covers, lean-to roofs, and pergolas. Many plans include detailed PDF blueprints, material lists, and tool requirements. Choose from modern designs like the 1420 Lean-to Pavilion or the 16×20 attached patio cover. With these guides, you can create a durable and stylish outdoor space tailored to your needs. Whether you’re aiming for a simple shade structure or an elaborate entertaining area, these DIY projects ensure a professional result with minimal cost and effort. Start building your dream patio today!

Construction Steps

Follow structured construction steps to build your patio cover, from planning and preparation to framing, roofing, and finishing touches, ensuring a sturdy and aesthetically pleasing outdoor space.

Planning and Preparation

Planning and preparation are crucial for a successful patio cover project. Start by assessing your site, ensuring it’s level and clear of obstacles. Check local building codes and regulations to ensure compliance. Determine the size and style of your patio cover based on your needs and available space. Create detailed blueprints or use pre-made patio cover plans PDF to guide your project. Obtain all necessary permits before beginning construction. Gather tools and materials, ensuring everything is measured and cut accurately. Proper planning will help avoid costly mistakes and ensure a smooth building process. Take your time to prepare thoroughly for the best results.

Building the Frame

Constructing the frame is the foundation of your patio cover. Begin by setting the footings according to your patio cover plans PDF. Use durable materials like wood or metal, ensuring they are weather-treated. Assemble the posts and beams, securing them firmly to the ground and each other for stability. Attach the frame to your house if building an attached patio cover, ensuring a secure connection. Double-check all measurements and alignments for accuracy. Use brackets and connectors for added strength, especially in areas with heavy snow or wind. A sturdy frame ensures safety and longevity, so take your time to build it right.

Installing Roofing

Installing roofing is a critical step in your patio cover project. Begin by ensuring the frame is secure and level. Choose your roofing material—such as metal, asphalt shingles, or corrugated metal—and follow the manufacturer’s instructions. Lay the roofing material evenly, starting from the lowest point to ensure proper drainage. Secure each panel or shingle with screws or nails, spacing them as recommended. Seal any gaps or overlaps to prevent water leakage. For fabric roofs, stretch the material tightly and attach it to the frame using the provided hardware; Finally, inspect the roof for stability and weatherproofing. Proper installation ensures durability and protection from the elements.

Finishing Touches

After constructing the frame and installing the roof, the final step is adding finishing touches. Install decorative trim or molding to cover any exposed edges or gaps. Sand and paint or stain the wood to match your home’s exterior. Add lighting fixtures or ceiling fans for ambiance and functionality. Ensure all hardware is securely tightened and weatherproofed. Consider adding decorative elements like fretwork or lattice for a personalized look. Finally, inspect the entire structure for any imperfections and make necessary adjustments. These finishing touches will enhance the appearance and functionality of your patio cover, creating a inviting outdoor space for years to come.

With the right patio cover plan, you can transform your outdoor space into a functional and stylish retreat. Whether you choose a wooden, metal, or fabric design, these structures offer shade and protection. By following detailed PDF guides, you can ensure a sturdy and visually appealing result. Proper planning, material selection, and construction techniques are key to longevity. Don’t hesitate to explore free patio cover plans and DIY projects to find the perfect fit for your home. Start your project today and enjoy countless moments under your new patio cover, enhancing your outdoor living experience for years to come.

think sheet.pdf

Think Sheets are reflective tools used in classrooms to help students consider their actions, consequences, and improvements. They promote accountability and self-awareness, serving as a progressive discipline strategy.

1.1 Definition and Purpose

A Think Sheet is a structured tool designed to guide students in reflecting on their behavior, its consequences, and ways to improve. It serves as an alternative to traditional discipline, focusing on problem-solving, accountability, and personal growth. The purpose is to encourage self-awareness and responsibility, helping students understand the impact of their actions and develop better decision-making skills.

1.2 Importance in Classroom Management

Think Sheets play a crucial role in classroom management by fostering accountability and self-reflection, reducing disruptions, and improving student behavior. They provide a structured method for addressing misbehavior, allowing teachers to support students in understanding their actions and developing responsibility. This approach encourages a positive learning environment and helps students grow emotionally and socially.

What is a Think Sheet?

A Think Sheet is a reflective tool used to help students analyze their behavior, understand consequences, and develop better choices through guided questions and self-reflection.

2.1 Structure and Components

A Think Sheet typically includes guided questions about the incident, such as actions taken, expectations violated, and consequences. It may also incorporate sections for reflections, problem-solving, and alternative choices; Some versions include visual aids for younger students to enhance understanding and engagement, ensuring a comprehensive approach to self-reflection and behavior improvement.

2.2 How It Differs from Traditional Discipline

Unlike traditional discipline, Think Sheets focus on reflection rather than punishment. They encourage students to analyze their actions, understand consequences, and develop solutions. This approach fosters accountability and growth, shifting from reactive measures to proactive learning, empowering students to take ownership of their behavior and decisions.

Benefits of Using Think Sheets

Think Sheets promote self-reflection, accountability, and emotional growth. They help students understand consequences, fostering better decision-making and behavior, while encouraging personal responsibility and mindful actions.

3.1 Promoting Self-Reflection and Accountability

Think Sheets guide students to reflect on their actions, encouraging them to identify consequences and take responsibility. By exploring their thoughts and feelings, students develop self-awareness and accountability. This process helps them understand the impact of their behavior, fostering personal growth and a sense of responsibility for their choices.

3;2 Encouraging Emotional Intelligence and Growth

Think Sheets help students develop emotional intelligence by exploring their emotions and the effects of their actions. This reflection fosters empathy and self-regulation, crucial for social-emotional growth. By understanding their feelings and considering others’, students build resilience and improve interpersonal relationships, essential skills for lifelong success and positive interactions.

How to Create a Think Sheet

Include relevant questions, space for reflection, and visual aids for younger students. Ensure clarity and alignment with behavior expectations to guide meaningful self-reflection and growth.

4.1 Key Questions to Include

Include questions like, “What happened?” “Who was affected?” and “What could you do differently?” These prompts guide students to reflect on their actions, consequences, and future choices, fostering accountability and growth. Ensure questions are clear, age-appropriate, and aligned with behavior expectations to encourage meaningful self-reflection.

4.2 Designing for Different Age Groups

Adapt Think Sheets for different age groups by varying complexity. Younger students benefit from visual aids and simple questions, while older students can handle detailed prompts. Use age-appropriate language and structure to ensure clarity and engagement, fostering reflection suited to their developmental levels and understanding.

Using Think Sheets in the Classroom

Think Sheets help students reflect on behavior, understand consequences, and develop better choices. They support SEL and behavior management, fostering accountability and growth in educational settings.

5.1 When and How to Implement Them

Think Sheets are most effective when used immediately after an incident, allowing students to reflect while emotions are fresh. Teachers should guide students through the process, ensuring they understand the purpose. Implementing them during quiet moments, like after recess or at the end of class, helps students focus on their reflections. Consistency is key to making them a meaningful classroom tool.

5.2 Role of Teachers in Guiding Reflection

Teachers play a vital role in guiding student reflection by creating a supportive environment and asking meaningful questions. They help students connect actions to consequences, fostering accountability and growth. Providing feedback and encouraging honest dialogue ensures students gain insight and develop better decision-making skills. Teachers also ensure the process remains constructive and focused on improvement, rather than punishment.

Think Sheets and Restorative Practices

Think Sheets align with restorative practices by focusing on reflection, understanding consequences, and repairing harm. They encourage empathy and responsibility, fostering a positive shift in student behavior and mindset.

6;1 Connection to Restorative Justice in Schools

Think Sheets connect to restorative justice by emphasizing reflection and accountability. They help students understand the impact of their actions, fostering empathy and encouraging amends, aligning with the core principles of restorative practices in educational settings to build a more inclusive and mindful community.

6.2 Combining Think Sheets with Other SEL Tools

Think Sheets complement other SEL tools like reflection circles and calm-down corners. They integrate with restorative practices, fostering emotional intelligence and social skills. By combining these strategies, educators create a comprehensive SEL framework that supports students in managing emotions, resolving conflicts, and developing empathy, enhancing overall personal and academic growth.

Effectiveness of Think Sheets

Think Sheets effectively reduce misbehavior by encouraging self-reflection and accountability. They empower students to understand consequences, fostering a more responsible and positive learning environment.

7.1 Impact on Student Behavior and Learning

Think Sheets positively influence student behavior by fostering self-reflection and accountability. They help students connect actions to consequences, enhancing emotional intelligence and responsibility. Over time, this leads to improved decision-making and a reduction in misbehavior, creating a more focused and respectful learning environment that supports academic and social growth.

7.2 Feedback from Teachers and Students

Teachers appreciate Think Sheets as effective tools for promoting reflection and accountability. Students often find them helpful for understanding their actions and consequences. While some students may initially resist, many report feeling heard and supported. The structured format fosters constructive dialogue, with teachers noting improved behavior and students gaining clarity on personal growth opportunities.

Supporting Student Self-Reflection

Creating a safe environment for reflection helps students process their actions and emotions. Guiding them to identify consequences and solutions fosters accountability and personal growth effectively.

8.1 Creating a Safe Environment for Reflection

Creating a safe environment for reflection involves fostering trust and emotional safety. Teachers should ensure students feel comfortable sharing thoughts without fear of judgment. Encouraging open dialogue and active listening helps students process their emotions and actions. A non-judgmental space allows learners to explore their mistakes and develop problem-solving skills. Clear expectations and supportive guidance further enhance reflective practices, promoting personal growth and improved behavior.

8.2 Helping Students Identify Consequences and Solutions

Think Sheets guide students in analyzing the impact of their actions and identifying solutions. By reflecting on who was affected and how, students develop problem-solving skills. These tools encourage learners to consider alternative choices and understand the importance of making amends. Teachers play a crucial role in fostering this reflective process, helping students take responsibility for their behavior and growth.

Think Sheets in Behavior Management

Think Sheets are tools for behavior management, helping students reflect on actions and consequences. They promote accountability and encourage better decision-making, used in classrooms to address specific challenges.

9.1 Addressing Specific Behavioral Challenges

Think Sheets are effective in addressing specific behavioral challenges by guiding students to reflect on their actions and consequences. They help identify patterns, such as disruptiveness or disrespect, and encourage students to develop solutions. By focusing on reflection and accountability, Think Sheets empower students to understand the impact of their behavior and make positive changes, fostering improved conduct and responsibility in the classroom.

9.2 Using Visual Aids for Younger Students

Visual aids in Think Sheets help younger students understand and reflect on their behavior. Pictures and simple icons make the process accessible, encouraging them to identify actions and consequences. This approach supports visual learners and helps develop critical thinking skills, teaching cause-and-effect relationships and fostering better decision-making in a way that aligns with their developmental stage.

Promoting Social-Emotional Learning (SEL)

Think Sheets foster social-emotional learning by helping students develop self-awareness, empathy, and problem-solving skills. They guide students to reflect on their actions and their impact on others, promoting personal growth and responsibility.

10.1 Linking Think Sheets to SEL Competencies

Think Sheets align with SEL competencies by fostering self-awareness, self-management, and relationship skills. They encourage students to identify emotions, analyze consequences, and develop empathy, directly linking to SEL goals. This structured reflection helps students recognize how their actions affect others, promoting a deeper understanding of social-emotional principles and encouraging responsible decision-making in various situations.

10.2 Fostering Empathy and Responsibility

Think Sheets cultivate empathy by prompting students to consider how their actions impact others. By reflecting on consequences, students develop a sense of responsibility for their behavior. This process encourages them to see situations from different perspectives, fostering compassion and understanding while promoting a culture of mutual respect and positive interactions within the classroom environment.

Think Sheets are invaluable tools fostering reflection, accountability, and growth. By encouraging self-awareness and empathy, they create a positive learning environment, benefiting students and educators alike in schools.

11.1 The Future of Think Sheets in Education

Think Sheets are poised to evolve with education, integrating technology for accessibility and personalization. Their adaptability ensures relevance in addressing diverse student needs, making them a sustainable tool for fostering reflection and growth in modern classrooms. As education advances, Think Sheets will remain a vital resource for promoting self-awareness and accountability among students.

11.2 Final Thoughts on Their Value in Schools

Think Sheets are invaluable in fostering accountability, self-reflection, and emotional growth. By encouraging students to analyze their actions and consequences, they promote a culture of responsibility and empathy. Their adaptability to diverse needs makes them a powerful tool for educators, enhancing both behavior management and social-emotional learning. Ultimately, Think Sheets empower students to grow into mindful, thoughtful individuals, enriching the educational experience.

the most dangerous game story pdf

Richard Connell, an American author and journalist, crafted The Most Dangerous Game, a timeless thriller published in 1924, exploring themes of survival and moral ambiguity through a chilling hunt.

1.1 Overview of Richard Connell’s Life and Works

Richard Connell, an American author and journalist, was born in 1893 and died in 1949. He began his career in journalism before transitioning to fiction, gaining acclaim for his short stories. Connell’s most famous work, The Most Dangerous Game, published in 1924, remains a classic thriller. His writing often explored themes of survival, morality, and human nature, leaving a lasting impact on the literary world. Connell’s legacy endures through his suspenseful storytelling and timeless themes.

1.2 Background and Publication History of The Most Dangerous Game

The Most Dangerous Game, written by Richard Connell, was first published in 1924 as part of his short story collection Variety. The story gained immediate acclaim for its suspenseful narrative and exploration of ethical themes. Published by Minton, Balch & Company in New York, it quickly became a classic in the thriller genre. The tale of survival and moral ambiguity has endured, remaining widely read and adapted. Its availability as a PDF has further expanded its reach, ensuring its timeless appeal to readers worldwide.

Plot Summary of The Most Dangerous Game

The story follows Sanger Rainsford, a hunter shipwrecked on an isolated island, where he faces General Zaroff, a sinister aristocrat who hunts humans for sport.

2.1 The Setting: Ship-Trap Island

Ship-Trap Island, a mysterious and isolated Caribbean location, evokes dread among sailors due to its eerie reputation. The island’s dense jungle and hidden dangers serve as the chilling backdrop for General Zaroff’s twisted hunting games. Its remote setting heightens the suspense, as Rainsford must survive both the island’s harsh environment and the sinister forces at play. The island’s isolation underscores the characters’ desperation and the moral dilemmas they face, making it a pivotal element in the story’s tense and thrilling narrative.

2.2 Key Events and Turning Points in the Story

The story unfolds with Rainsford, a skilled hunter, falling overboard and washing up on Ship-Trap Island. He discovers the eerie mansion of General Zaroff, who reveals his twisted game of hunting humans. Rainsford is forced to participate, leading to a tense cat-and-mouse chase. A pivotal moment occurs when Rainsford outsmarts Zaroff by creating a man-eating dog trap. The story reaches its climax as Rainsford confronts Zaroff, ultimately turning the tables and securing his escape. These events showcase Rainsford’s resourcefulness and the moral ambiguity of the game.

Character Analysis

Rainsford, a skilled hunter, and General Zaroff, a twisted aristocrat, embody contrasting moralities. Their dynamic explores the thin line between predator and prey, highlighting human nature’s duality.

3.1 Sanger Rainsford: The Protagonist

Sanger Rainsford, a skilled big-game hunter from New York, is the protagonist of The Most Dangerous Game. Stranded on Ship-Trap Island, he showcases resourcefulness and intellect. Initially, Rainsford is portrayed as a seasoned hunter, but his experiences on the island challenge his beliefs about hunting and survival. His ability to adapt and outwit General Zaroff highlights his resilience and cleverness. Through his journey, Rainsford evolves from a confident hunter to a morally conflicted survivor, questioning the ethics of hunting and the value of human life.

3.2 General Zaroff: The Antagonist

General Zaroff, a wealthy and aristocratic hunter, is the antagonist of The Most Dangerous Game. He uses Ship-Trap Island as a private hunting ground, preying on humans for sport. Zaroff’s twisted philosophy justifies hunting people as the ultimate challenge, showcasing his madness and sophistication. His intelligence and refined demeanor contrast with his brutal nature, making him a compelling and dangerous adversary. Through his character, Connell explores themes of moral decay and the dangers of unchecked power, as Zaroff represents the darker aspects of human nature.

3.3 Supporting Characters: Whitney and the Sailor

Whitney, Rainsford’s friend, plays a pivotal role by introducing the mystery of Ship-Trap Island. His curiosity and skepticism about the island’s eerie reputation set the tone for the story. The unnamed sailor, whose death adds to the island’s ominous atmosphere, serves as a silent warning of the dangers that await. Both characters, though minor, contribute to the narrative by highlighting the island’s enigmatic nature and foreshadowing the horrors Rainsford will face, thus enhancing the story’s suspense and intrigue.

Themes and Symbolism

The story explores themes of survival, moral ambiguity, and the hunter-hunted dynamic, symbolizing the primal struggle between humanity and nature through its eerie island setting.

4.1 The Hunter vs. The Hunted

The story masterfully flips the traditional hunter-prey dynamic, as Rainsford transitions from a skilled hunter to a desperate survivor. General Zaroff, obsessed with the thrill of the chase, views humans as the ultimate prey, blurring the line between predator and victim. This reversal underscores the psychological and moral complexities of hunting, challenging Rainsford’s perspective and forcing him to confront the ethics of his own actions. The tension between the two characters highlights the primal struggle for survival and the darker aspects of human nature.

4.2 Moral Ambiguity and Ethics in Hunting

The story delves into the ethical dilemmas surrounding hunting, as General Zaroff’s twisted games blur the line between sport and brutality. Rainsford, a seasoned hunter, confronts the moral implications of treating humans as prey, challenging his own views on the ethics of hunting. The narrative raises questions about the value of human life and the justification of hunting for pleasure, highlighting the darker aspects of human nature and the consequences of unchecked ambition and arrogance. This moral ambiguity leaves readers questioning the true cost of survival and entertainment.

4.3 Survival Instincts and Human Nature

The story explores how survival instincts surface under extreme pressure, as Rainsford must rely on primal strategies to outwit General Zaroff. The narrative reveals the duality of human nature, where civilization’s veneer fades, exposing raw desperation and cunning. Rainsford’s transformation from hunter to prey highlights the universal will to survive, while Zaroff’s ruthless tactics illustrate the dangerous extremes humanity can reach when morality is discarded. This dynamic underscores the story’s tension between civilized restraint and primal survival instincts.

Reception and Impact

The Most Dangerous Game has received widespread acclaim for its gripping suspense and thought-provoking themes, solidifying its place as a classic in literature and popular culture.

5.1 Critical Reception and Reviews

The Most Dangerous Game has been widely praised for its suspenseful narrative and exploration of moral ambiguity. Critics highlight its ability to blend thrills with philosophical questions, making it a standout in the thriller genre. The story’s themes of survival and ethics have resonated with readers, cementing its reputation as a classic. Its enduring popularity is evident in its inclusion in various literary anthologies and its adaptation into multiple formats, showcasing its timeless appeal and cultural significance.

5.2 Cultural Impact and Legacy

The Most Dangerous Game has profoundly influenced popular culture, inspiring films, TV shows, and even music. Its concept of human hunting has become a cultural reference point, symbolizing extreme survival scenarios. The story’s adaptability has led to numerous stage and screen adaptations, ensuring its relevance across generations. Its exploration of human nature and ethics continues to captivate audiences, making it a significant part of literary and cultural discourse. This enduring legacy underscores its significance as a timeless thriller.

Adaptations and Interpretations

The Most Dangerous Game has been adapted into films, TV shows, and stage plays, influencing popular culture. Its PDF and related works remain widely accessible online.

6.1 Film, TV, and Stage Adaptations

The Most Dangerous Game has been adapted into numerous films, TV episodes, and stage plays, ensuring its enduring popularity. A 2017 book trailer on Video Game Island highlighted its suspenseful appeal. The story’s themes of survival and moral dilemmas have attracted filmmakers and playwrights worldwide, with various interpretations keeping the tale fresh for new audiences. Its availability in PDF and digital formats has further boosted its accessibility, making it a timeless classic in modern media.

6.2 Influence on Popular Culture

The Most Dangerous Game has profoundly influenced popular culture, inspiring countless discussions on survival, ethics, and human nature. Its themes are often referenced in educational contexts, with PDF versions widely used in classrooms. The story’s chilling premise has sparked debates about civilization and morality, making it a staple in literary analysis. Its availability online has ensured its relevance in modern media, with adaptations and interpretations continuing to captivate audiences, solidifying its legacy as a timeless thriller.

fagor pressure cooker instruction manual

The Fagor Pressure Cooker is a versatile kitchen appliance designed for efficient and safe cooking. Its comprehensive manual guides users through features, safety, and operation, ensuring ease of use for all skill levels.

1.1 Overview of the Fagor Pressure Cooker

The Fagor Pressure Cooker is a high-quality, versatile kitchen appliance designed for efficient cooking. Available in models like Duo, Rapida, and Express, it offers advanced features for pressure cooking, steaming, and simmering. Built with durable materials, it ensures safe and energy-efficient performance. The instruction manual provides detailed guidance on components, operation, and maintenance, making it user-friendly for cooks of all levels.

1.2 Key Features and Benefits

The Fagor Pressure Cooker features multiple cooking modes, including pressure cooking, steaming, and simmering. Its durable construction and energy-saving design ensure efficient performance. Safety devices, such as flame failure protection, enhance user security. The user-friendly control panel and comprehensive manual make operation straightforward. These features combine to offer a versatile, reliable, and safe cooking experience for home chefs and professionals alike, optimizing meal preparation and preserving nutrients.

Important Safety Precautions

Always read the manual before use. Avoid touching hot surfaces and ensure the cooker is placed on a stable, heat-resistant surface. Follow all safety guidelines to prevent accidents and ensure proper function.

2.1 General Safety Guidelines

Always read the manual before using the Fagor Pressure Cooker. Ensure you understand all instructions and safety precautions. Never touch hot surfaces or allow children near the cooker while in use. Place the cooker on a stable, heat-resistant surface, away from flammable materials. Regularly inspect for damage and ensure all parts are securely fitted. Follow all guidelines to avoid accidents and ensure safe, efficient performance.

2.2 Safety Devices and Features

The Fagor Pressure Cooker includes multiple safety devices to ensure secure operation. A locking mechanism prevents opening the lid while pressure is present. The pressure relief valve automatically releases excess steam, preventing over-pressurization. Additional features include thermal sensors and automatic shut-off, enhancing safety. Regular inspection of these components is essential to maintain optimal performance and prevent potential hazards during cooking.

Fagor Pressure Cooker Parts Diagram

The Fagor Pressure Cooker Parts Diagram illustrates essential components like the lid, gasket, pressure valve, and handles. These parts ensure safe and efficient cooking, as detailed in the manual.

3.1 Components and Accessories

The Fagor Pressure Cooker includes essential components like the lid, sealing gasket, pressure valve, and handles. Accessories such as steam baskets, trivets, and recipe books enhance cooking versatility. These parts are designed for durability and ease of use, ensuring optimal performance and safety during cooking sessions.

3.2 Understanding the Control Panel

The control panel features intuitive buttons for pressure control, timer settings, and mode selection. An LCD display shows cooking progress and settings. Safety mechanisms, such as automatic shut-off and pressure sensors, ensure safe operation. The panel is designed for easy navigation, allowing users to monitor and adjust cooking parameters efficiently while maintaining optimal performance and safety during use.

Installation and Setup

Unpack and inspect the cooker for damage. Place it on a heat-resistant surface, ensuring proper ventilation. Plug in the unit and refer to the manual for detailed setup instructions to ensure safe and proper installation.

4.1 Unpacking and Initial Inspection

Upon unpacking, carefully inspect the Fagor Pressure Cooker for any visible damage or dents. Ensure all components, including the lid, gasket, and control panel, are present and undamaged. Verify the power cord and accessories are included. If any damage is found, contact Fagor customer support immediately for assistance or replacement.

4.2 Placement and Connectivity Options

Place the Fagor Pressure Cooker on a stable, heat-resistant surface, ensuring good ventilation. Keep it away from children and flammable materials. For electric models, plug into a grounded outlet. For stovetop models, ensure compatibility with your cooktop type (gas, electric, or induction). Follow manual guidelines for proper installation and connectivity to ensure safe and efficient operation.

Operating Instructions

Follow the Fagor Pressure Cooker manual for safe operation. Start by adding ingredients, securing the lid, and setting the desired mode. Monitor pressure and timing, ensuring proper ventilation. Refer to the guide for specific instructions on pressure cooking, steaming, and simmering functions to achieve optimal results every time.

5.1 Basic Operating Steps

To begin, ensure the cooker is placed on a heat-resistant surface. Add ingredients and liquids as per your recipe. Close the lid securely, aligning the arrow on the lid with the arrow on the cooker. Turn the pressure regulator knob to the desired setting. Wait for the pressure indicator to rise, signaling the cooker is pressurized. Allow cooking for the recommended time, then safely release pressure. Always follow the manual for specific guidance on operation.

5.2 Pressure Cooking Modes and Functions

The Fagor Pressure Cooker offers multiple cooking modes, including manual, automatic, and keep-warm functions. Use the pressure regulator to adjust settings, ensuring optimal results. The control panel provides easy navigation for selecting modes. The pressure indicator signals when the cooker is pressurized, allowing precise control. Refer to the manual for detailed guidance on utilizing these functions effectively for various recipes and cooking needs.

5.3 Steaming and Simmering Options

The Fagor Pressure Cooker includes a steamer basket for healthy meal prep and a simmering function for gentle cooking. Use the steamer to cook vegetables and seafood without losing nutrients. The simmering mode is ideal for soups, sauces, or delicate dishes. Ensure the lid is sealed properly to retain steam and flavor. Refer to the manual for detailed instructions on these functions to enhance your cooking experience.

Cooking Guidelines and Time Tables

This section provides essential cooking guidelines and detailed time tables for various foods. It ensures optimal results by guiding users on pressure settings and cooking durations for meats, grains, and vegetables.

6.1 Recommended Cooking Times for Common Foods

This section outlines the recommended cooking times for popular ingredients like meats, grains, and vegetables. It provides detailed guidelines to ensure perfectly cooked meals, with adjustments for pressure settings and specific food types. Users can refer to these tables to achieve consistent results, whether cooking beans, poultry, or seafood, tailored to their Fagor Pressure Cooker model.

6.2 Adjusting Pressure and Heat Settings

Adjusting pressure and heat settings on your Fagor Pressure Cooker ensures optimal cooking results. Use the control panel to select high or low pressure, and regulate heat for simmering or browning. Preheating is essential before setting pressure, and venting properly after cooking prevents overheating. Refer to the manual for specific guidelines tailored to your model and cooking needs.

Maintenance and Troubleshooting

Regularly clean the lid, gasket, and valve to ensure optimal performance. Check for blockages and replace worn parts. Refer to the manual for troubleshooting common issues like pressure buildup problems or sealing malfunctions.

7.1 Cleaning and Storage Tips

After each use, clean the Fagor Pressure Cooker thoroughly with mild detergent and warm water. Avoid abrasive cleaners to prevent scratching. Dry all parts, especially the gasket and valve, to prevent rust. Store the cooker in a dry place, with the lid slightly ajar to ensure airflow. Regular cleaning and proper storage maintain performance and longevity.

7.2 Common Issues and Solutions

Common issues with the Fagor Pressure Cooker include steam leaks, pressure regulator malfunctions, or clogged valves. For steam leaks, inspect and replace the gasket if damaged. For pressure issues, ensure the valve is clean and functioning. Regularly clean the steam release valve to prevent clogging. Refer to the manual for detailed troubleshooting steps or contact Fagor customer support for persistent problems;

Accessories and Optional Parts

The Fagor Pressure Cooker offers optional accessories like steam baskets, sealing rings, and replacement valves. These enhance functionality and extend the cooker’s versatility for various cooking techniques.

8.1 Available Accessories for Enhanced Cooking

The Fagor Pressure Cooker offers a range of accessories to enhance your cooking experience. These include steam baskets for healthy steaming, replacement gaskets for a tight seal, and additional valves for improved pressure control. Optional accessories like non-stick pans and stainless steel inserts provide versatility, while cleaning tools ensure easy maintenance. These parts are designed to maximize the cooker’s efficiency and adaptability for various recipes and cooking techniques.

8.2 Where to Purchase Genuine Parts

Genuine Fagor Pressure Cooker parts can be purchased directly from the Fagor website or through authorized retailers. Ensure authenticity by avoiding third-party sellers. Visit the official Fagor online store or check local appliance dealers for verified accessories. Always verify the seller’s authenticity to guarantee compatibility and quality of the parts for your specific Fagor model.

Warranty and Customer Support

Fagor offers a comprehensive warranty covering parts and labor for one year. For inquiries or assistance, contact their customer service team via phone, email, or the official website.

9.1 Warranty Terms and Conditions

Fagor Pressure Cooker warranty covers parts and labor for one year from purchase. It applies to defects in materials and workmanship under normal use. Registration required. Excludes misuse or modifications. For details, refer to the manual or contact customer support.

9.2 Contacting Fagor Customer Service

For assistance, contact Fagor Customer Service via phone, email, or through their official website. Support is available Monday to Friday, 9 AM to 5 PM EST. Visit the Fagor website for contact details and additional resources to resolve inquiries or concerns promptly.

Frequently Asked Questions

Discover answers to common questions about the Fagor Pressure Cooker, including operation, maintenance, and troubleshooting, to enhance your cooking experience and ensure optimal performance.

10.1 Common Queries About the Fagor Pressure Cooker

Users often inquire about the Fagor Pressure Cooker’s parts, troubleshooting, and optimal usage. Common questions include how to replace seals, resolve lid issues, and adjust pressure settings. Queries also cover specific models like the Duo and Rapida, their maintenance, and where to find genuine accessories or customer support for assistance.

10.2 Tips for Optimal Performance

For optimal performance, regularly clean the lid and seal to ensure proper pressure sealing. Check for blockages in the steam release valve and use the recommended liquid levels. Always adhere to the cooking time tables and guidelines provided in the manual. Experimenting with advanced functions like steaming and simmering can enhance your cooking experience; Proper maintenance ensures longevity and efficiency of your Fagor Pressure Cooker.

Advanced Cooking Techniques

Explore advanced methods like precise temperature control and layered cooking to enhance flavors. Utilize multiple functions for efficient meal preparation, ensuring creative and delicious results every time.

11.1 Maximizing the Potential of Your Pressure Cooker

To maximize your Fagor Pressure Cooker’s potential, experiment with diverse cooking modes andfunctions. Utilize the timer for precise control, and explore steaming and simmering options to prepare a variety of dishes efficiently. Always refer to the manual for guidance on advanced features to ensure optimal performance and versatility in your culinary creations.

11.2 Innovative Recipes and Ideas

Explore creative recipes tailored for the Fagor Pressure Cooker, from hearty stews to flavorful risottos. Try infusing global cuisines, like Indian curries or Mexican chili, for a twist. Experiment with vegetarian and vegan dishes, ensuring even cooking and locked-in flavors. The cooker’s versatility allows for meal prepping, desserts, and more, making it a must-have for culinary exploration and innovation in your kitchen.

Environmental and Energy Efficiency

The Fagor Pressure Cooker is designed with eco-friendly materials and energy-saving features, reducing cooking time and energy consumption while promoting sustainable cooking practices for a greener kitchen.

12.1 Eco-Friendly Aspects of the Fagor Pressure Cooker

The Fagor Pressure Cooker is crafted with eco-conscious materials, minimizing environmental impact. Its design reduces energy consumption by up to 70% compared to traditional methods, making it an energy-efficient choice for modern kitchens. Additionally, the durable construction ensures longevity, reducing the need for frequent replacements and thus lowering overall environmental footprint.

12.2 Energy-Saving Features

The Fagor Pressure Cooker incorporates energy-saving technologies to reduce power consumption. Its advanced pressure-regulating system minimizes heat loss, while automatic shut-off and smart sensors optimize energy use. These features ensure efficient cooking, lowering energy bills and promoting eco-friendly performance without compromising on functionality or results.

The Fagor Pressure Cooker offers efficient, diverse, and safe cooking solutions. Its energy-saving features and durability make it a valuable addition to any kitchen, encouraging creative and responsible cooking.

13.1 Summary of Key Points

The Fagor Pressure Cooker manual provides a detailed guide to safe and efficient cooking. It covers key features, safety precautions, operating steps, and maintenance tips. The cooker’s energy-efficient design and multiple safety devices ensure reliable performance. By following the manual, users can maximize their cooking experience, achieve optimal results, and extend the product’s durability for years of satisfying meals.

13.2 Encouragement for Safe and Creative Cooking

Embrace safe and creative cooking with your Fagor Pressure Cooker. Always follow safety guidelines to ensure a risk-free experience. Experiment with diverse recipes and cooking modes to unlock your culinary potential. Maintain your cooker regularly for optimal performance. With proper care and creativity, your Fagor Pressure Cooker will be your trusted companion in the kitchen for countless delicious meals.

weighted blanket weight guide kg

Weighted blankets are therapeutic tools designed to provide deep pressure stimulation, promoting relaxation and comfort. They typically contain weighted materials like polypropylene pellets or glass beads, offering a calming sensory experience. These blankets have gained popularity for their potential to reduce stress, improve sleep quality, and offer a sense of security; They are often recommended for individuals seeking non-invasive, comforting solutions for anxiety or insomnia. The weighted blanket weight guide in kg helps users choose the ideal size based on their body weight, ensuring optimal comfort and benefits.

1.1 What Are Weighted Blankets?

Weighted blankets are specially designed blankets filled with weighted materials, such as plastic pellets or glass beads, sewn into compartments. They are engineered to provide deep touch pressure (DTP), a therapeutic technique that mimics the comforting sensation of being hugged. The added weight distributes pressure evenly across the body, promoting relaxation and reducing stress. These blankets typically range in weight from 2 kg to 13 kg, with the ideal weight often recommended as 10% of the user’s body weight. They are used for their calming effects and are popular among those seeking improved sleep and anxiety relief.

1.2 Benefits of Using a Weighted Blanket

Weighted blankets offer numerous benefits, primarily through the application of deep touch pressure, which can reduce stress and anxiety. They promote relaxation, improve sleep quality, and provide a calming, grounding sensation. Many users report feeling more secure and comforted, which can be particularly beneficial for those with sensory processing disorders or insomnia. The added weight stimulates serotonin production, aiding in mood improvement and emotional well-being. These blankets are also non-invasive and easy to use, making them a popular choice for individuals seeking natural stress relief and enhanced sleep without medication or therapy.

General Guidelines for Choosing the Right Weight

Choosing the right weight involves the 10% body weight rule and considering personal comfort, health conditions, and sleeping preferences for optimal comfort and benefits.

2.1 The 10% Body Weight Rule

The 10% body weight rule is a common guideline for selecting a weighted blanket, suggesting the blanket should weigh approximately 10% of the user’s body weight. For example, a 70kg person might choose a 7kg blanket. This rule aims to provide enough pressure for comfort without feeling overwhelming. However, individual preferences vary, and some users may find lighter or heavier options more suitable. It’s important to balance this guideline with personal comfort and consult recommendations to ensure the best experience.

2.2 Factors to Consider Beyond Body Weight

Beyond body weight, personal preference plays a significant role in choosing the right weighted blanket. Some users prefer a lighter blanket for ease of movement, while others find deeper pressure comforting. Weight distribution is also crucial; even weight across the body ensures comfort. Material type, such as polyester or cotton, can affect breathability and comfort. Additionally, health conditions like arthritis or claustrophobia may influence the ideal weight. Consulting a weighted blanket guide or expert can help tailor the choice to individual needs, ensuring safety and comfort.

Weight Recommendations by Age and Body Weight

Weighted blankets are tailored to age and body weight, ensuring safety and comfort. Children and adults have specific guidelines to match their needs effectively.

3.1 Children’s Weighted Blankets

Children’s weighted blankets are designed to provide comfort and relaxation for kids. The recommended weight is typically 10% of the child’s body weight, ensuring safety and effectiveness. For example, a child weighing 25kg should use a 2.5kg blanket, while a 35kg child may opt for a 3.5kg blanket. Ages 3-6 years often use 2.2kg blankets, and 6-12 years may prefer 4.5kg. It’s essential to choose sizes that align with both age and weight for optimal comfort and therapeutic benefits, ensuring the blanket is not too heavy for the child’s frame.

3.2 Adult Weighted Blankets

Adult weighted blankets are tailored to provide comfort and relaxation for individuals of various sizes. The recommended weight is typically 10% of the user’s body weight, ensuring optimal pressure. For adults under 60kg, a 5kg blanket is often suitable, while those between 60-80kg may prefer a 7kg option. Heavier individuals, ranging from 80-100kg, can opt for a 9kg blanket, and those over 100kg may find an 11kg blanket comfortable. Proper fit is crucial to avoid discomfort, with materials like polypropylene pellets or glass beads offering even weight distribution for a restful experience.

Understanding the Science Behind Weighted Blankets

Weighted blankets utilize deep touch pressure (DTP), a therapeutic technique that mimics the calming effects of a gentle hug. DTP increases serotonin, a mood-regulating hormone, while promoting melatonin production for better sleep. This science-backed approach helps reduce anxiety, stress, and restlessness, offering a natural solution for relaxation and improved well-being.

4.1 Deep Touch Pressure (DTP) and Its Effects

Deep Touch Pressure (DTP) is a therapeutic method that applies gentle, distributed weight to the body. Weighted blankets use this principle to simulate the comforting sensation of a warm embrace. Research indicates that DTP can increase serotonin levels, promoting relaxation and reducing anxiety. It also enhances melatonin production, improving sleep quality. Additionally, DTP has been shown to lower cortisol levels, combating stress and fostering a calming environment. This scientific basis explains why weighted blankets are often recommended for individuals seeking natural relief from insomnia, restless nights, or chronic stress, providing both physical and emotional comfort through their carefully designed weight distribution systems.

Weighted Blanket Weight Chart

A weighted blanket weight chart guides users to select the ideal blanket weight based on their body weight. Typically, blankets range from 2 kg to 13 kg, with recommendations suggesting 10% of the user’s weight for optimal comfort and therapeutic benefits. Charts often categorize users by weight ranges, ensuring the blanket provides the right amount of pressure without feeling overwhelming. This tool helps users make informed decisions to maximize the blanket’s effectiveness and comfort.

5.1 Body Weight vs. Blanket Weight Recommendations

The ideal weighted blanket weight is typically 10% of the user’s body weight, ensuring comfort and therapeutic benefits. For example, a 36-45 kg individual may opt for a 4.5 kg blanket, while a 60-75 kg person might prefer a 6.8 kg blanket. Charts often categorize users into ranges, such as 25-35 kg for 3.2 kg blankets or 50-75 kg for 6.8 kg options. These recommendations balance pressure and relaxation, avoiding overwhelming heaviness. Always choose a weight that aligns with your body weight for the best experience.

Special Considerations for Overweight Users

For overweight users, weight distribution is crucial to ensure comfort and effectiveness. Heavier individuals may benefit from slightly larger or evenly distributed weighted blankets to avoid discomfort.

6.1 How Weight Distribution Affects Comfort

Proper weight distribution in a weighted blanket is essential for comfort, especially for overweight users. Uneven distribution can lead to pressure points and discomfort. A well-designed blanket ensures the weight is evenly spread, providing consistent deep touch pressure. This enhances relaxation and prevents restricted movement. For heavier individuals, larger blankets with balanced weight distribution are recommended to avoid excessive pressure on specific areas. Proper distribution maximizes the therapeutic benefits of weighted blankets, ensuring a restful and comfortable experience for all users, regardless of body weight or size.

The Role of Weighted Blankets in Sleep Improvement

Weighted blankets can significantly enhance sleep quality by providing deep touch pressure, which increases serotonin levels and reduces anxiety, promoting a restful and rejuvenating sleep experience.

7.1 How Weight Affects Sleep Quality

The weight of a blanket plays a crucial role in sleep quality by applying deep touch pressure, which stimulates serotonin production, reducing anxiety and stress. A weighted blanket typically weighs between 2-13 kg, with the ideal weight being around 10% of the user’s body weight. This pressure helps create a calming effect, promoting deeper sleep cycles; However, excessive weight can cause discomfort, disrupting sleep. Proper weight distribution ensures even pressure, enhancing relaxation without restricting movement. Balancing the weight according to individual needs is key to improving sleep quality and overall restfulness.

Washing and Maintenance Tips for Weighted Blankets

Hand wash gently with mild detergent to preserve weights. Avoid machine washing to prevent damage. Use a soft brush for tough stains. Air dry to maintain structure. Check fabric care labels for specific instructions.

8.1 Care Instructions for Different Materials

Weighted blankets require specific care based on their materials. Cotton and polyester blankets can be machine washed on a gentle cycle, while minky or bamboo covers should be removed and hand-washed. Avoid harsh detergents or bleach, as they may damage the fabric or weights. For glass bead-filled blankets, gentle spotting is recommended to prevent weight displacement. Air drying is ideal to maintain structure and prevent shrinkage. Always check the manufacturer’s care label for specific instructions, as some materials may need special handling to ensure durability and comfort.

Weighted blankets offer a unique solution for relaxation and sleep improvement. By following the 10% body weight rule and considering personal comfort, you can find the perfect fit. Thanks for reading—hope this guide helps you cozy up for better rest!

9.1 Final Tips for Selecting the Perfect Weight

Choosing the right weighted blanket weight is personal. Start with the 10% rule: your blanket should be 10% of your body weight. For adults, 5–10 kg is common, while children may prefer 2–4 kg. Consider your body type, preferences, and how you sleep. If unsure, opt for a lighter blanket to begin with. Always check size charts and material options to ensure comfort. The goal is to feel calm and relaxed, so prioritize your needs and adjust as necessary for the best experience.

rise of kyoshi pdf

The Rise of Kyoshi is the first novel in the Chronicles of the Avatar series‚ exploring Kyoshi’s journey from humble beginnings to becoming the legendary Avatar․

1․1 Overview of the Book

The Rise of Kyoshi‚ written by F․C․ Yee and Michael Dante DiMartino‚ is a young adult novel that delves into the origin story of Avatar Kyoshi‚ one of the most enigmatic figures in the Avatar universe․ Set 400 years before Avatar: The Last Airbender‚ the book explores Kyoshi’s journey from a humble servant to the legendary Avatar‚ detailing her struggles with power‚ identity‚ and the weight of responsibility․ The novel also introduces key groups like the Kyoshi Warriors and the Dai Li‚ expanding the rich lore of the Avatar world․

1․2 The Avatar Universe and Its Significance

The Avatar universe‚ as depicted in Avatar: The Last Airbender‚ revolves around a world divided into four nations‚ where select individuals can “bend” elements․ The Avatar‚ a reincarnating figure‚ maintains balance and harmony․ The Rise of Kyoshi expands this universe‚ offering a deeper look into its history and cultural dynamics․ By exploring Kyoshi’s life‚ the novel highlights themes of power‚ identity‚ and leadership‚ enriching the lore and providing context for the events of the original series․ This adds layers to the beloved franchise’s legacy․

The Origin Story of Kyoshi

Kyoshi’s journey begins with her humble upbringing as an abandoned child and servant‚ detailing her rise to becoming the Avatar and her overcoming adversity․

2․1 Kyoshi’s Humble Beginnings

Kyoshi was born an abandoned child and grew up as a servant in Jianzhu’s household‚ facing hardship and anonymity․ Her early life was marked by struggle and obscurity‚ with no indication of her destined role as the Avatar․ Despite her challenging circumstances‚ Kyoshi’s resilience and determination laid the foundation for her extraordinary journey․ Her humble origins contrast sharply with her eventual rise to power‚ making her story one of profound transformation and self-discovery․

2․2 The Discovery of Kyoshi’s Identity as the Avatar

Kyoshi’s life changed drastically when a spirit identified her as the true Avatar during a perilous encounter orchestrated by Jianzhu․ Initially believed to be a servant‚ Kyoshi’s revelation shattered the notion that Yun‚ a charismatic Earthbender‚ was the Avatar․ This discovery thrust her into a world of chaos and responsibility‚ marking the beginning of her journey to master the four elements and accept her destiny․ The revelation sparked both wonder and conflict‚ setting the stage for her transformation into a legendary figure․

The Journey of Self-Discovery and Mastery

Kyoshi’s journey is marked by intense training‚ self-doubt‚ and growth as she embraces her role as the Avatar‚ learning to harmonize her identity with immense power and responsibility․

3․1 Kyoshi’s Training and Challenges

Kyoshi’s training as the Avatar is fraught with difficulty‚ as she navigates mastering the four elements while grappling with her newfound identity․ Her journey is marked by intense physical and emotional struggles‚ as she learns to balance her humble origins with the weight of her responsibilities․ Under the guidance of her mentors‚ Kyoshi faces numerous trials that test her resolve‚ forcing her to confront her fears and doubts․ The process is as much about self-discovery as it is about mastering bending‚ shaping her into a powerful yet compassionate leader․

3․2 The Role of Mentors in Kyoshi’s Development

Mentors play a pivotal role in shaping Kyoshi’s journey‚ providing guidance and wisdom․ Jianzhu‚ initially believing Yun to be the Avatar‚ later becomes a key figure in Kyoshi’s development‚ offering both support and challenge․ Yun‚ a charismatic Earthbender‚ serves as both a friend and a moral compass‚ despite his own personal struggles․ Together‚ they teach Kyoshi the ways of the world‚ bending‚ and leadership‚ helping her navigate the complexities of her newfound identity and the burdens of being the Avatar․

The Supporting Characters and Their Impact

Supporting characters like Jianzhu and Yun significantly influence Kyoshi’s journey‚ shaping her identity and understanding of the world‚ while also reflecting the broader cultural dynamics․

4․1 Jianzhu and His Influence on Kyoshi

Jianzhu‚ a charismatic Earthbender‚ plays a pivotal role in Kyoshi’s life․ As her master‚ he initially believes himself to be the Avatar‚ influencing Kyoshi’s early understanding of her identity․ His actions‚ driven by ambition and belief in his own destiny‚ inadvertently propel Kyoshi into a world of chaos․ Jianzhu’s complex character and shifting dynamics with Kyoshi shape her journey‚ forcing her to confront themes of power and betrayal․ His influence remains a cornerstone of her development as she navigates her path to becoming the Avatar․

4․2 Yun and His Role in Kyoshi’s Journey

Yun‚ initially believed to be the Avatar‚ holds significant importance in Kyoshi’s story․ His charming and confident demeanor contrasts with Kyoshi’s humility‚ creating a dynamic that challenges her self-perception․ Yun’s eventual fall from grace serves as a cautionary tale for Kyoshi‚ highlighting the dangers of power and deception․ Their relationship‚ marked by both camaraderie and conflict‚ profoundly impacts Kyoshi’s understanding of leadership and responsibility‚ shaping her approach to mastering the Avatar’s role․

The Formation of the Kyoshi Warriors and Dai Li

Kyoshi founded the Kyoshi Warriors as her elite guard‚ symbolizing her power and legacy‚ while the Dai Li evolved into a force tied to her complex history․

5․1 The Creation and Purpose of the Kyoshi Warriors

The Kyoshi Warriors were an elite group of fighters handpicked by Kyoshi to serve as her personal guard and enforcers of justice․ Formed during her rise to power‚ they symbolized her strength and authority․ Their primary purpose was to protect the vulnerable and maintain balance in the world․ This formidable team became a symbol of inspiration‚ showcasing Kyoshi’s leadership and strategic brilliance․ Their creation marked a turning point in her journey‚ solidifying her legacy as a formidable Avatar․

5․2 The Dai Li and Their Eventual Impact on the Earth Kingdom

The Dai Li‚ initially formed as a security force by Kyoshi‚ evolved into a powerful and secretive organization within the Earth Kingdom․ Over time‚ their influence grew‚ leading to internal corruption and authoritarian control․ Despite their original purpose to maintain order‚ the Dai Li’s actions eventually undermined the Earth Kingdom’s stability and contributed to its political turmoil․ Their legacy became a cautionary tale of how even well-intentioned institutions can descend into oppression․

Themes Explored in the Novel

The Rise of Kyoshi delves into themes of power‚ corruption‚ and identity‚ exploring how individuals wield influence and grapple with moral dilemmas in shaping their world․

6․1 The Nature of Power and Corruption

The Rise of Kyoshi examines the dual nature of power‚ portraying it as both a tool for good and a corrupting force․ Kyoshi’s journey reveals how authority can shape individuals‚ often leading to moral ambiguity and the exploitation of power for personal gain․ The novel highlights the dangers of unchecked power through characters like Jianzhu‚ who misuse their influence‚ and contrasts this with Kyoshi’s struggle to wield her abilities responsibly․ This theme underscores the challenges of balancing strength with compassion in a world prone to corruption․

6․2 Leadership and the Weight of Responsibility

The Rise of Kyoshi delves into the burdens of leadership‚ showcasing Kyoshi’s struggle to balance her identity with the expectations of being the Avatar․ The novel highlights the isolation that comes with immense responsibility‚ as Kyoshi faces difficult decisions that impact entire nations․ Her journey underscores the importance of self-determination and the lessons she learns from her mentors about wielding power compassionately․ The story emphasizes how leadership requires sacrifice and the courage to forge one’s own path‚ even in the face of overwhelming pressure․

Historical Context and World-Building

The Rise of Kyoshi is set 400 years before the events of Avatar: The Last Airbender‚ offering a rich exploration of the Avatar world’s history and cultures․

7․1 The Setting: 400 Years Before “Avatar: The Last Airbender”

The Rise of Kyoshi unfolds in a world 400 years before the events of Avatar: The Last Airbender‚ offering a detailed glimpse into the Avatar universe’s early history․ The story is set in a time of cultural and political upheaval‚ with the Earth Kingdom’s rise to prominence and the evolving dynamics between the four nations; This era also explores the Spirit World’s influence and the origins of iconic groups like the Dai Li‚ providing a foundational understanding of the Avatar world’s development․

7․2 Cultural and Political Dynamics of the Time

The Rise of Kyoshi delves into the cultural and political complexities of the Avatar world 400 years before Aang’s time․ The Earth Kingdom’s dominance is evident‚ with its rigid social hierarchies and emerging factions like the Dai Li․ The novel highlights the strained relationships between the four nations‚ as well as the evolving role of the Avatar in maintaining global harmony․ Additionally‚ the Spirit World’s influence on human affairs is explored‚ showcasing a time when spiritual and political realms were deeply intertwined․

Reception and Impact of the Novel

The Rise of Kyoshi received widespread acclaim‚ praised for its deep character development and fresh insights into the Avatar universe‚ solidifying its place as a beloved addition to the series․

8․1 Fan Response and Critical Reviews

Fans and critics alike praised The Rise of Kyoshi for its compelling narrative and deep character development․ The novel was celebrated for its fresh perspective on the Avatar universe‚ offering new insights into Kyoshi’s legendary journey․ Reviewers highlighted the book’s ability to balance action with emotional depth‚ making it a standout addition to the series․ The prose format allowed for a richer exploration of themes‚ resonating with both long-time fans and new readers‚ further cementing its place in the Avatar canon․

8․2 The Novel’s Contribution to the Avatar Canon

The Rise of Kyoshi enriches the Avatar universe by delving into the life of one of its most enigmatic figures․ The novel fills gaps in the timeline‚ offering a detailed account of Kyoshi’s journey and the origins of the Kyoshi Warriors and Dai Li․ It expands on the cultural and political landscape of the Earth Kingdom‚ providing depth to the world-building․ By exploring themes of power‚ corruption‚ and leadership‚ the book adds layers to the Avatar canon‚ making it a vital read for fans seeking a deeper understanding of the series’ history․

surah imran pdf

Surah Imran, the third chapter of the Quran, is a Medinan surah that explores themes of faith, divine guidance, and justice․ It emphasizes the importance of righteousness and serves as a source of spiritual enlightenment for believers, offering timeless wisdom and practical teachings for daily life․ The surah is deeply revered in Islamic tradition and is often studied for its profound insights into human nature and the path to moral excellence․

Overview of Surah Imran in the Quran

Surah Imran is the third chapter of the Holy Quran, comprising 200 verses․ It is a Medinan surah, revealed after the Prophet Muhammad’s migration to Medina, and is named after the family of Imran, which includes prominent figures like Maryam (Mary) and her son Isa (Jesus)․ The surah emphasizes the oneness of God, the importance of faith, and the balance between belief and righteous deeds․ It also addresses the People of the Book, calling them to adhere to the truth and avoid disputes․ The surah includes stories of previous prophets, such as Ibrahim (Abraham) and Ishaq (Isaac), to illustrate divine guidance and human responsibility․ It serves as a comprehensive guide for believers, blending theological insights with practical wisdom, making it a cornerstone of Islamic teachings and reflection․ Its verses offer clarity on moral and spiritual matters, reinforcing the Quran’s role as a divine revelation․

Significance of Surah Imran in Islamic Teachings

Surah Imran holds a prominent place in Islamic teachings, offering profound insights into faith, divine guidance, and moral responsibility․ It is one of the longest and most comprehensive surahs, addressing believers and non-believers alike, emphasizing the oneness of God and the balance between belief and righteous actions․ The surah is deeply rooted in Islamic theology, providing guidance on issues like justice, humility, and the avoidance of arrogance․ It also serves as a bridge between the Abrahamic religions, highlighting shared values and inviting reflection on divine revelation․ The surah’s emphasis on the family of Imran symbolizes the importance of righteous lineage and spiritual heritage․ Its teachings are often recited in prayers and studied for personal and communal growth, making it a cornerstone of Islamic spirituality and a source of inspiration for believers seeking moral and ethical clarity in their lives․

Key Themes and Verses in Surah Imran

Surah Imran addresses themes of faith, divine guidance, justice, and righteousness, with notable verses emphasizing the importance of belief, moral responsibility, and the balance between faith and action․

Surah Imran contains numerous verses that highlight essential Islamic teachings․ Verse 31, for instance, invites humanity to follow Allah’s path, emphasizing devotion and submission․ Verse 102 urges believers to be mindful of their actions, stressing accountability․ Verse 190 reflects on the signs of creation, encouraging contemplation of Allah’s wisdom․ These verses underscore themes of faith, morality, and divine guidance, providing followers with a moral compass and spiritual direction․ Their meanings remain timeless, offering insights into the balance between belief and practice, as well as the pursuit of righteousness in daily life․ These teachings are central to understanding Surah Imran’s significance in Islamic spirituality and practical living․

Thematic Analysis: Faith, Guidance, and Justice

Surah Imran delves deeply into the themes of faith, guidance, and justice, presenting them as interconnected pillars of a righteous life․ Faith is portrayed not merely as belief but as a commitment to righteous action, emphasizing trust in Allah’s plan․ Guidance is a recurring motif, with the surah offering clear directives on moral living and the path to spiritual enlightenment․ Justice is upheld as a divine imperative, encouraging fairness and equity in all dealings․ These themes are intertwined, illustrating how faith without guidance is incomplete and how justice is the practical manifestation of divine will․ The surah’s exploration of these concepts provides believers with a comprehensive framework for navigating life’s challenges while adhering to Islamic principles․ This thematic interplay underscores the surah’s relevance in guiding individuals toward a balanced and morally upright existence․

Benefits of Reciting Surah Imran

Reciting Surah Imran strengthens faith, enhances spiritual growth, and provides divine guidance․ It offers solace, wisdom, and practical insights for navigating life’s challenges with grace and clarity and brings inner peace․

Spiritual and Emotional Benefits for Believers

Reciting Surah Imran offers profound spiritual and emotional benefits, fostering a deep connection with faith and divine guidance․ It provides comfort and solace, helping believers navigate life’s challenges with resilience and hope․ The surah’s verses emphasize trust in Allah’s plan, reducing anxiety and fostering inner peace․ Its teachings inspire self-reflection, moral growth, and a stronger commitment to righteousness․ Many find emotional stability through its reminders of Allah’s mercy and justice, which strengthen one’s spiritual foundation․ Regular recitation can enhance emotional well-being, offering a sense of security and purpose․ It also cultivates gratitude and contentment, essential for a balanced and fulfilling life․ Overall, Surah Imran is a powerful tool for spiritual nourishment and emotional healing, guiding believers toward a harmonious and faith-centered existence․

Practical Guidance for Daily Life

Surah Imran offers practical wisdom that guides believers in their daily lives, addressing decision-making, morality, and personal growth․ Verses like 3:159 emphasize compassion and justice in leadership, while 3:190-191 encourage reflection and gratitude, fostering a mindful approach to life․ The surah also provides guidance on seeking divine help in times of need, as in 3:192-194, which inspires trust in Allah’s plan․ It teaches believers to prioritize righteousness over worldly gains, promoting integrity in all actions․ The surah’s teachings on patience and perseverance (3:200) help individuals navigate challenges with resilience․ Additionally, it emphasizes the importance of self-accountability and striving for excellence, making it a valuable resource for ethical decision-making and personal development․ By applying these principles, believers can lead balanced, purposeful lives that align with Islamic values and promote harmony in their communities․

Downloading and Studying Surah Imran PDF

Surah Imran PDFs are readily available on trusted Islamic websites, offering easy access to the text, translation, and commentary․ Downloading and studying the PDF allows believers to delve into its teachings anytime, anywhere, fostering deeper understanding and reflection․

How to Find Reliable Sources for Surah Imran PDF

To find reliable sources for Surah Imran PDF, visit trusted Islamic websites or official portals that specialize in Quranic resources․ Look for websites with a strong reputation, such as those affiliated with recognized Islamic institutions or scholars․ Ensure the PDF includes accurate Arabic text, reliable translations, and insightful commentary․ Platforms like Google Scholar or archive․org may also host verified versions․ Additionally, apps like Quran․com or Muslim Pro provide downloadable PDFs with verified content․ Always check for updates and ensure the source is credible to avoid misinformation․ By using these methods, believers can access high-quality materials for deeper study and reflection․

Using Surah Imran PDF for Reflection and Learning

Surah Imran PDF serves as a valuable resource for both reflection and learning․ Dedicate time to read and ponder over its verses, focusing on themes like faith, guidance, and justice․ Use the PDF to highlight key verses, jot down reflections, and explore deeper meanings․ Recite the surah regularly, especially in times of need, to seek comfort and divine wisdom․ The PDF format allows for easy portability, enabling believers to study the surah anytime, anywhere․ Additionally, share the PDF with others to foster discussions and collective learning․ By incorporating Surah Imran into daily routines, individuals can strengthen their spiritual connection and apply its timeless teachings to modern life, fostering personal growth and a deeper understanding of Islamic values․

Surah Imran holds profound significance in modern contexts, offering timeless wisdom for spiritual growth and ethical living․ Its teachings remain a powerful guide, inspiring believers to embrace faith and justice while fostering a deeper connection with divine truth․ Exploring Surah Imran through PDF resources provides an accessible way to reflect on its verses, making it a valuable tool for personal and communal enrichment․

Importance of Surah Imran in Modern Contexts

Surah Imran remains highly relevant in modern times, offering guidance on faith, justice, and moral integrity․ Its teachings emphasize the importance of adhering to divine principles in a rapidly changing world․ The surah’s focus on righteousness, compassion, and fairness resonates deeply in addressing contemporary issues such as social inequality and ethical decision-making․ It also serves as a powerful tool for interfaith dialogue, promoting mutual understanding and respect․ For believers, Surah Imran provides a framework for navigating life’s challenges with resilience and faith․ Its universal message continues to inspire personal and societal transformation, making it a timeless source of wisdom for modern audiences seeking spiritual and moral guidance․ Studying Surah Imran through accessible formats like PDFs ensures its teachings remain relevant and accessible to new generations․

Encouragement to Explore Further

Exploring Surah Imran further is a deeply rewarding experience that offers profound insights into faith, guidance, and justice․ By delving into its verses, believers can gain a deeper understanding of Islamic teachings and their application in modern life․ Utilizing resources like Surah Imran PDFs provides an accessible way to study the surah, reflecting on its timeless wisdom․ Encouraging others to engage with Surah Imran fosters a sense of community and shared spiritual growth․ Whether through personal reflection or group discussions, exploring this surah can enrich one’s connection to their faith and inspire positive change․ Embrace the opportunity to immerse yourself in its teachings and discover the transformative power of Surah Imran in your life and the lives of others․ Let this surah be a constant source of inspiration and guidance on your spiritual journey․

wedding planner download pdf

A wedding planner PDF is an essential tool for organizing and streamlining the planning process. It offers checklists, timelines, and budget tools to ensure a stress-free experience.

1.1 What is a Wedding Planner PDF?

A wedding planner PDF is a downloadable resource designed to help couples organize their wedding planning process. It typically includes checklists, timelines, budget templates, and vendor management tools. These PDFs are customizable, allowing users to tailor the content to their specific needs. They often feature printable pages that can be compiled into a physical binder or used digitally. The goal of a wedding planner PDF is to simplify planning by providing a structured framework for tracking progress, managing tasks, and ensuring no detail is overlooked. It serves as a comprehensive guide, helping couples stay organized and focused throughout the planning journey.

1.2 Benefits of Using a Wedding Planner PDF

Using a wedding planner PDF offers numerous benefits, including enhanced organization, reduced stress, and a structured approach to planning. These downloadable resources provide customizable templates, checklists, and timelines, ensuring no detail is overlooked. They help couples stay on track with deadlines, manage budgets effectively, and communicate clearly with vendors. The ability to print or use digitally makes them versatile for any planning style. By centralizing all wedding-related information, a planner PDF fosters clarity and efficiency, allowing couples to focus on enjoying their engagement while creating a memorable wedding experience. It’s a practical tool that simplifies the complex process of wedding planning.

Budget Planning Tools

Budget planning tools in wedding planner PDFs include detailed spreadsheets and expense tracking worksheets. These resources help couples organize finances, monitor spending, and ensure cost control effectively.

2.1 Wedding Budget spreadsheets

2.1 Wedding Budget Spreadsheets

Wedding budget spreadsheets are comprehensive financial planning tools within wedding planner PDFs. They provide structured templates to allocate and track expenses across various categories, such as venue, catering, attire, and decor. These spreadsheets allow couples to set budget goals, monitor spending, and identify cost-saving opportunities. Many templates include formulas for automatic calculations, making it easier to manage finances. They often cover pre-set categories and offer customization options to suit individual needs. By using these tools, couples can maintain financial control and ensure their wedding stays within budget. These spreadsheets are essential for transparent and organized financial planning, helping to reduce stress and simplify decision-making.

2.2 Expense Tracking Worksheets

Expense tracking worksheets are vital components of wedding planner PDFs, designed to monitor and record every payment related to the wedding. These detailed templates allow couples to categorize expenditures, ensuring no costs are overlooked. By logging each transaction, couples can maintain a clear overview of their spending, helping to prevent overspending. Many worksheets include columns for budgeted amounts, actual costs, and differences, providing insights into financial deviations. This tool promotes transparency and accountability, making it easier to adjust spending as needed. Customizable to fit individual needs, expense tracking worksheets are indispensable for maintaining financial control and ensuring the wedding stays on budget.

Wedding Checklists

Wedding checklists are comprehensive tools for organizing tasks and timelines, ensuring no detail is overlooked. They help prioritize and track progress, from vendor contacts to decoration setups.

3.1 Pre-Wedding Task Checklists

Pre-wedding task checklists are detailed guides that outline essential tasks from engagement to the wedding day. These lists often include booking vendors, finalizing the guest list, and confirming timelines. They help couples stay organized and ensure every detail is addressed. By breaking down tasks into manageable steps, checklists reduce stress and prevent oversights. Many wedding planner PDFs offer customizable checklists that can be tailored to specific needs, ensuring a smooth planning process. These tools are invaluable for couples aiming to stay on track and enjoy a seamless journey to their special day.

3.2 Vendor and Supplier Checklists

Vendor and supplier checklists are crucial for managing relationships with wedding vendors, ensuring all services are confirmed and delivered. These checklists typically include contact information, contract details, and deadlines for payments or decisions. They help track progress, confirm deliveries, and ensure vendors understand their roles. By organizing vendor information in one place, couples can avoid miscommunications and last-minute issues. Many wedding planner PDFs offer customizable vendor checklists, allowing couples to tailor them to their specific needs. These tools are essential for maintaining clear communication and ensuring every aspect of the wedding is seamlessly executed by vendors and suppliers.

Timelines and Schedules

Timelines and schedules are vital for a smooth wedding planning process. Wedding planner PDFs offer customizable templates to track progress, set deadlines, and organize tasks efficiently.

4.1 Wedding Planning Timeline Templates

Wedding planning timeline templates are indispensable for couples aiming to stay organized. These templates break down the planning process into manageable parts, from initial decisions to the wedding day. They often include key milestones, such as booking vendors, finalizing the guest list, and scheduling dress fittings. Many wedding planner PDFs offer customizable timelines, allowing couples to tailor the schedule to their specific needs. By using these templates, couples can ensure no detail is overlooked and deadlines are met. They also provide a clear visual overview of the planning journey, helping to reduce stress and keep everything on track.

4.2 Wedding Day Schedule Examples

Wedding day schedule examples provide a detailed outline of the timeline for the big day. These templates typically include sections for preparation, ceremony, cocktail hour, reception, and closing events. They often feature customizable fields to input specific times, locations, and activities. Examples may include setup times, vendor arrivals, photo sessions, and speeches. These schedules help ensure a smooth flow, keeping everyone involved on the same page. Couples can download and print these PDF templates, tailoring them to fit their unique plans. Having a clear visual guide reduces chaos and allows the wedding party to focus on enjoying the celebration.

Vendor Management

Vendor management tools in wedding planner PDFs include checklists and contact lists to organize vendor details. Contract templates ensure smooth communication and accountability effectively.

5.1 Vendor Contact Lists

Vendor contact lists are essential for organizing vendor details. These lists typically include names, roles, phone numbers, emails, and contract information. They help ensure seamless communication and accountability, preventing misunderstandings. By keeping all vendor contacts in one place, couples can quickly access the information they need. This tool is particularly useful during the final stages of planning when coordination is critical. Many wedding planner PDFs offer customizable templates for vendor contact lists, allowing couples to tailor the information to their specific needs. Properly managing vendor contacts ensures that every aspect of the wedding, from catering to decorations, is executed without issues.

5.2 Vendor Contract Templates

Vendor contract templates are crucial for ensuring clarity and accountability with wedding vendors. These templates outline the scope of work, payment terms, delivery dates, and cancellation policies. By using customizable PDF templates, couples can create legally binding agreements tailored to their specific needs. Proper contracts protect both parties and reduce the risk of misunderstandings. Many wedding planner PDFs include sample vendor contracts that can be downloaded and edited. These templates cover various services, such as catering, photography, and decorations. Having organized contracts ensures that all vendors understand their responsibilities, helping the wedding run smoothly. This tool is indispensable for maintaining professional relationships and avoiding last-minute disputes.

Guest Management

Guest management tools help organize attendee details, RSVP tracking, and dietary preferences. Printable templates ensure efficient communication and coordination for seamless event planning and execution.

6.1 Guest List Templates

Guest list templates are indispensable for managing attendees efficiently. These templates allow couples to track RSVPs, contact details, and dietary preferences in an organized manner. Available as downloadable PDFs, they often include columns for names, relationships, and special requests. Customizable to fit various wedding sizes, they ensure no guest is overlooked. By using these templates, couples can easily sort and filter information, making communication with vendors and planners seamless. They also help in creating accurate seating charts and send-out lists. Printable and editable, these tools simplify the process of keeping track of guests, ensuring a well-coordinated and stress-free event planning experience.

6.2 Seating Chart Worksheets

Seating chart worksheets are vital tools for organizing your wedding reception layout. These templates help couples assign seats, manage table arrangements, and ensure a smooth guest experience. Available as downloadable PDFs, they often include grids or diagrams to visualize table setups. Couples can label tables, list attendees, and note special requests, such as dietary restrictions or preferences. These worksheets also help identify empty seats and prevent overlaps. By planning ahead, couples can minimize last-minute chaos and ensure all guests are accommodated comfortably. Printable and customizable, seating chart worksheets are essential for creating a well-organized and enjoyable wedding reception. They simplify the logistics of seating, making the event more efficient and stress-free.

Wedding Day Essentials

Wedding day essentials include checklists for must-have items and layout diagrams for ceremonies and receptions. These tools ensure everything is in place for a flawless celebration.

7.1 Bridal Emergency Kit Checklist

A bridal emergency kit checklist ensures every unforeseen situation is covered. Common items include safety pins, tissues, mints, bobby pins, and pain relievers. Many kits also list needle and thread, deodorant, and breath mints.

Having a mini sewing kit and shoe repair items can save the day. Makeup essentials like lipstick and blotting papers are also crucial. Hydration and snacks are often included to keep energy levels up.

A well-prepared checklist helps the bride feel secure and ready for any last-minute issue, ensuring the wedding day remains stress-free and joyful.

7.2 Wedding Ceremony and Reception Layouts

Wedding ceremony and reception layouts are crucial for creating a visually appealing and functional event space. These layouts typically include detailed diagrams for seating arrangements, aisle placement, and altar positioning.

They also outline guest flow from the ceremony to the reception, ensuring a smooth transition. Many PDF planners offer customizable templates to suit various venues and themes.

From round table setups to theater-style seating, these layouts help visualize the space and make decisions easier. They often include notes for decor placement and key positions like the DJ or photo booth.

Downloading these layouts allows couples to share their vision clearly with vendors and the wedding party, ensuring everything aligns with their dream wedding.