mens chain size guide

Choosing the right men’s chain involves balancing style, comfort, and durability. This guide helps you select the perfect chain by considering neck size, pendant weight, and personal preferences.

1.1 Understanding the Importance of Proper Chain Sizing

Proper chain sizing is crucial for both style and comfort. A well-fitted chain enhances your appearance while ensuring long-lasting durability. Incorrect sizing can lead to discomfort or even damage to the chain. Understanding the right measurements ensures a balanced look, making it essential for achieving a polished and confident style.

1.2 Brief Overview of Chain Styles and Materials

Men’s chains come in various styles like Figaro, Cable, Rope, and Curb, each offering unique aesthetics. Materials range from gold, silver, and stainless steel to titanium, differing in durability and cost. Understanding these options helps in selecting a chain that aligns with personal taste and lifestyle, ensuring a perfect blend of style and practicality for everyday wear or special occasions.

Determining the Right Chain Size

Accurate measurement of neck size, considering pendant weight, and personal style are key to selecting the right chain size for comfort and aesthetic appeal.

2.1 Measuring Your Neck Size

To accurately measure your neck size, wrap a flexible ruler or string snugly around the base of your neck. Ensure the tape is level and not too tight. Note the measurement in inches or centimeters. For a comfortable fit, add 0.5 to 1 inch to your neck size. This ensures the chain sits well without feeling restrictive. Use this measurement as a base for selecting your chain length.

2.2 Considering Pendant Weight and Size

The weight and size of a pendant significantly impact chain selection. Heavier pendants require thicker, sturdier chains for durability. Delicate chains suit lightweight pendants, ensuring a balanced look. The pendant size should complement the chain thickness to avoid overwhelming the design. Always choose a chain robust enough to support the pendant, ensuring comfort and preventing damage. Proper pairing enhances both functionality and aesthetic appeal.

2.3 Personal Style and Comfort Preferences

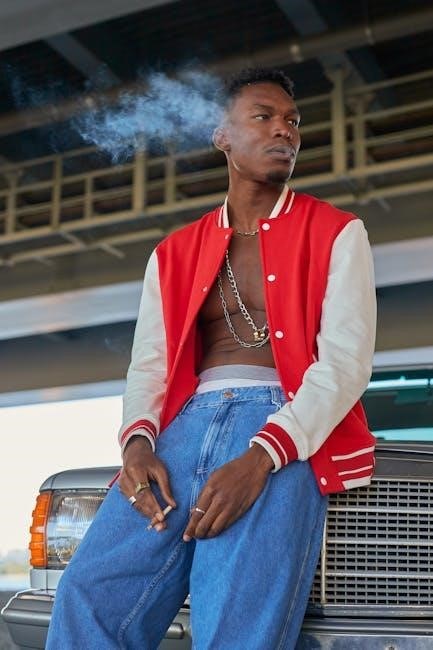
Personal style and comfort are crucial when selecting a chain. Consider your face shape, outfit, and occasion to ensure the chain complements your look. Thicker chains suit bold styles, while thinner chains are ideal for minimalism. Comfort-wise, choose a length that sits comfortably on your neck without feeling restrictive. Balancing style with comfort ensures the chain enhances your appearance and remains wearable all day.

Chain Thickness and Weight

Chain thickness and weight significantly impact durability and comfort, ensuring a sturdy yet wearable accessory that enhances your style and provides lasting satisfaction.

3.1 Common Chain Thickness Measurements

Men’s chains typically range in thickness from 0.5mm to 10mm. Popular options include 2mm, 4mm, and 6mm, with thinner chains suitable for delicate pendants and thicker ones for bold statements. The thickness directly impacts durability and style, ensuring a balance between comfort and visual appeal. Choosing the right measurement depends on personal preference, pendant size, and desired aesthetic, making it a crucial factor in selecting the perfect chain.

3.2 How Chain Weight Affects Durability and Comfort

Chain weight plays a key role in both durability and comfort. Heavier chains are more durable but may feel cumbersome, while lighter chains are comfortable but less robust. The right weight ensures strength without sacrificing wearability, making it essential to balance these factors based on lifestyle and preferences for optimal comfort and longevity.

Popular Chain Styles for Men

Popular men’s chain styles include Figaro, Cable, and Rope chains. Each offers unique textures and durability, catering to different tastes and preferences for a polished look.

4.1 Figaro Chains

Figaro chains are a classic choice, known for their stylish and sophisticated design. Originating in Italy, they feature a distinctive pattern of flat, interlocking links. Durable and versatile, they pair well with pendants or stand alone. Their sleek appearance makes them suitable for both casual and formal occasions, appealing to men who prefer a refined yet understated look. Proper care ensures they retain their luster and remain a timeless accessory.

4.2 Cable Chains

Cable chains are a popular choice for their sturdy, rope-like design, offering both durability and versatility. Their interlocking links provide strength while maintaining a sleek appearance. Ideal for everyday wear, cable chains can support pendants without bending or twisting. Their timeless appeal lies in their simplicity and robust construction, making them a favorite for men seeking a practical yet stylish accessory that complements various outfits and preferences.

4.3 Rope Chains

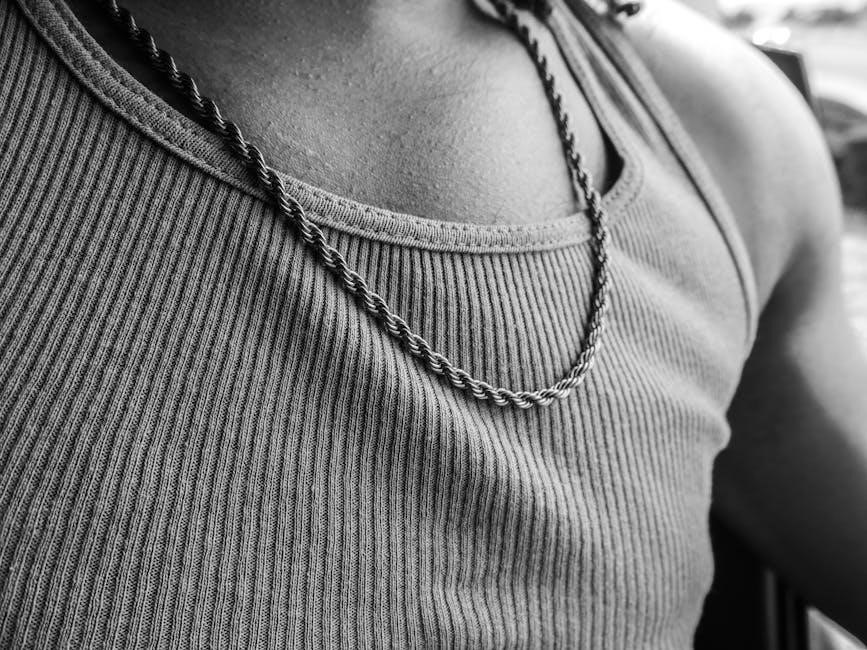
Rope chains are known for their distinctive woven or braided design, offering a textured, masculine look. Their intertwined strands create a strong and durable chain, ideal for supporting heavier pendants. Available in various thicknesses, rope chains strike a balance between style and functionality, making them a versatile choice for both casual and formal wear. Their unique aesthetic and robust construction make them a popular option for men seeking a statement piece that withstands everyday use.

How to Measure for a Chain

Measuring for a chain involves determining your neck size and desired fit. Use a string or ruler to ensure accuracy and comfort when selecting your chain length.

5.1 Using a String or Flexible Ruler

To measure your neck for a chain, wrap a string or flexible ruler around your neck comfortably. Mark where the string overlaps, then measure the length with a ruler. Ensure the fit isn’t too tight or loose for comfort. This method provides an accurate chain length, allowing for a little extra room if you plan to add a pendant. Regularly checking ensures the best fit for your style and comfort preferences.

5.2 Ensuring a Comfortable Fit

A comfortable fit is essential for everyday wear. Ensure the chain isn’t too tight or restrictive. Test the chain by wearing it for a short period to confirm it doesn’t cause discomfort. Thicker chains may feel heavier but are more durable. Aim for a balance between style and comfort, leaving enough room for the chain to move slightly. Proper fit enhances both appearance and wearability, making your chain a pleasure to wear.

Chain Care and Maintenance

Proper care ensures your chain’s longevity. Regular polishing prevents tarnish, while avoiding harsh chemicals maintains its integrity. Store it separately to prevent tangling and damage.

6.1 Cleaning Your Chain

Regular cleaning keeps your chain looking its best. Use a soft cloth to wipe down the chain daily. For deeper cleaning, mix mild soap with warm water, then gently scrub with a soft-bristled toothbrush. Rinse thoroughly and dry to prevent water spots. Avoid harsh chemicals like bleach or ammonia, as they can damage certain metals. For stubborn stains, a baking soda and water paste can be effective. Always dry your chain completely after cleaning to maintain its shine and integrity.

6.2 Storing Your Chain Properly

Proper storage is essential to maintain your chain’s condition. Store it in a cool, dry place, away from direct sunlight to prevent discoloration. Use a jewelry box or pouch with separate compartments to avoid tangling. Lay chains flat or hang them to prevent stretching. Avoid storing in humid environments, like bathrooms, as moisture can cause damage. Regularly inspect stored chains for signs of wear or corrosion. Proper storage ensures your chain remains pristine and ready to wear.

Popular Brands for Men’s Chains

Reputable brands like Tiffany & Co., David Yurman, and Cartier offer high-quality men’s chains. These brands are known for their exceptional craftsmanship and timeless designs, catering to various styles and preferences.

7.1 Reputable Jewelry Brands

Leading brands like Tiffany & Co., David Yurman, and Cartier are renowned for their exceptional craftsmanship. These brands offer premium men’s chains in various styles, ensuring durability and elegance. James Allen and Blue Nile also provide high-quality options, catering to diverse tastes. Their attention to detail and use of superior materials make them trusted choices for men seeking timeless accessories. These brands consistently deliver pieces that blend sophistication with everyday wearability.

Common Mistakes to Avoid

Common mistakes include guessing neck size and ignoring pendant weight. Proper fit ensures comfort and style. Avoid these errors for the perfect chain.

8.1 Guessing Your Size Instead of Measuring

Guessing your chain size can lead to an ill-fitting accessory, affecting both comfort and style. Proper measurement ensures the chain sits comfortably and looks proportionate. Avoid estimating to prevent a chain that’s too tight or too loose. Use a flexible ruler or string to measure your neck accurately for the best fit. This step is crucial for maximizing comfort and ensuring the chain complements your appearance effectively.

8.2 Ignoring Pendant Weight

Ignoring pendant weight can lead to a chain that appears disproportionate or may even break under the weight. Always consider the size and weight of the pendant when selecting a chain to ensure it can support the accessory securely.

Choose a chain thickness that complements the pendant while maintaining comfort. A well-balanced chain and pendant combination enhances both style and durability, ensuring a polished look. Proper consideration prevents potential damage and ensures a refined appearance.

Selecting the perfect men’s chain requires careful consideration of size, style, and personal preferences. By following this guide, you’ll find a chain that enhances your look and lasts.

9.1 Recap of Key Points

Proper chain sizing balances comfort and style, considering neck size, pendant weight, and personal preferences. Chain thickness affects durability, while style options like Figaro or cable chains offer versatility. Measuring accurately ensures the best fit, and maintaining your chain through cleaning and proper storage extends its lifespan. Prioritize quality materials for longevity and pair chains with pendants thoughtfully to avoid overwhelming the design. Always measure rather than guess to find the perfect chain.

9.2 Final Tips for Choosing the Perfect Chain

When selecting a chain, balance style, comfort, and durability. Consider your lifestyle and how often you’ll wear it. Measure accurately to avoid guessing, and choose a thickness that suits your build. Pair heavier pendants with sturdier chains, and opt for high-quality materials like gold or silver for longevity. Experiment with styles to match your wardrobe, and don’t forget to clean and store your chain properly to maintain its shine and integrity.

braun 9 series manual

Safety Precautions

Ensure the device is turned off before cleaning or maintaining. Avoid using damaged cords or chargers. Keep the shaver out of children’s reach. Use only Braun-approved parts.

  • Do not submerge the device in water for extended periods.
  • Avoid exposure to extreme temperatures or hot water.
  • Regularly inspect the cord for damage or wear.

1.1. General Safety Information

Safety First: Always read the manual thoroughly before using the Braun Series 9. Ensure the device is turned off and unplugged during maintenance. Avoid using damaged cords or chargers, as this could lead to electrical hazards. Keep the shaver out of reach of children and pets. Never use the device near water or in a bathtub unless specifically designed for such use. Avoid exposing the shaver to extreme temperatures or direct sunlight.

  • Use only Braun-approved accessories and parts to maintain safety and performance.
  • Regularly inspect the cord for signs of wear or damage.
  • Do not submerge the device in water for extended periods, even if it is waterproof.

1.2. Proper Handling and Usage Guidelines

Always use the Braun Series 9 shaver as intended. Avoid applying excessive force, as this can damage the blades or cause injury. Clean the shaver under running water, but ensure it is fully dried before storing. Regularly inspect and replace worn parts to maintain performance. Use only Braun-approved accessories to ensure safety and optimal functionality.

  • Store the device in a cool, dry place to prevent damage.
  • Avoid sharing the shaver to maintain hygiene and performance.
  • Refer to the manual for specific travel and storage instructions.

Key Features of the Braun Series 9

The Braun Series 9 offers advanced shaving technology with its unique Lift & Cut system and adjustable settings for personalized comfort and efficiency. Designed for a superior shaving experience.

2.1. Unique Lift & Cut System

The Braun Series 9 features the innovative Lift & Cut system, designed to capture and cut hairs more efficiently. This advanced technology ensures a closer shave by lifting hairs and cutting them at the base, reducing irritation. The system adapts to various skin types and hair lengths, providing a comfortable and precise shaving experience. It enhances performance, especially for tough stubble, ensuring smooth results.

2.2. Adjustable Settings for Personalized Shaving

The Braun Series 9 offers customizable shaving options with adjustable settings. Users can choose from multiple shaving modes to suit their preferences, ensuring a personalized experience. The device adapts to different beard types and skin sensitivities, providing optimal results. This feature enhances comfort and efficiency, making it ideal for various grooming needs while maintaining a high level of performance and user satisfaction.

How to Use the Braun Series 9

Charge the Braun Series 9 fully before first use. Shave on dry skin for optimal results. Clean under running water after each use for maintenance.

3.1. Step-by-Step Operating Instructions

Charge the Braun Series 9 fully before first use. Ensure the shaver is turned off. Hold it at a slight angle, gliding it in the direction of hair growth. Shave in smooth, even strokes. Clean under running water after use. Allow it to dry or store in the charging case. Regularly maintain the blades for optimal performance and longevity.

3.2. Shaving Techniques for Optimal Results

Shave in the direction of hair growth for a closer cut. Use light pressure and smooth strokes to avoid irritation. Clean the shaver under running water after use. The Lift & Cut system captures and cuts hairs efficiently. Adjust settings for sensitive areas or thicker hair. Regularly maintain the blades for consistent performance. These techniques ensure a comfortable and effective shaving experience with the Braun Series 9.

  • Shave in the direction of hair growth.
  • Use light pressure for comfort.
  • Clean under running water.

Maintenance and Cleaning

Regularly rinse the shaver under running water. Use the provided cleaning brush to remove hair clippings. Ensure all parts are dry before storing the device.

4.1. Cleaning Under Running Water

To clean the Braun Series 9 under running water, rinse the shaver head and inner components thoroughly. Use the provided cleaning brush to remove hair clippings. Avoid using harsh chemicals or abrasive materials. Ensure all parts are rinsed well and dried before reassembly. Regular cleaning helps maintain optimal performance and hygiene.

4.2. Replacing Parts and Accessories

Replace worn or damaged parts promptly to ensure optimal performance. Genuine Braun accessories are recommended for compatibility and safety. Refer to the user manual for guidelines on replacing shaver heads, foils, or chargers. Contact Braun customer support for assistance or to purchase authentic parts. Regular replacements maintain efficiency and extend the product’s lifespan.

Troubleshooting Common Issues

Address issues like charging problems or performance decline. Clean the shaver regularly and check for worn parts. Refer to the manual for detailed solutions and maintenance tips.

  • Restart the device or reset settings if issues persist.

5.1. Solving Charging and Battery Problems

Address charging issues by ensuring the cord is undamaged and properly connected. Avoid using damaged chargers or adapters. If the battery life declines, reset the device or charge it for 24 hours. Clean the charging contacts for better connectivity. If problems persist, consult the manual or contact Braun customer support for assistance.

  • Check for blockages in the charging port.
  • Use only Braun-approved chargers.
  • Avoid overcharging to maintain battery health.

5.2. Addressing Performance Decline

If your Braun Series 9 shaver’s performance declines, clean the blades under running water to remove hair clippings. Replace dull foils or blades with genuine Braun parts. Ensure the Lift & Cut system is functioning properly. Regular maintenance and proper storage can prevent performance issues. For persistent problems, refer to the manual or contact Braun support for further assistance.

  • Clean the shaver regularly to maintain efficiency.
  • Inspect and replace worn-out parts promptly.
  • Use only Braun-approved accessories for optimal results.

Accessories and Spare Parts

Explore compatible accessories like travel cases, cleaning brushes, and replacement blades. Purchase genuine Braun parts from authorized retailers to ensure optimal performance and longevity of your shaver.

6.1. Compatible Accessories for Enhanced Use

Enhance your Braun Series 9 experience with genuine accessories like travel cases, cleaning stations, and replacement blades. Travel cases protect your shaver on the go, while cleaning stations maintain hygiene. Replacement blades ensure consistent shaving performance. Always purchase from authorized retailers to guarantee authenticity and compatibility. These accessories are designed to optimize your shaving experience and extend the product’s lifespan. Refer to the manual for a full list of compatible options.

  • Travel cases for portability
  • Cleaning stations for maintenance
  • Replacement blades for optimal performance

6.2. Where to Purchase Genuine Parts

For authentic Braun Series 9 parts, visit the official Braun website or authorized retailers. These sources guarantee genuine products, ensuring safety and compatibility. Avoid third-party sellers to prevent counterfeit purchases. Contact Braun customer support for verified retailers or assistance in finding local distributors. Always verify the seller’s authenticity to maintain your product’s warranty and performance.

  • Official Braun website
  • Authorized Braun retailers
  • Braun customer support

Ensure all purchases are from trusted sources for optimal results and warranty validity.

Warranty and Service Information

Your Braun Series 9 shaver is backed by a comprehensive warranty. Register your product for extended coverage. Contact Braun customer support for service claims or queries.

  • Warranty coverage varies by region.
  • Service claims require proof of purchase.
  • Visit the official Braun website for details.

7.1. Understanding the Warranty Policy

The Braun Series 9 warranty ensures coverage for manufacturing defects. The standard warranty period is two years, extendable with registration. It covers repairs and replacements using genuine parts; Unauthorized modifications or non-Braun parts may void the warranty. Register your product online for extended benefits. Proof of purchase is required for warranty claims. Visit the Braun website for detailed terms and conditions.

7.2. Contacting Braun Customer Support

For assistance, visit the Braun website and navigate to the “Support” section. Contact options include live chat, email, and phone. Check the website for region-specific contact details. Representatives are available to help with inquiries, repairs, and warranty claims. Ensure to have your product serial number ready for faster service. Braun’s customer support team is committed to resolving issues promptly and efficiently. Visit www.braun;com for more information.

User Manual Specifics

The Braun Series 9 manual is available digitally, offering detailed guides for safe and effective use. Key sections cover safety, features, and troubleshooting for optimal performance.

8.1. Navigating the Digital Manual

The Braun Series 9 digital manual is easily accessible in PDF format, offering multilingual support. Users can navigate through sections via bookmarks and hyperlinks. Key features include a detailed table of contents, interactive indexes, and full-text search functionality. Compatible with all devices, the manual provides step-by-step guides and troubleshooting tips. Always refer to the official Braun website for the most updated version of the manual.

8.2. Key Sections Every User Should Read

Essential sections include safety precautions, operating instructions, and maintenance tips. Users should review the warranty information and troubleshooting guide for quick solutions. The accessories and replacement parts section ensures optimal performance. Reading these sections helps maximize the shaver’s lifespan and user satisfaction, providing clarity on proper usage and care. Always refer to these key areas for a seamless experience and to maintain the product’s functionality.

Battery and Charging Guidelines

Charge the shaver for 1 hour. Avoid overcharging. Clean terminals regularly for optimal charging. Store the battery away from extreme temperatures. Replace if capacity decreases significantly.

9.1. Charging Procedures and Safety Tips

Charge your Braun Series 9 shaver for approximately one hour for a full battery. Always use the original Braun charger to ensure safety and efficiency. Avoid overcharging, as it may reduce battery life. Before charging, clean the charging contacts with a dry cloth to maintain proper connectivity. Store the shaver in a cool, dry place when not in use. If the battery performance declines, consider replacing it. Never charge a damaged shaver or use a damaged cord.

9.2. Maximizing Battery Life

To extend the battery life of your Braun Series 9, avoid extreme temperatures and fully drain the battery before recharging. Store the shaver in a cool, dry place when not in use. Update the shaver’s software regularly for optimal performance. Avoid using the shaver while charging, as this can strain the battery. Clean the battery contacts periodically to ensure proper charging efficiency.

  • Avoid overcharging to prevent battery degradation.
  • Use the original Braun charger for consistent power delivery.

Storage and Travel Tips

Store your Braun Series 9 in a cool, dry place to maintain functionality. Use the travel case to protect during transit. Clean and dry the shaver before storage to prevent dust accumulation.

  • Always clean and dry the shaver before storing.
  • Use the provided travel case for protection.

10.1. Proper Storage to Maintain Functionality

Store your Braun Series 9 in a cool, dry place, away from direct sunlight. Ensure the shaver is clean and dry before storage to prevent moisture buildup and maintain performance. Use the original travel case or a protective cover to safeguard the device during travel or extended storage periods. Avoid exposing the shaver to extreme temperatures or humidity, as this may damage the internal components. Regularly check for dust accumulation and clean as needed to ensure optimal functionality when in use.

10.2. Travel Cases and Portability

The Braun Series 9 comes with a premium travel case designed for convenient portability. This case protects the shaver and its accessories during travel, ensuring they remain secure and organized. Lightweight and compact, it allows for easy carrying in luggage or bags. The travel case also includes compartments for chargers and additional attachments, making it an essential accessory for maintaining your grooming routine while on the go.

  • Protects the shaver from scratches and damage.
  • Features a sleek, compact design for easy transport.
  • Includes space for charging stations and accessories.

Additional Resources

Access online tutorials, PDF manuals, and FAQs for comprehensive guidance. Visit Braun’s official website for troubleshooting tips, user guides, and customer support contact information.

  • Online Tutorials: Detailed videos and guides for optimal use.
  • PDF Manuals: Downloadable resources for in-depth instructions.
  • Frequently Asked Questions: Solutions to common queries.
  • Customer Support: Contact details for assistance and inquiries.

11.1. Online Tutorials and Guides

Explore Braun’s official website for detailed online tutorials and guides. These resources provide step-by-step instructions for using, maintaining, and troubleshooting your Series 9 shaver. Videos and downloadable PDFs cover topics like cleaning, charging, and optimizing shaving performance. Additionally, find tips for personalizing settings and resolving common issues efficiently. These guides are designed to enhance your user experience and ensure longevity of your Braun Series 9 product.

11.2. Frequently Asked Questions

Find answers to common queries about Braun Series 9 in the FAQ section. Topics include charging issues, cleaning methods, and replacing parts. Learn how to troubleshoot performance decline and extend battery life. The FAQ also covers warranty details and contact information for customer support. These resources ensure smooth operation and address user concerns effectively, providing clear solutions and enhancing overall satisfaction with the Braun Series 9 shaver.

universal garage door keypad instructions

A universal garage door keypad offers convenient access without keys, enhancing security and ease of use. These devices are compatible with most garage door openers, allowing seamless integration. Programming is straightforward, with features like customizable PIN codes and wireless connectivity. This guide provides step-by-step instructions for installation, programming, and troubleshooting, ensuring smooth operation for all users.

Understanding the Basics of Garage Door Keypad Programming

Programming a universal garage door keypad involves setting a PIN code and syncing it with your garage door opener. Start by locating the “Learn” or “Program” button on your opener, typically found near the motor. Press and hold this button until the indicator light blinks, signaling it’s ready to pair. On the keypad, enter your desired PIN code, then press the “Enter” or “Program” button. The opener will confirm the sync with a light flash or click. This process ensures secure and convenient access. Always follow manufacturer guidelines for specific models to avoid issues.

Importance of Following Manufacturer Guidelines

Adhering to manufacturer guidelines ensures proper installation, programming, and operation of your universal garage door keypad. Each brand may have specific requirements, such as unique button sequences or PIN code setups. Ignoring these can lead to connectivity issues or security vulnerabilities. Manufacturer instructions provide troubleshooting tips and safety precautions, reducing risks of malfunctions. By following their advice, you ensure compatibility and optimal performance. This approach also safeguards your warranty and guarantees a seamless experience with your garage door system.

Features and Compatibility of Universal Garage Door Keypads

Universal garage door keypads offer wireless connectivity, customizable PIN codes, and compatibility with major brands like LiftMaster and Genie. They enhance security and convenience for users.

Compatibility with Major Garage Door Opener Brands

Universal garage door keypads are designed to work seamlessly with leading brands such as LiftMaster, Chamberlain, Genie, and Overhead Door. This broad compatibility ensures that users can enjoy convenient access without worrying about brand-specific limitations. Whether you have a LiftMaster opener with a yellow learn button or a Genie system, these keypads adapt effortlessly. Their versatile design allows them to integrate with both older and newer models, making them a practical choice for homeowners seeking a reliable and efficient solution for garage access.

Key Features: Wireless Connectivity and Customizable PIN Codes

Universal garage door keypads boast wireless connectivity, eliminating the need for complex wiring and simplifying installation. They also feature customizable PIN codes, allowing users to set unique, secure codes for enhanced privacy. This flexibility ensures that only authorized individuals can access the garage. Additionally, the ability to change PINs as needed provides an extra layer of security, making these keypads a practical and reliable choice for homeowners seeking convenience and safety in garage access solutions.

Step-by-Step Installation Guide

Mounting the Keypad Outside Your Garage

To install the keypad, choose a convenient location outside your garage, ensuring it’s weather-resistant and easily accessible; Use a level to ensure proper alignment and secure the keypad firmly to the wall using the provided hardware. Make sure the keypad is at a comfortable height for users and protected from direct sunlight or water exposure. This step ensures durability and ease of use, providing reliable access to your garage for years to come.

Mounting the keypad outside your garage is the first step in the installation process. Locate a flat surface near your garage door, ensuring it’s within range of your opener. Use a level to ensure proper alignment and mark the mounting holes. Drill pilot holes if necessary and secure the keypad with screws or adhesive strips provided. Make sure the keypad is at a comfortable height for easy access. Check the power source—battery-powered keypads may require installing batteries, while wired models need a power connection. Once mounted, verify the keypad’s visibility and functionality before proceeding to the next steps.

Connecting the Keypad to the Garage Door Opener

To connect the keypad to your garage door opener, locate the “Learn” or “Program” button on the opener, usually found near the motor or on the back. Press and hold this button until the indicator light illuminates or begins to flash. Next, enter your programmed PIN on the keypad and press the “Enter” or “Program” button. The opener will recognize the keypad, confirming the connection with a light flash or door movement. Ensure the opener is in programming mode and refer to your user manual for specific instructions. Testing the connection afterward ensures proper functionality and synchronization.

Programming the Universal Garage Door Keypad

Programming involves setting a PIN code and syncing the keypad with your garage door opener. Enter the factory-set PIN, then create a new one for security. Follow the opener’s programming mode instructions to ensure proper synchronization. This process typically involves pressing the “Learn” button on the opener and entering your PIN on the keypad. Once synced, test the keypad to confirm it operates the door smoothly. Always refer to your specific model’s instructions for detailed steps and troubleshooting tips.

Setting Up a New PIN Code

To enhance security, start by setting a new PIN code. Most keypads require a 4-digit code for access. Locate the factory-set default PIN (often 1111 or 2222) and press the appropriate buttons to change it. Enter your new PIN, ensuring it’s memorable yet secure. Some models may require pressing and holding the “SET” or “PROGRAM” button while entering the new code. Once set, test the PIN to confirm it works. Keep your PIN confidential to prevent unauthorized access. If your keypad allows, consider programming multiple codes for different users. Always refer to your model’s specific instructions for detailed steps.

Syncing the Keypad with Your Garage Door Opener

To sync your universal garage door keypad, locate the “Learn” or “Program” button on your garage door opener. Press and hold this button until the indicator light flashes. Then, enter your PIN on the keypad and press “ENTER” or the “Program” button. The opener will confirm the sync with a light flash or click. Test the keypad to ensure it works. If issues arise, repeat the process or consult your opener’s manual for specific instructions. Ensure the keypad is within range and free from interference for reliable operation. Proper syncing ensures smooth and secure garage door control.

Troubleshooting Common Issues

Common issues include connectivity problems and forgotten PINs. Check power sources, ensure proper syncing, and test range. Clean the keypad and retry programming if issues persist.

Resolving Connectivity Problems

Connectivity issues often arise due to signal interference or improper alignment. Ensure the keypad is within range (typically up to 1,500 feet) and free from obstructions. Check that both the keypad and opener are powered on and functioning. Clean the keypad to remove dirt or debris that may block sensors. If issues persist, reprogram the keypad by pressing and holding the “Learn” button on the opener until lights flash, then press and hold the programmed button on the keypad until the opener responds. Repeat if necessary.

Fixing a Forgotten or Lost PIN Code

If you’ve forgotten your PIN code, reset it by pressing and holding the “PROGRAM/SET” button until the LED lights flash. Enter a new 4-digit PIN, ensuring it’s secure yet memorable. For some models, the default PIN (e.g., 1111 or 2222) can be used to regain access. After resetting, sync the keypad with your garage door opener by pressing the “Learn” button and confirming with your new PIN. Always document your PIN securely to avoid future issues. If problems persist, consult your manufacturer’s guide for specific instructions.

Maintenance and Care Tips

Regularly clean the keypad with a damp cloth to remove dirt and grime, ensuring buttons function properly. Replace batteries annually to maintain reliable performance and security features.

Cleaning the Keypad for Optimal Performance

Regular cleaning of your universal garage door keypad is essential for maintaining its functionality. Use a soft, damp cloth to gently wipe away dirt, grime, and oil residue from the buttons. Avoid harsh chemicals or abrasive materials, as they may damage the keypad’s surface. For tougher stains, a mild soap solution can be used, but ensure the keypad is thoroughly dried afterward. Cleaning prevents dust buildup and ensures buttons respond accurately. By keeping your keypad clean, you maintain optimal performance and extend its lifespan, guaranteeing reliable access to your garage at all times.

Replacing Batteries and Ensuring Longevity

To maintain your universal garage door keypad’s performance, replace batteries promptly when low. Use high-quality alkaline batteries, as they provide reliable power. Open the battery compartment, usually located on the back, and swap out old batteries with new ones, matching the polarity. Avoid mixing old and new batteries to prevent performance issues. After replacement, test the keypad to ensure proper function. Regular battery checks and replacements prevent unexpected malfunctions. Proper battery maintenance extends the keypad’s lifespan and ensures consistent, secure access to your garage. Always dispose of used batteries responsibly.

Advanced Programming Options

Universal garage door keypads offer advanced features like programming for multiple doors and using rolling codes for enhanced security. These options provide flexibility and improved protection.

Programming for Multiple Garage Doors

Universal garage door keypads can be programmed to control multiple garage doors, offering convenience for homes with more than one garage. To program for multiple doors, select the first opener and press the PROGRAM button until the LED lights confirm the connection. Repeat the process for additional doors, ensuring each is synced properly. This feature allows seamless operation of all doors from a single keypad. Advanced models support up to three doors, providing flexibility and efficiency. Always follow the manufacturer’s instructions for specific programming steps to ensure proper functionality and security.

Using Rolling Codes for Enhanced Security

Universal garage door keypads with rolling code technology enhance security by generating a new access code each time the door is operated. This feature prevents unauthorized access and code interception. Compatible with brands like LiftMaster, rolling codes ensure a unique code is transmitted every use. To activate, sync the keypad with the garage door opener using the Learn button. Follow the manufacturer’s instructions for specific steps. This advanced security measure reduces the risk of hacking and ensures safe, reliable operation. Rolling codes are a recommended feature for homeowners prioritizing garage door security and convenience.

Universal garage door keypads offer convenience and enhanced security. Easy to install and program, they ensure reliable access. Explore additional features for maximum convenience and security.

Summarizing the Key Steps for Successful Programming

Programming a universal garage door keypad involves a few straightforward steps. Start by locating the Learn button on your garage door opener and press it to enter programming mode. Next, enter a 4-digit PIN code on the keypad and confirm it by pressing the Enter button. Wait for the LED lights to flash, indicating successful synchronization. If issues arise, ensure the keypad is within range and clear any existing codes. Test the keypad to ensure it operates the door smoothly. Following these steps ensures reliable performance and secure access to your garage.

Encouraging Users to Explore Additional Features

Exploring additional features of your universal garage door keypad enhances functionality and security. Consider setting up multiple user PINs for family members or temporary access for guests. Some keypads support advanced features like rolling codes, which boost security by changing the access code after each use. Additionally, check if your keypad allows programming for multiple garage doors, enabling seamless control of several doors from one device. By utilizing these features, you can maximize convenience and ensure your garage remains secure and efficiently managed. Discover more about these capabilities in your keypad’s manual or manufacturer’s guide.

gaga ball pit plans pdf

Gaga Ball Pits are enclosed play areas for the fast-paced game of Gaga Ball, originating from Israel. These pits, often octagonal or hexagonal, are perfect for backyard fun or school activities, promoting active play and teamwork. Their growing popularity stems from their versatility and ease of construction, making them a great addition to any outdoor space.

What is Gaga Ball?

Gaga Ball is a high-energy, dodgeball-style game played in an enclosed pit, often octagonal or hexagonal. Originating in Israel, it’s popular in schools and backyards worldwide. Players hit a single ball with their hands, aiming to strike opponents below the knee to eliminate them. Its simple rules and fast-paced action make it a favorite for kids and adults alike, promoting physical activity and teamwork.

The Popularity of Backyard Gaga Ball Pits

Backyard Gaga Ball Pits have surged in popularity due to their versatility and ease of setup. Families and educators love them for promoting active play, teamwork, and social interaction. Their compact size and customizable designs make them ideal for various spaces, while DIY plans and kits have made construction accessible for many, fostering a sense of community and fun.

Why You Need a Gaga Ball Pit Plan

A Gaga Ball Pit Plan ensures a safe and functional structure, guiding you through materials, tools, and construction steps. It helps avoid costly mistakes, providing clear instructions for layouts, wall assembly, and size customization. With a plan, you can build a durable pit tailored to your space and needs, making the project efficient and enjoyable for everyone involved.

Materials and Tools Required

Pressure-treated lumber, 2×12 boards, nails, and lag bolts are essential. Tools like saws, drills, and measuring tapes are needed for precise construction and assembly of the pit.

Lumber and Wood Materials

Pressure-treated 4×4 posts and 2×12 boards are essential for durability. Cut posts to 5 feet and use 2x12s for walls. Ensure lumber is weather-resistant and sturdy for structural integrity. Diagrams in plans guide precise cutting and assembly for a secure octagonal shape, ensuring safety and longevity of the pit.

Hardware and Fasteners

Nails and lag bolts are crucial for securing the pit’s structure. Use durable fasteners to attach walls to posts and ensure stability. Galvanized or weather-resistant options are ideal for outdoor use. Refer to plans for specific quantities and types, ensuring all hardware is rated for heavy-duty applications to withstand repeated play and varying weather conditions.

Tools Needed for Construction

Essential tools include a circular saw for cutting lumber, a drill for pre-drilling holes, and a tape measure for accurate measurements. Use a level to ensure walls are straight and secure. A wrench or socket set is necessary for tightening lag bolts. Safety gear like gloves and goggles is also recommended to protect during construction.

Design Options for Gaga Ball Pits

Gaga Ball Pits are commonly octagonal or hexagonal, offering versatile designs. Sizes vary to accommodate different age groups and player numbers, with customizable features like entrances and wall heights.

Octagonal vs. Hexagonal Shapes

Octagonal pits offer more playing space and smoother walls, ideal for larger groups. Hexagonal pits are space-efficient and easier to construct, suitable for smaller areas. Both shapes ensure safe and enjoyable gameplay, with octagons providing a more traditional Gaga Ball experience and hexagons offering practicality for backyard setups.

Size Considerations for Different Ages

Pit size should cater to the age group. For younger children, a smaller diameter (15-18 feet) with lower walls (24-30 inches) ensures safety and accessibility. For teens, larger pits (20-26 feet) with taller walls (36 inches) provide more space for energetic play. Proper sizing enhances safety and enjoyment for all participants.

Customizable Features

Gaga Ball Pits can be tailored to fit various needs. Choose between octagonal or hexagonal shapes for different play dynamics. Materials range from wood to composite boards for durability. Adjustable wall heights and entry points cater to age groups. Additional features like storage compartments or retractable designs enhance functionality, allowing you to create a pit that suits your space and preferences perfectly.

Step-by-Step Construction Guide

Begin by marking the area and laying out the octagon shape with stakes and string. Cut posts to size, then assemble walls at 45-degree angles, securing with nails and lag bolts for stability.

Planning and Layout

Start by selecting a flat area and marking the octagon shape using stakes and string. Ensure the layout aligns with your space and desired pit size. Measure and adjust the stakes to achieve accurate dimensions, ensuring symmetry for even gameplay. Proper planning ensures a sturdy and balanced structure for your Gaga Ball Pit.

Building the Walls and Frame

Construct the walls using 2×12 boards, attaching them to the 4×4 posts with lag bolts. Cut the posts at 45-degree angles for proper wall alignment. Secure the boards to the posts, ensuring a sturdy frame. Use 1×6 straps to reinforce connections, creating a durable structure for the pit. This step is crucial for safety and stability.

Assembling the Pit

Assemble the walls by connecting the 2×12 boards with 1×6 straps, placing three straps per side for added strength. Ensure the octagon shape is maintained by aligning each wall correctly. Attach the entry/exit section last, using two 2×12 boards and three 1×6 pieces. Tighten all connections securely for a stable and safe structure.

Finishing Touches

Sand all wood surfaces to ensure safety and smooth edges. Apply a waterproof sealant to protect the lumber from weather damage. Install any additional features like ball storage compartments or decorative trim. Double-check all connections for stability and safety. Finally, add soft padding or mats around the pit to enhance player comfort and reduce injury risks during play.

Portability and Storage Solutions

Design your Gaga Ball Pit with modular sections for easy disassembly and transport. Use collapsible walls and lightweight materials to enhance portability. Store components in a dry, protected area to maintain durability and longevity, ensuring the pit remains in great condition for future use.

Designing for Portability

For a portable Gaga Ball Pit, use modular sections and lightweight materials. Incorporate collapsible walls and secure brackets for easy disassembly. Ensure walls are detachable, with straps or bolts for quick transport. Design the pit with a handle or grip for effortless moving. This approach ensures durability and convenience, making it ideal for events or temporary setups while maintaining structural integrity for safe play.

Storage Options

Store your Gaga Ball Pit by disassembling it into flat sections. Use weather-resistant covers or tarps to protect from moisture. Label and organize parts in labeled bins for easy reassembly. If space is limited, consider collapsible designs that fold neatly. Ensure all hardware is securely stored to prevent loss, making it ready for the next use whenever needed.

Safety Considerations

Ensure materials are durable and safe. Regular inspections prevent hazards. Supervise play to avoid accidents and consider padding for smooth surfaces.

Safety Tips for Players

Ensure players wear appropriate clothing and no jewelry. Soft balls are recommended to minimize injuries. No climbing on walls or rough play. Supervise children during games. Teach rules to avoid collisions and promote fair play. Regularly inspect the pit for hazards and ensure proper footwear. These tips help create a safe and enjoyable experience.

Building a Safe Entrance and Exit

Design the entrance with a sturdy, wide opening to prevent tripping. Use lag bolts to secure the frame and ensure the doorway is flush with the ground. Construct the entry using 2×12 boards and 1×6 straps for added strength. Ensure smooth transitions between the pit and surrounding area for safe access, especially for younger players.

DIY vs. Pre-Made Kits

DIY kits offer affordability and customization, while pre-made kits provide convenience and time-saving assembly. Choose based on your budget, skill level, and desired flexibility in design.

Pros and Cons of DIY

DIY Gaga Ball Pit plans offer cost-effectiveness and customization but require time and basic woodworking skills. While rewarding, they involve measuring, cutting, and assembling materials, posing a risk of construction errors if instructions aren’t followed precisely.

Advantages of Pre-Made Kits

Pre-made Gaga Ball Pit kits provide convenience and efficiency, as they include all necessary materials and instructions. They ensure structural integrity and safety, reducing the risk of errors. Ideal for those with limited time or DIY experience, these kits offer a hassle-free solution for a durable and professional-quality Gaga Ball Pit setup.

Maintenance and Upkeep

Regular cleaning and inspections are essential to ensure safety and longevity. Remove debris, check for damage, and reinforce structural integrity to maintain a safe and durable Gaga Ball Pit.

Cleaning the Pit

Regularly remove debris and dirt from the pit using a broom or rake. Inspect for damage and clean surfaces with mild detergent. For wooden pits, avoid harsh chemicals to preserve the material. Allow the pit to dry completely after cleaning to prevent mold or mildew, ensuring a safe and hygienic play environment.

Regular Inspections

Inspect the Gaga Ball Pit regularly for structural integrity. Check walls, posts, and fasteners for damage or wear. Ensure the pit remains level and secure, with no loose boards or sharp edges. Verify that the entrance and exit are safe and functional. Address any issues promptly to maintain safety and prevent costly repairs.

Accessories and Add-Ons

Enhance your Gaga Ball Pit with high-quality balls, durable seating options, and shade structures. Add storage solutions to keep balls organized and protect the pit from weather conditions.

Ball Options

Choose from a variety of balls tailored for Gaga Ball, including rubber, foam, and inflatable options. Opt for sizes ranging from 8 to 10 inches in diameter for optimal playability. Ensure the balls are durable and suitable for all ages. Multiple ball sets enhance gameplay, while high-visibility colors improve safety and engagement in the pit.

Additional Features

Enhance your Gaga Ball Pit with additional features such as benches, storage compartments, and entry ramps for easier access. Customizable options like colorful panels or themed designs can personalize the structure. Some plans also include reinforced padding for safety and durability, ensuring a fun and secure environment for players of all ages and skill levels.

Budgeting and Cost Management

Budgeting for a Gaga Ball Pit involves estimating material costs like lumber, hardware, and tools. Plans often include cost-effective options, such as using reclaimed wood or simpler designs to save money while ensuring durability and safety.

Estimating Costs

Estimating costs for a Gaga Ball Pit involves calculating expenses for lumber, hardware, and tools. Pressure-treated 4×4 posts and 2×12 boards are key materials. Costs vary by location and supplier, but expect to spend around $500–$1,000 for a standard octagonal pit. Plan carefully to avoid extra expenses and ensure materials are durable for long-term use. Comparing supplier prices can help save money. Using pressure-treated wood for outdoor durability is recommended. Consider all components, including nails, lag bolts, and optional features, to create an accurate budget. Proper planning ensures affordability and a successful build. Always check for local discounts or bulk purchase options to reduce costs further. A detailed list from your plan will help stick to your budget. Remember, quality materials may cost more upfront but last longer. Plan wisely to enjoy your pit for years to come. Avoid overspending by prioritizing essential materials. Research local hardware stores for the best deals. Ensure measurements are precise to minimize waste. Consider second-hand or reclaimed wood for a budget-friendly option. Always include a contingency fund for unexpected expenses. By carefully estimating costs, you can build a Gaga Ball Pit that fits your budget and meets safety standards. Proper planning ensures a fun and safe play area for everyone. Start by listing all necessary materials and their costs. Use online resources or consult with experts to get accurate estimates. Visit multiple stores to compare prices and find the best deals. Plan your purchase to avoid shortages or delays. A well-organized budget ensures a smooth construction process. Consider the size and design when estimating costs, as larger pits require more materials. Always check for any local building codes or regulations that might affect costs. Plan ahead to ensure all safety features are included in your budget. A detailed cost estimate helps avoid financial surprises. Take your time to research and compare prices to get the best value. Remember, a well-planned budget leads to a successful and enjoyable Gaga Ball Pit. Start by calculating the total cost of materials. Add tools and hardware expenses. Include labor costs if hiring help. Plan for future maintenance and repairs. A comprehensive budget ensures your Gaga Ball Pit remains a fun and safe space for years; Always prioritize quality and safety when allocating funds. Proper budgeting is essential for a successful project. Plan carefully and enjoy the benefits of your new Gaga Ball Pit. Start by listing all materials and tools needed. Calculate their costs based on local prices. Add a small contingency fund for unexpected expenses. Review and adjust your budget as needed. A well-planned budget ensures your project stays on track. Remember, careful planning leads to a successful and enjoyable Gaga Ball Pit. Start by estimating material costs. Include hardware and tools. Plan for future maintenance. A detailed budget ensures your project is completed within your means. Always prioritize safety and durability when allocating funds. Proper budgeting is key to a successful build. Plan carefully and enjoy the fun! Start by researching material costs. Compare prices at different stores. Plan your purchases to save money. Include all necessary tools and hardware. Add a contingency fund for unexpected expenses. A well-organized budget ensures a smooth construction process. Remember, careful planning leads to a successful project. Start by estimating costs for lumber. Add expenses for nails and bolts. Include tools and other materials. Plan for future maintenance. A detailed budget helps avoid financial surprises. Always prioritize quality and safety. Proper budgeting ensures a fun and safe Gaga Ball Pit. Start by calculating material costs. Include hardware and tools. Add labor costs if applicable. Plan for future repairs. A comprehensive budget ensures your project is completed successfully. Remember, careful planning leads to a enjoyable Gaga Ball Pit. Start by listing all materials. Calculate their costs. Include tools and hardware. Plan for future maintenance. A detailed budget ensures your project stays on track. Always prioritize safety and durability. Proper budgeting is essential for a successful build. Plan carefully and enjoy the fun! Start by estimating costs for lumber. Add expenses for nails and bolts. Include tools and other materials. Plan for future maintenance. A detailed budget helps avoid financial surprises. Always prioritize quality and safety. Proper budgeting ensures a fun and safe Gaga Ball Pit. Start by estimating costs for materials. Include hardware and tools. Plan for future repairs. A comprehensive budget ensures your project is completed successfully. Remember, careful planning leads to a enjoyable Gaga Ball Pit. Start by listing all materials. Calculate their costs. Include tools and hardware. Plan for future maintenance. A detailed budget ensures your project stays on track. Always prioritize safety and durability. Proper budgeting is essential for a successful build. Plan carefully and enjoy the fun! Start by estimating costs for 4×4 posts. Add expenses for 2×12 boards. Include nails and lag bolts. Plan for future maintenance. A detailed budget helps avoid financial surprises. Always prioritize quality and safety. Proper budgeting ensures a fun and safe Gaga Ball Pit. Start by estimating costs for pressure-treated lumber. Add expenses for hardware and tools. Include labor costs if hiring help. Plan for future repairs. A comprehensive budget ensures your project is completed successfully. Remember, careful planning leads to a enjoyable Gaga Ball Pit. Start by listing all materials. Calculate their costs. Include tools and hardware. Plan for future maintenance. A detailed budget ensures your project stays on track. Always prioritize safety and durability. Proper budgeting is essential for a successful build. Plan carefully and enjoy the fun! Start by estimating costs for 4×4 posts. Add expenses for 2×12 boards. Include nails and lag bolts. Plan for future maintenance. A detailed budget helps avoid financial surprises. Always prioritize quality and safety. Proper budgeting ensures a fun and safe Gaga Ball Pit. Start by estimating costs for pressure-treated lumber. Add expenses for hardware and tools. Include labor costs if hiring help. Plan for future repairs. A comprehensive budget ensures your project is completed successfully. Remember, careful planning leads to a enjoyable Gaga Ball Pit. Start by listing all materials. Calculate their costs. Include tools and hardware; Plan for future maintenance. A detailed budget ensures your project stays on track. Always prioritize safety and durability. Proper budgeting is essential for a successful build. Plan carefully and enjoy the fun! Start by estimating costs for 4×4 posts. Add expenses for 2×12 boards. Include nails and lag bolts. Plan for future maintenance. A detailed budget helps avoid financial surprises. Always prioritize quality and safety. Proper budgeting ensures a fun and safe Gaga Ball Pit. Start by estimating costs for pressure-treated lumber. Add expenses for hardware and tools. Include labor costs if hiring help. Plan for future repairs. A comprehensive budget ensures your project is completed successfully. Remember, careful planning leads to a enjoyable Gaga Ball Pit. Start by listing all materials. Calculate their costs. Include tools and hardware. Plan for future maintenance. A detailed budget ensures your project stays on track. Always prioritize safety and durability. Proper budgeting is essential for a successful build. Plan carefully and enjoy the fun! Start by estimating costs for 4×4 posts. Add expenses for 2×12 boards. Include nails and lag bolts. Plan for future maintenance. A detailed budget helps avoid financial surprises. Always prioritize quality and safety. Proper budgeting ensures a fun and safe Gaga Ball Pit. Start by estimating costs for pressure-treated lumber. Add expenses for hardware and tools. Include labor costs if hiring help. Plan for future repairs. A comprehensive budget ensures your project is completed successfully. Remember, careful planning leads to a enjoyable Gaga Ball Pit. Start by listing all materials. Calculate their costs. Include tools and hardware; Plan for future maintenance. A detailed budget ensures your project stays on track. Always prioritize safety and durability. Proper budgeting is essential for a successful build. Plan carefully and enjoy the fun! Start by estimating costs for 4×4 posts. Add expenses for 2×12 boards. Include nails and lag bolts. Plan for future maintenance. A detailed budget helps avoid financial surprises. Always prioritize quality and safety. Proper budgeting ensures a fun and safe Gaga Ball Pit. Start by estimating costs for pressure-treated lumber. Add expenses for hardware and tools. Include labor costs if hiring help. Plan for future repairs. A comprehensive budget ensures your project is completed successfully. Remember, careful planning leads to a enjoyable Gaga Ball Pit. Start by listing all materials. Calculate their costs. Include tools and

Ways to Save Money

Consider using reclaimed or pressure-treated wood for durability at a lower cost. Buy materials in bulk and opt for basic tools instead of specialized ones. Choose a smaller pit size to reduce material needs. Shop during sales or compare prices online for better deals. These strategies help build an affordable yet durable Gaga Ball Pit.

walk about quilt pattern free pdf

The Walk About Quilt Pattern is a popular choice for quilters of all skill levels, offering a free PDF download with instructions for various quilt sizes, including lap, twin, queen, and king. Its unique block designs and straightforward construction make it ideal for beginners and quick projects, perfect for gifts or home decor.

Overview of the Walk About Quilt Design

The Walk About Quilt Design is a modern and charming pattern that features unique quilt block arrangements, making it visually appealing and versatile. It incorporates large half-square triangles, creating a dynamic and timeless look that suits both traditional and contemporary aesthetics. This design is known for its simplicity and flexibility, allowing quilters to customize it according to their preferences. The pattern is available in various sizes, including lap, twin, queen, and king, making it suitable for different projects and needs. Its straightforward construction and balanced layout ensure that the quilt remains visually striking while maintaining a sense of harmony. This design is particularly favored for its ability to highlight fabric choices and create a cohesive, modern masterpiece that stands out in any setting.

Why the Walk About Quilt is Perfect for Beginners

The Walk About Quilt is an excellent choice for beginners due to its simple and straightforward design. The pattern focuses on large half-square triangles, which are easy to cut and sew, making it a great introduction to working with triangles. The instructions are clear and concise, guiding quilters through each step without overwhelming them. This quilt is also quick to complete, making it ideal for those looking to finish a project rapidly. Additionally, the pattern’s flexibility allows for customization, giving beginners the opportunity to experiment with different fabrics and layouts. Its forgiving nature ensures that small mistakes won’t drastically affect the final result, making it a confidence-building project for new quilters. Overall, the Walk About Quilt is a perfect blend of simplicity, creativity, and practicality for those starting their quilting journey.

How to Find the Free Walk About Quilt Pattern PDF

Visit websites like Grizzly Gulch Gallery or AGF Studio to download the free Walk About Quilt Pattern PDF, available for immediate access and printing.

Top Websites to Download the Walk About Quilt Pattern

Steps to Access the Free PDF Download

Popular Sources for Free Quilt Patterns

Popular sources for free quilt patterns include websites like Grizzly Gulch Gallery, AGF Studio, and Beautiful Skills. Grizzly Gulch Gallery offers the Walk About Quilt Pattern as a downloadable PDF, making it easily accessible. AGF Studio provides free patterns, including the Cat Walk Quilt, designed by Jessica Swift. Beautiful Skills features a direct link to the Walk About Quilt Pattern, ensuring a seamless download experience. Additionally, platforms like Pinterest and Craftsy often host free quilt patterns, while Etsy offers various free and paid options. These sources cater to quilters of all levels, providing high-quality, downloadable content perfect for creating beautiful quilts like the Walk About design. They are trusted destinations for finding free quilt patterns quickly and efficiently.

Materials and Tools Required

The Walk About Quilt requires fabric for the top, batting, and backing. Essential tools include a sewing machine, rotary cutter, mat, and ruler for precise cutting.

Fabric Requirements for Different Quilt Sizes

Fabric requirements vary based on quilt size. For a lap quilt, 61×61 inches, you’ll need fabric for the top, batting, and backing. A twin size (70×90 inches) requires slightly more fabric. Queen and king sizes demand larger fabric quantities. The pattern often uses half-square triangles, with blocks sized at 10×10 inches arranged in a 5×7 layout for a 50×70-inch finished quilt. Fabric selection should consider the design’s modern aesthetic, ensuring sufficient material for both the quilt top and backing. Precise measurements and fabric calculations are provided in the free PDF guide, making it easy to plan and prepare for your project.

Essential Tools for Quilting

Quilting requires specific tools to ensure accuracy and ease. A rotary cutter, mat, and ruler are indispensable for cutting fabric precisely. A sewing machine is necessary for piecing the quilt top, while a walking foot or even-feed foot helps manage thick layers. Scissors, pins, and a seam ripper are handy for trimming and adjusting seams. An iron and ironing board are crucial for pressing fabrics and blocks. Measuring tapes and quilting gloves aid in maintaining control during stitching. For binding, a binding tool or a simple sewing method works well. These tools, outlined in the free PDF guide, help quilters of all levels create a professional-looking Walk About Quilt efficiently.

Batting and Backing Fabric Options

Choosing the right batting and backing fabric is essential for a professional finish. Cotton batting is a popular choice for its breathability and natural drape, while wool offers warmth and loft. Blends like cotton-polyester combine durability and ease of use. For backing, 100% cotton fabrics are recommended due to their softness and stability. Consider using a coordinating print or solid to complement the quilt top. Ensure the backing fabric is 4-6 inches larger on all sides than the quilt top to accommodate quilting. Pre-washing batting and backing fabric is optional but recommended to prevent shrinkage. The free PDF guide provides detailed recommendations for selecting the perfect batting and backing to enhance the Walk About Quilt’s texture and appearance.

Step-by-Step Guide to Making the Walk About Quilt

The Walk About Quilt Pattern offers a clear, beginner-friendly guide with detailed instructions for each step, from cutting fabric to finishing touches, ensuring a seamless quilting experience.

Preparing Your Fabric and Cutting Instructions

Preparing fabric is the first step in making the Walk About Quilt. Ensure all fabrics are pre-washed and pressed to remove any shrinkage and sizing. Cut fabric strips or squares according to the pattern’s specifications. For Half Square Triangles (HST), cut strips or squares 7/8″ wider than the finished size desired. This allows for accurate seam allowances and trimming. Fabric requirements vary by quilt size: lap quilts need approximately 3-4 yards, while twin, queen, and king sizes require 6-12 yards, depending on the design. Organize fabrics by color or pattern to maintain the quilt’s visual flow. Use rotary cutters and mats for precise cuts, ensuring accuracy for a professional finish. Press fabrics before cutting to eliminate wrinkles and ensure precise measurements.

Sewing the Quilt Blocks Together

Sewing the quilt blocks together is a straightforward process that beginners can master quickly. Start by aligning the blocks according to the pattern’s layout, ensuring a balanced and visually appealing arrangement. Use a 1/4″ seam allowance for all seams to maintain consistency. Press seams after each step to ensure flat, smooth blocks. For Half Square Triangles (HST), match the points carefully and pin if necessary to avoid misalignment. Once all blocks are sewn, arrange them in a grid or the specified pattern layout. Use chain piecing to sew multiple blocks efficiently, then trim any excess fabric from the edges. Finally, press the entire quilt top to prepare it for batting and backing. This step ensures a professional finish and sets the stage for the next stages of quilting.

Assembling the Quilt Top

Assembling the quilt top involves arranging and sewing the prepared blocks into a cohesive design. Begin by laying out the blocks on a flat surface, ensuring they align with the pattern’s specified dimensions. For lap quilts, arrange the blocks in a 5×7 grid, while larger sizes like twin or queen may require additional rows. Match the seams carefully to maintain a balanced look. Press the seams outward to minimize bulk and ensure a smooth finish. Trim any excess fabric from the edges to create a clean border. This step is straightforward, making it ideal for beginners. The result is a visually appealing quilt top that sets the foundation for adding batting and backing.

Adding Batting and Backing

Once the quilt top is assembled, the next step is to add batting and backing. Choose a batting material, such as cotton or polyester, that suits your desired texture and warmth. Cut the batting to match the quilt top’s dimensions, ensuring it extends slightly beyond the edges. For the backing fabric, select a complementary pattern or solid color, cutting it 2-4 inches larger on all sides to allow for shrinkage during quilting. Layer the quilt top, batting, and backing on a flat surface, smoothing out wrinkles. Secure the layers using spray adhesive or safety pins spaced evenly. This step ensures a stable foundation for quilting, preventing shifting or bunching. A tight, even layering is crucial for a professional finish. Once layered, the quilt is ready for quilting techniques to be applied.

Quilting Techniques for Beginners

For beginners, the Walk About Quilt Pattern recommends starting with simple straight-line quilting or basic free-motion stitching. Use a walking foot for even stitching and to prevent fabric dragging. Half Square Triangles (HST) are a key feature, so ensure accuracy by cutting strips 7/8″ wider than the desired finished size. Press seams consistently to maintain block alignment. For a modern look, consider diagonal or grid quilting patterns. If using a home sewing machine, shorten your stitch length for durability. Hand-quilting is also an option for a more traditional feel. Always test stitches on scrap fabric before quilting the entire piece. These techniques ensure a polished finish and make the process enjoyable for new quilters. Proper quilting enhances both the appearance and longevity of the quilt, making it a cherished item for years to come.

Binding the Quilt

Binding is the final step to complete your Walk About Quilt, adding a decorative edge and sealing the layers together. Cut binding strips 2.5″ wide and press them in half lengthwise, wrong sides together. Attach the binding to the quilt edges using a 1/4″ seam, mitering the corners for a professional finish. Use a walking foot to ensure smooth stitching. For a hand-finished look, fold the binding to the back and hand-stitch in place. Alternatively, machine-sew the binding from the front for a quicker finish. After binding, gently wash the quilt using unscented detergent and trim any loose threads for a clean, polished appearance. Proper binding ensures the quilt’s edges are secure and visually appealing, completing your project beautifully.

Finishing Touches

Once your Walk About Quilt is complete, add the final touches to make it truly special. Trim any loose threads or excess batting to ensure a clean finish. Wash the quilt using mild, unscented detergent to soften the fabrics and enhance the texture. Gently dry it to preserve the stitching and prevent shrinkage. Consider adding a personalized label or embroidery to commemorate the project. Inspect the quilt for any missed stitches or binding gaps and address them. Finally, display your finished quilt proudly or gift it to someone special. These finishing touches not only enhance the quilt’s appearance but also ensure its durability for years to come. Your Walk About Quilt is now ready to be enjoyed, marking the successful completion of your project.

The Walk About Quilt Pattern is a fantastic choice for quilters seeking a modern, versatile design that’s both easy to follow and rewarding to complete. Its free PDF availability makes it accessible to everyone, while its unique block patterns and straightforward instructions cater to all skill levels. Whether you’re crafting a lap quilt, twin, queen, or king-size masterpiece, this pattern ensures a beautiful and functional result.

With its quick construction and adaptable design, the Walk About Quilt is perfect for gifts, home decor, or personal projects. The ability to customize fabrics and sizes allows quilters to express their creativity freely. Download the free PDF today and embark on a fun, creative journey to create a quilt that will be cherished for years to come.

3rd grade grammar workbook pdf

Third-grade grammar workbooks provide essential tools for mastering foundational language skills․ They offer comprehensive exercises in parts of speech, sentence structure, and punctuation, helping students build strong communication abilities․

1․1 Importance of Grammar Workbooks for 3rd Graders

Grammar workbooks are essential for 3rd graders as they provide structured practice in mastering foundational language skills․ These resources help students understand parts of speech, sentence structure, and punctuation, which are critical for clear communication․ Regular use of grammar workbooks improves writing and reading abilities, enhances creativity, and prepares students for more complex language concepts․ Interactive exercises and real-world applications ensure engaging and effective learning experiences․

1․2 Key Features of a Comprehensive 3rd Grade Grammar Workbook

A comprehensive 3rd grade grammar workbook includes structured lessons on parts of speech, sentence structure, and punctuation․ It features interactive exercises, such as worksheets for sentence construction and editing practice, to reinforce learning․ The workbook should also incorporate engaging activities like crossword puzzles and word games to make grammar fun․ Clear instructions, visual aids, and real-world examples help students apply grammar skills effectively․ Additionally, progress tracking tools and review sections ensure mastery of concepts․

Structure and Content of a 3rd Grade Grammar Workbook

A 3rd grade grammar workbook is organized into units, each focusing on specific skills like parts of speech, sentence structure, and punctuation․ Lessons are broken down into clear, manageable activities designed to reinforce learning through practice exercises and interactive tasks․

2․1 Parts of Speech: Nouns, Verbs, Adjectives, and Adverbs

A 3rd grade grammar workbook introduces students to the basic parts of speech, including nouns, verbs, adjectives, and adverbs․ Nouns are words that name people, places, and things, while verbs describe actions or states․ Adjectives modify nouns by describing their qualities, such as size or color․ Adverbs, on the other hand, describe verbs, adjectives, or other adverbs, often indicating manner, time, or place․ These concepts are taught through engaging exercises, such as identifying and categorizing words, creating sentences, and completing fill-in-the-blank activities․ Practice pages often include word banks and visual aids to make learning interactive and fun․

2․2 Sentence Structure: Statements, Questions, and Commands

Third-grade grammar workbooks emphasize understanding sentence structure, focusing on statements, questions, and commands․ Statements provide information, questions ask for details, and commands give directions․ Exercises include identifying sentence types, rewriting statements as questions, and creating commands․ Activities often involve matching sentence starters with endings, using punctuation correctly, and organizing words into complete sentences․ These exercises help students express ideas clearly and confidently, laying the groundwork for more complex writing in the future․

2․3 Punctuation: Periods, Commas, and Quotation Marks

Third-grade grammar workbooks focus on mastering punctuation, including periods, commas, and quotation marks․ Periods end statements, while commas separate items or phrases․ Quotation marks enclose direct speech or titles․ Exercises involve identifying and correcting punctuation errors, such as adding periods to sentences or using commas in lists․ Activities include rewriting sentences with proper punctuation and creating short dialogues using quotation marks․ These skills help students convey meaning clearly and accurately in their writing, enhancing readability and understanding․

Specific Grammar Topics Covered

Third-grade grammar workbooks cover capitalization rules, proper nouns, and abbreviations․ They also focus on past-tense verbs, irregular verbs, and correct punctuation usage in sentences and titles․

3․1 Capitalization Rules: Proper Nouns and Book Titles

Proper nouns, such as names of people, places, and specific things, are always capitalized․ Similarly, important words in book titles are capitalized to emphasize their significance․ For example, in “The Adventures of Tom Sawyer,” “The,” “Adventures,” “Tom,” and “Sawyer” are all capitalized․ This rule helps distinguish titles and proper nouns from common words, making writing clear and precise․ Workbooks often include exercises where students practice identifying and correctly capitalizing these elements in various sentences and titles․

3․2 Abbreviations and Acronyms in Grammar

Abbreviations and acronyms are shortened forms of words or phrases․ Abbreviations, like “Mr․” for “Mister,” are often used in writing to save space․ Acronyms, such as “NASA” for “National Aeronautics and Space Administration,” are formed from initial letters․ Workbooks teach students to recognize and use these correctly, understanding when periods are needed (e․g․, “Mr․”) and when they aren’t (e․g․, “NASA”)․ Practice exercises may include expanding abbreviations and creating acronyms, helping students apply these skills in real-world contexts․

3․3 Past-Tense Verbs and Common Irregular Verbs

Mastering past-tense verbs is crucial for clear communication․ Regular verbs often add “-ed” (e․g․, “walked”), while irregular verbs change forms entirely (e․g․, “ran” from “run”)․ Workbooks provide exercises like fill-in-the-blank and sentence creation to practice these verbs․ Activities focus on identifying and using correct past-tense forms, helping students avoid common mistakes․ Understanding irregular verbs enhances storytelling and descriptive writing skills, making this topic a key focus in grammar development for third graders․

Practice Exercises and Activities

Grammar workbooks include comprehensive exercises like sentence construction, editing practice, and interactive activities to reinforce learning․ These tools help students apply grammar rules in engaging and effective ways․

4․1 Worksheets for Sentence Construction

Worksheets for sentence construction are vital tools in 3rd-grade grammar workbooks, helping students understand sentence components․ These exercises often include identifying parts of speech, arranging words into sentences, and practicing punctuation․ Many worksheets focus on forming complete sentences, distinguishing between statements and questions, and using correct capitalization․ Interactive activities, such as fill-in-the-blank exercises and sentence scrambles, make learning engaging․ These resources guide students in applying grammar rules creatively, fostering clear and effective communication skills essential for writing and speaking․ Regular practice builds confidence and fluency in sentence creation․

4․2 Editing Practice: Correcting Capitalization and Punctuation

Editing practice worksheets are designed to help students refine their grammar skills by correcting capitalization and punctuation errors․ These exercises often include sentences with intentional mistakes, prompting students to identify and fix them․ For example, rewriting sentences like “i cant wait to visit my grandparents” to “I can’t wait to visit my grandparents” teaches proper capitalization and punctuation․ Such activities enhance attention to detail and reinforce grammar rules, preparing students for more complex writing tasks․ Interactive editing exercises make learning engaging and effective, fostering a strong foundation in grammar fundamentals․

4․3 Interactive Activities for Grammar Reinforcement

Interactive activities in 3rd-grade grammar workbooks make learning engaging and fun․ These include crossword puzzles, word searches, and fill-in-the-blank exercises that reinforce grammar rules․ Students can practice identifying parts of speech, correcting sentences, and completing stories with appropriate vocabulary․ Games and quizzes also encourage active participation, making grammar concepts memorable․ These activities cater to different learning styles, ensuring that students stay motivated and retain what they’ve learned in a dynamic and enjoyable way․

Real-World Applications of Grammar Skills

Grammar skills are essential for clear communication in writing and speech․ Students apply these skills in writing paragraphs, essays, and creative stories, enhancing their ability to express ideas effectively․

5․1 Writing Paragraphs and Short Essays

Mastering grammar skills is crucial for effective writing․ Third-grade grammar workbooks often include exercises that guide students in organizing ideas into clear, structured paragraphs․ These activities focus on identifying main ideas, using topic sentences, and supporting details․ Students also learn to apply proper punctuation and capitalization rules when writing short essays․ Such practices help young writers develop coherence and clarity in their compositions, preparing them for more complex writing tasks in higher grades․ Grammar workbooks provide the tools needed to build confidence and proficiency in written communication;

5․2 Using Grammar in Creative Writing

Grammar skills are essential for creative writing, enabling students to express ideas vividly and accurately․ Third-grade workbooks often include exercises that encourage using descriptive language, such as adjectives and verbs, to craft engaging stories or poems․ These activities help students understand how grammar rules enhance storytelling and dialogue․ By applying proper punctuation and capitalization, young writers can create polished, imaginative pieces․ Interactive prompts and exercises in workbooks foster creativity while reinforcing grammatical accuracy, making writing a fun and meaningful learning experience․

5․3 Grammar for Effective Communication

Mastering grammar is crucial for clear and effective communication․ Third-grade workbooks emphasize proper punctuation, capitalization, and sentence structure to help students express themselves confidently․ By learning to use parts of speech and verb tenses accurately, children can convey their ideas in writing and speech․ Exercises in workbooks often focus on crafting complete sentences and organizing thoughts logically․ This foundational skill enables students to communicate their thoughts clearly, whether writing essays, sharing stories, or engaging in everyday conversations, fostering both academic and social success․

Additional Resources and Supplements

Supplement your child’s learning with online grammar tools, recommended workbooks, and PDF resources․ Tips for parents and teachers, like interactive activities, can further enhance grammar skills development effectively․

6․1 Online Tools for Grammar Practice

Online tools like K5 Learning offer free worksheets and interactive exercises for grammar practice․ Platforms such as FlipBuilder provide access to PDF workbooks like “studentbook oxford grammar 3․” These resources include self-correcting exercises, animations, and progress tracking․ They enhance learning by making grammar practice engaging and accessible․ Many tools are designed for home use, allowing parents and teachers to support students effectively․ These supplements are ideal for reinforcing lessons and keeping kids motivated to improve their grammar skills year-round․

6․2 Recommended Workbooks and PDF Resources

Recommended workbooks include “Our World 3 Grammar Workbook” and “Scholastic Success With Grammar Grade 3․” These resources provide comprehensive exercises on parts of speech, sentence structure, and punctuation․ PDFs like “studentbook oxford grammar 3” offer interactive and printable pages for practice; Many workbooks are designed for classroom or home use, featuring clear instructions and engaging activities․ They are ideal for reinforcing grammar concepts and helping students progress at their own pace․ These materials are widely available online for easy access and downloading․

6․3 Tips for Parents and Teachers to Support Learning

Parents and teachers can support learning by encouraging regular practice with grammar workbooks․ Interactive activities, like creating sentences with flashcards, can make learning engaging․ Providing feedback on exercises helps students understand their mistakes․ Encouraging reading and writing at home reinforces grammar skills․ Integrating grammar into daily conversations and routines also aids retention․ Using online tools and PDF resources, such as “studentbook oxford grammar 3,” can supplement traditional workbooks․ Consistency and a supportive environment are key to fostering mastery and confidence in grammar․

A 3rd-grade grammar workbook is an effective tool for improving language skills, offering structured exercises and activities to ensure a strong foundation for future academic success․

7․1 The Role of Consistent Practice in Grammar Mastery

Consistent practice is crucial for grammar mastery, as it reinforces foundational skills and builds confidence․ Regular exercises in workbooks help students internalize rules and apply them accurately․ Through repeated exposure to concepts like parts of speech, sentence structure, and punctuation, learners develop a strong command of language․ Practice also fosters problem-solving abilities and enhances creativity in writing․ By dedicating time to grammar drills and activities, students can achieve long-term proficiency and excel in communication․

7․2 Assessing Progress and Understanding

Assessing progress in grammar mastery involves regular quizzes, worksheets, and creative projects․ These tools help identify strengths and areas needing improvement․ By evaluating assignments and exercises, teachers and parents can track a child’s understanding of concepts like capitalization, punctuation, and sentence structure․ Feedback from these assessments guides targeted practice, ensuring personalized learning․ Celebrating small achievements motivates students, fostering confidence and a positive attitude toward grammar․ Continuous evaluation supports a comprehensive grasp of language skills, preparing learners for advanced communication tasks․

base of tongue exercises pdf

Base of tongue exercises target the posterior tongue muscles to improve strength, mobility, and coordination. These exercises are often recommended by speech therapists to address conditions like dysphagia. Regular practice enhances swallowing and speech clarity, relying on simple tools like gauze or tongue depressors for resistance. Consistency is key for noticeable progress.

Purpose and Benefits of Base of Tongue Exercises

Base of tongue exercises aim to enhance muscle strength, coordination, and mobility in the posterior tongue. These exercises are particularly beneficial for improving swallowing mechanics, reducing dysphagia symptoms, and clarifying speech articulation. By strengthening the base of the tongue, individuals can achieve better control during swallowing and speaking. Regular practice also promotes proper tongue positioning, reducing the risk of aspiration and improving overall oral motor function. Tools like gauze or tongue depressors are often used to provide resistance, helping to build endurance and stamina. Consistent practice can lead to significant improvements in both swallowing and communication abilities, making these exercises a valuable therapeutic tool for various conditions.

Importance of Tongue Strength for Swallowing and Speech

Tongue strength, particularly at the base, is crucial for effective swallowing and clear speech. The tongue’s muscles play a vital role in propelling food and liquid during swallowing, preventing aspiration. Weakness can lead to dysphagia and related complications. In speech, precise tongue movements are essential for articulation. Weakness may result in unclear speech or difficulty pronouncing words, affecting communication. Strengthening exercises, often using tools like gauze or tongue depressors, enhance muscle function. Improved strength leads to better coordination with other oral muscles, ensuring efficient swallowing and speech processes. Targeted exercises focusing on the base of the tongue are particularly beneficial in therapeutic settings for addressing swallowing disorders and improving speech clarity.

Types of Base of Tongue Exercises

Exercises include tongue stretching, resistance work, and mobilization techniques. Tools like gauze or tongue depressors are often used to enhance strength and coordination for improved function.

Tongue Stretching Exercises

Tongue stretching exercises involve extending the tongue to its maximum range in various directions. Stick out your tongue straight, then move the tip from side to side, holding each position for a few seconds. Use gauze or a washcloth to gently pull the tongue further, enhancing the stretch. These exercises improve flexibility, strength, and coordination of the tongue muscles, which are essential for swallowing and speech. Regular practice helps reduce fatigue and increases endurance. Start with 5 repetitions and gradually increase as comfort allows. Consistency is key to achieving noticeable improvements in tongue mobility and overall function.

Resistance Exercises for Tongue Strengthening

Resistance exercises for tongue strengthening involve using tools like gauze, washcloths, or tongue depressors to create opposition. Hold the tongue tip firmly with gauze and pull it back into the mouth while resisting. Repeat 3-5 times, gradually increasing resistance. Another exercise involves pressing the tongue tip against a tongue depressor. These exercises build muscle endurance and power, enhancing swallowing and articulation. Start with light resistance and progress as strength improves. It’s important to avoid pain and focus on a strong stretch. Consistency and proper form are key to achieving noticeable improvements in tongue strength over time.

Tongue Mobilization Techniques

Tongue mobilization techniques focus on improving flexibility and coordination by moving the tongue in various directions. Stick your tongue out and move it from side to side, holding each position for 5 seconds. Repeat 5 times, resting as needed. Another exercise involves protruding the tongue as far as possible and holding for 5 seconds. You can also practice moving the tongue tip to the roof of the mouth and back. These exercises enhance range of motion and strength, reducing fatigue. Perform them daily, gradually increasing repetitions as comfort allows. Consistency helps improve swallowing and speech clarity without causing discomfort or pain.

How to Perform Base of Tongue Exercises Effectively

Start with proper breathing to relax the throat. Use tools like gauze or tongue depressors for resistance. Focus on slow, controlled movements and gradually increase intensity. Track progress weekly.

Proper Breathing Techniques During Exercises

Proper breathing is essential for effective base of tongue exercises. Begin by inhaling deeply through your nose, filling your lungs completely, and exhale slowly through pursed lips. This technique helps relax the throat muscles and maintain focus. During exercises, avoid holding your breath, as it can cause tension. Instead, synchronize your breathing with each movement—inhale before starting and exhale during exertion. Diaphragmatic breathing is recommended to ensure a steady airflow, which supports consistent effort and prevents muscle strain. Proper breathing enhances exercise efficiency and promotes overall relaxation.

Using Tools Like Tongue Depressors or Gauze

Tongue depressors or gauze are commonly used to provide resistance during base of tongue exercises. To use a tongue depressor, place it gently on the tongue tip and apply light pressure. This helps strengthen the tongue muscles as they push against the depressor. For gauze, wrap it around the tongue tip and pull gently while resisting with the tongue. These tools enhance exercise effectiveness by increasing resistance, allowing for targeted muscle engagement. Ensure tools are clean and used with gentle force to avoid discomfort. Proper use of these aids can significantly improve tongue strength and coordination over time.

Safety and Precautions

Stop exercises if pain occurs; only a strong stretch should be felt. Avoid practicing on a full stomach. Use clean tools and seek professional guidance if discomfort persists.

Understanding When to Stop or Modify Exercises

Immediately stop exercises if experiencing pain, dizziness, or shortness of breath. Mild discomfort is normal, but sharp pain indicates overexertion. If fatigue or difficulty breathing arises, rest or modify the exercise. Adjust intensity or duration if exercises feel too strenuous. Consult a healthcare professional if discomfort persists or worsens. Prioritize comfort and safety to avoid injury or strain. Listen to your body and pause when needed to ensure a safe and effective workout routine.

Common Mistakes to Avoid During Practice

Common mistakes include improper tongue placement, overexertion, and inconsistent practice. Many individuals fail to maintain the correct tongue position during exercises, reducing effectiveness. Overexertion can lead to muscle strain or discomfort. Inadequate breathing techniques may hinder progress and cause fatigue. Ignoring proper posture or skipping warm-ups can also negatively impact results. Additionally, some individuals may not track their progress, making it difficult to adjust routines. To avoid these mistakes, ensure proper form, listen to your body, and maintain a consistent practice schedule. Regular monitoring and adjustments will help achieve optimal benefits and prevent setbacks.

Creating a Workout Plan

Creating a workout plan involves setting realistic goals, defining exercise repetitions, and tracking progress. Adjust routines based on individual needs and therapist feedback for optimal results.

Setting Realistic Goals and Repetitions

Setting realistic goals and repetitions is crucial for effective base of tongue exercises. Start with achievable targets, such as performing 3-5 repetitions of each exercise daily. Gradually increase the number of repetitions as strength and endurance improve. For example, begin with 5 repetitions of tongue stretching and resistance exercises, then progress to 10 or more as comfort allows. Goals should be specific, measurable, and aligned with individual needs, ensuring steady progress without overexertion. Regular assessment and adjustment of goals help maintain motivation and ensure exercises remain challenging yet manageable.

Tracking Progress and Adjusting Routine

Tracking progress in base of tongue exercises is essential for maximizing effectiveness. Maintain a journal to record the number of repetitions, sets, and any discomfort or improvement. Note advancements in tongue strength, swallowing ease, and speech clarity. Regularly review this data to assess progress and adjust the routine as needed. If exercises become too easy, increase repetitions or intensity. Conversely, if discomfort persists, reduce the workload temporarily. Adjustments should be gradual, ensuring consistent improvement without overexertion. Tailor the routine to individual progress, celebrating small milestones to stay motivated and engaged in the exercise program.

Additional Resources

Access detailed PDF guides and instructional videos online. Join forums and communities for support, tips, and expert advice on performing base of tongue exercises effectively.

Recommended PDF Guides for Base of Tongue Exercises

Find detailed PDF guides online that provide step-by-step instructions for base of tongue exercises. These resources often include illustrations and routines tailored for specific needs. Many guides emphasize the use of tools like gauze or tongue depressors for resistance training. They also outline proper techniques to avoid injury and maximize results. Some PDFs are designed for speech therapists, offering clinical insights, while others are geared toward home practice. These guides typically cover exercise variations, progression plans, and tracking methods. They are valuable for improving tongue strength, swallowing function, and speech clarity. Consistency and proper form are consistently highlighted for optimal outcomes.

Online Communities and Forums for Support

Joining online communities and forums can provide valuable support and guidance for base of tongue exercises. Platforms like Reddit, Facebook Groups, and specialized health forums offer spaces to share experiences and ask questions. Many speech therapy and dysphagia-focused communities include discussions on exercise routines and progress tracking. Users often exchange tips, recommend resources, and provide motivation. Professional forums, such as those for speech-language pathologists, may also offer evidence-based advice. These online spaces foster connection and accountability, helping individuals stay consistent with their exercise practices. Engaging with these communities can enhance your understanding and commitment to improving tongue strength and function.

celpip writing task 1 sample pdf

CELPIP Writing Task 1 requires test-takers to write a concise email (150-) in 27 minutes‚ responding to a given scenario. This task assesses writing skills‚ clarity‚ and coherence‚ making it essential to practice with sample PDFs for effective preparation.

Download sample PDFs here to enhance your writing skills.

1.1 Overview of CELPIP Writing Task 1

CELPIP Writing Task 1 involves composing a well-structured email in response to a specific scenario. Test-takers have 27 minutes to write an email between 150-. The task evaluates clarity‚ coherence‚ and the ability to convey information effectively. The email must address the given situation‚ whether formal or informal‚ and demonstrate proper formatting‚ tone‚ and vocabulary. Practicing with sample PDFs is highly recommended to understand the expected structure and content. These samples provide examples of how to organize ideas logically and meet the word limit. By reviewing these materials‚ candidates can improve their writing skills and familiarize themselves with the exam format. Access sample PDFs here for better preparation.

1.2 Importance of Practicing with Sample PDFs

Practicing with sample PDFs is crucial for excelling in CELPIP Writing Task 1. These resources provide real-life examples‚ helping you understand the expected format‚ tone‚ and structure. By reviewing sample emails‚ you can identify common scenarios and learn how to address them effectively. This practice enhances your ability to organize ideas logically‚ use appropriate vocabulary‚ and maintain coherence within the 150-200 word limit. Additionally‚ sample PDFs familiarize you with the exam’s timing and requirements‚ reducing anxiety during the actual test. Regular practice with these materials ensures that you can articulate your thoughts clearly and meet the evaluation criteria effectively. Download sample PDFs here to refine your writing skills and boost your confidence.

Structure of CELPIP Writing Task 1

CELPIP Writing Task 1 involves crafting a well-structured email with a clear subject line‚ greeting‚ body‚ and closing. Ensure the email is concise‚ logical‚ and free of errors.

2.1 Understanding the Email Format

Mastering the email format is crucial for CELPIP Writing Task 1. The email should include a clear subject line‚ a proper greeting‚ a well-organized body‚ and a polite closing. The subject line should briefly state the purpose‚ while the greeting sets the tone. The body must clearly address the scenario‚ providing all necessary details in a logical flow. Finally‚ the closing should thank the recipient and include your name. Using formal or informal language depends on the context. Practicing with sample PDFs helps familiarize yourself with the expected structure and tone. Ensure your email is concise‚ within 150-‚ and free of grammatical errors to achieve a high score.

View sample email formats here.

2.2 Key Components of a Task 1 Email

A CELPIP Writing Task 1 email must include a clear subject line‚ a proper greeting‚ a structured body‚ and a polite closing. The subject line should briefly summarize the email’s purpose‚ while the greeting sets the tone (e.g.‚ “Dear [Recipient’s Name]”). The body should address the scenario with clarity‚ providing all necessary details in a logical flow. The closing should thank the recipient and include your name. Ensuring your email is concise (150-) and free of errors is vital for a high score. Using sample PDFs can help you understand these components better and improve your writing skills.

Explore sample emails here.

Tips for Success in CELPIP Writing Task 1

Plan effectively‚ use clear vocabulary‚ and maintain a logical structure. Practice with sample PDFs to improve coherence and avoid grammatical errors‚ ensuring a polished and professional email.

View sample PDFs for practice.

3.1 Planning Your Response Effectively

Effective planning is crucial for a high-scoring response. Start by reading the task carefully and brainstorming key points. Allocate 5 minutes to outline the email’s structure‚ ensuring a clear introduction‚ body‚ and conclusion. Use bullet points to organize ideas‚ focusing on clarity and relevance. Practice timing yourself with sample PDFs to refine your strategy. A well-planned response ensures coherence and meets the 150-200 word requirement‚ enhancing your score in CELPIP Writing Task 1.

3.2 Using Appropriate Vocabulary and Tone

Using appropriate vocabulary and tone is essential for a high score in CELPIP Writing Task 1. Formal emails require professional language‚ while informal emails should be friendly yet clear. Avoid slang or overly complex words. Ensure your tone matches the recipient and scenario‚ such as expressing concern for complaints or gratitude for requests. Use transition words to maintain flow and coherence. Practice with sample PDFs to familiarize yourself with the expected language style. Consistent practice helps refine your vocabulary and tone‚ making your emails polished and effective for any given task.

Sample Answers for CELPIP Writing Task 1

CELPIP Writing Task 1 sample answers provide examples of well-structured emails for various scenarios‚ demonstrating appropriate vocabulary‚ tone‚ and format. These samples help candidates understand expected standards and improve their writing skills. Access sample PDFs for practice.

4.1 Formal Email Samples

Formal email samples for CELPIP Writing Task 1 demonstrate professional communication in scenarios like work-related requests or complaints. Examples include writing to a property agent about apartment issues or a restaurant manager about a reservation. These samples showcase proper structure‚ tone‚ and vocabulary‚ ensuring clarity and conciseness. They often include a clear subject line‚ polite introduction‚ detailed explanation‚ and a courteous closing. Practicing with these samples helps candidates master formal email writing‚ essential for scoring high in the CELPIP exam. Access sample PDFs to review and practice formal email formats effectively.

4.2 Informal Email Samples

Informal email samples for CELPIP Writing Task 1 illustrate casual communication‚ such as writing to a friend or family member. Examples include sending birthday wishes‚ sharing travel plans‚ or offering advice. These samples demonstrate the use of conversational language and a relaxed tone while maintaining clarity. They often include a friendly greeting‚ a brief explanation of the purpose‚ and a warm closing. Practicing with informal email samples helps candidates understand how to adapt their writing style to different contexts. Reviewing sample PDFs provides insight into structuring informal emails effectively for the CELPIP exam‚ ensuring a natural and engaging tone.

Common Mistakes to Avoid

Common mistakes include poor time management‚ grammar errors‚ and insufficient word count. Avoid rushing; ensure proper structure‚ vocabulary‚ and clarity to achieve a high score.

5.1 Time Management Errors

Time management is crucial in CELPIP Writing Task 1. Many candidates rush through planning‚ leading to disorganized emails. Allocate 5 minutes for brainstorming and structuring your response. Dedicate 20 minutes to writing and 2 minutes for proofreading to avoid common errors. Practicing with sample PDFs helps improve efficiency. For example‚ downloadable templates can guide you in structuring your email effectively. Ensure each section—greeting‚ body‚ and closing—is clear and concise. Proper time distribution ensures a coherent and polished response‚ maximizing your score.

5.2 Grammar and Spelling Mistakes

Grammar and spelling mistakes are common pitfalls in CELPIP Writing Task 1‚ significantly impacting scores. These errors often result from rushing or poor proofreading. To avoid them‚ ensure proper verb tense consistency‚ subject-verb agreement‚ and correct article usage. Additionally‚ avoid typos by reviewing your email before submission. Tools like grammar checkers can help‚ but reliance on them is risky. Practicing with sample PDFs‚ such as those found here‚ can improve your writing accuracy. Pay attention to punctuation and word choice to convey your message clearly. Regular practice and attention to detail are key to minimizing these mistakes and achieving a high score.

Resources for Practicing CELPIP Writing Task 1

Enhance your preparation with free online sample PDFs and paid courses offering detailed feedback. Utilize tools like grammar checkers and practice platforms to refine your skills.

Access resources here for effective practice.

6.1 Free Online Sample PDFs

Free online sample PDFs are an excellent resource for practicing CELPIP Writing Task 1. These PDFs provide real-life scenarios‚ sample emails‚ and model answers to help you understand the expected format and tone. Websites like CELPIP Samples and CelpipStore offer downloadable materials that include task prompts‚ scoring criteria‚ and annotated examples. Additionally‚ platforms like Hzadeducation offer free guides and templates to improve your writing structure. By reviewing these samples‚ you can familiarize yourself with common topics and refine your email-writing skills. Regular practice with these resources will help you achieve a high score in the CELPIP Writing Task 1.

6.2 Paid Courses and Writing Tools

Investing in paid courses and writing tools can significantly enhance your preparation for CELPIP Writing Task 1. Platforms like Hzadeducation and CelpipStore offer comprehensive courses with structured lessons‚ sample PDFs‚ and expert feedback. These resources often include video tutorials‚ interactive exercises‚ and personalized writing evaluations. Paid tools like CELPIP Samples Pro provide access to advanced strategies and real-time feedback‚ helping you refine your email-writing skills. Additionally‚ some courses offer live sessions with instructors who can address specific weaknesses. These paid resources are particularly useful for understanding scoring criteria and improving your ability to write clear‚ concise emails tailored to CELPIP requirements.

Consistent practice with sample PDFs and focused preparation are key to mastering CELPIP Writing Task 1. Regular review of structured emails and feedback will enhance your performance and score.

7.1 Final Tips for Achieving a High Score

To excel in CELPIP Writing Task 1‚ focus on clear structure‚ appropriate tone‚ and accurate grammar. Begin with a strong subject line and greeting‚ then organize your email into logical paragraphs. Use formal or informal language based on the scenario‚ and ensure your message is concise. Proofread for spelling and grammar errors‚ and always adhere to the 150-200 word limit. Practicing with sample PDFs will help you master the format and improve your vocabulary. Additionally‚ time management is crucial—spend a few minutes planning your response before writing. By following these strategies‚ you can confidently achieve a high score in the CELPIP Writing Task 1.

Download sample PDFs to refine your skills.

7.2 Importance of Consistent Practice

Consistent practice is vital for mastering CELPIP Writing Task 1. Regularly reviewing sample PDFs helps familiarize yourself with the task format‚ tone‚ and vocabulary. By practicing‚ you can identify and correct mistakes‚ improving clarity and coherence in your writing. Additionally‚ consistent practice builds confidence and helps you manage time effectively during the exam. Regularly working through sample questions ensures you can express your ideas clearly and meet the word count requirements. Over time‚ this dedication will enhance your ability to score high in the CELPIP Writing Task 1‚ making consistent practice an essential part of your preparation journey.

Access sample PDFs to practice effectively.

the bump birth plan pdf

A birth plan outlines preferences for labor, delivery, and postpartum care, ensuring a personalized experience. The Bump Birth Plan PDF offers a comprehensive template to guide expectant parents in making informed decisions.

What is a Birth Plan?

A birth plan is a written document outlining preferences for labor, delivery, and postpartum care. It is created by expectant parents in collaboration with their healthcare provider to ensure a personalized birthing experience. The plan typically includes details such as the desired location of birth, labor preferences, pain management options, and delivery procedures. The Bump Birth Plan PDF provides a structured template to help couples organize their thoughts and communicate their wishes effectively. This plan is not only a guide for medical staff but also a tool for parents to feel more prepared and in control of their experience. While it is flexible to accommodate unforeseen circumstances during labor, it serves as a clear expression of the family’s priorities and expectations. It is essential to discuss and share the plan with healthcare providers beforehand to ensure alignment and understanding.

Why is a Birth Plan Important?

A birth plan is essential as it allows expectant parents to communicate their preferences and priorities to healthcare providers. It ensures that their wishes are respected during labor, delivery, and postpartum care. The Bump Birth Plan PDF provides a clear and organized way to document these preferences, making it easier for medical staff to understand the family’s goals. Having a birth plan also helps reduce anxiety by preparing parents for the experience and ensuring they feel informed and in control. It fosters collaboration between parents and healthcare providers, creating a more personalized and supportive birthing experience. Additionally, it serves as a flexible guide that can adapt to unforeseen circumstances while still honoring the family’s values and choices. Ultimately, a birth plan empowers parents to take an active role in shaping one of life’s most significant moments.

Key Elements of a Birth Plan

A birth plan typically includes preferences for the location, labor process, pain management, delivery method, and postpartum care. The Bump Birth Plan PDF helps organize these details clearly and concisely.

Location of Birth

Deciding where to give birth is a crucial part of the planning process. Many expectant parents choose between a hospital, birthing center, or home birth, depending on their preferences and medical needs. The Bump Birth Plan PDF provides a section to specify the chosen location, ensuring healthcare providers are informed. This decision impacts the overall birthing experience, so it’s important to consider factors like medical facilities, comfort, and support. By clearly stating the location in the birth plan, parents can ensure their wishes are respected, creating a more personalized and stress-free experience during labor and delivery.

Labor and Delivery Preferences

Labor and delivery preferences outline how you envision your birthing experience. This includes choices like labor positioning, mobility, and the presence of support people. The Bump Birth Plan PDF provides a section to detail these preferences, ensuring healthcare providers understand your wishes. Preferences may also cover the use of medical interventions, monitoring, and the overall atmosphere during labor. Clearly communicating these preferences helps create a personalized and stress-free experience, aligning your birthing goals with medical guidelines. This section is crucial for expectant parents to express their desires, fostering a collaborative approach with healthcare teams during this significant life event.

Pain Management Options

Pain management options are a critical part of a birth plan, allowing expectant parents to outline their preferences for managing discomfort during labor. The Bump Birth Plan PDF includes a section for specifying whether natural methods, such as breathing techniques or hydrotherapy, are preferred, or if medical interventions like epidurals or IV pain relief are desired. This ensures that healthcare providers understand the individual’s pain tolerance and desired approach. Additionally, the template allows for noting any allergies or concerns regarding pain relief options. By clearly documenting these choices, parents can feel more prepared and in control of their birthing experience, aligning their pain management strategy with their overall birthing goals; This section is essential for creating a personalized and comfortable labor process.

Delivery and Pushing Preferences

Delivery and pushing preferences are a vital component of a birth plan, allowing parents to outline their desires for the actual birthing process. The Bump Birth Plan PDF provides a structured space to detail preferences such as the desired position during delivery, whether coached pushing is preferred, or if a mother wishes to push instinctively. It also allows for specifying preferences regarding delayed cord clamping, episiotomies, or the use of instruments like forceps. This section ensures that healthcare providers understand the mother’s wishes for the delivery, promoting a more aligned and empowering experience. By documenting these preferences, parents can feel more confident in their ability to guide the delivery process according to their personal comfort and goals. This section is crucial for ensuring a birthing experience that respects individual choices and priorities.

Creating a Birth Plan with The Bump

The Bump Birth Plan PDF is a comprehensive guide to crafting a personalized birth plan. It offers a user-friendly template to help expectant parents make informed decisions about their birthing experience.

Overview of The Bump Birth Plan PDF

The Bump Birth Plan PDF is a detailed and customizable guide designed to help expectant parents create a tailored birth plan. It includes sections for labor preferences, pain management options, delivery procedures, and postpartum care. The template is user-friendly, allowing couples to easily outline their wishes for a personalized birthing experience. With clear categories and space for specific instructions, it ensures that healthcare providers understand the family’s goals. Additionally, the PDF covers newborn care and emergency contact information, making it a holistic tool for preparing for childbirth. Its structured format makes it easy to share with medical teams, ensuring that everyone is aligned on the plan. This resource is invaluable for first-time parents or those seeking a more organized approach to their birth plan.

How to Customize the Template

Customizing The Bump Birth Plan PDF is straightforward and tailored to individual preferences. Users can edit sections like labor preferences, pain management, and delivery procedures. The template allows for personal notes and specific instructions, ensuring a personalized experience. It also includes space for newborn care preferences and emergency contact details. To customize, simply download the PDF, fill in the provided fields, and save the document. Couples can discuss their preferences with healthcare providers to align the plan with medical guidelines. The template’s flexibility ensures it meets diverse needs, from natural labor to medical interventions. By personalizing each section, expectant parents can create a birth plan that reflects their unique wishes and priorities. This customization process empowers families to feel prepared and in control of their birthing experience.

Sharing the Plan with Healthcare Providers

Sharing your birth plan with healthcare providers ensures they understand your preferences and priorities. Discuss the plan during prenatal appointments to address any concerns or questions. Provide copies to your obstetrician, midwife, and hospital staff to ensure everyone is aligned. This collaboration helps create a supportive environment during labor and delivery. Your healthcare provider can offer valuable insights based on medical expertise, helping to refine the plan while respecting your wishes. Open communication is key to making informed decisions together. By sharing your birth plan, you empower your healthcare team to honor your choices and provide personalized care. This step fosters trust and ensures a cohesive approach to your birthing experience.

Additional Considerations

Your birth plan should include postpartum care preferences, newborn procedures, and emergency contact information. These details ensure a smooth transition after delivery and address any unexpected situations.

Postpartum Care Preferences

Postpartum care preferences are essential for a smooth recovery and bonding experience. Consider including details about physical comfort, such as temperature, lighting, and pain management options. Emotional support, like having a partner or support person nearby, is also important. Additionally, specify preferences for breastfeeding assistance, skin-to-skin contact, and postpartum meals. Some parents also outline plans for rest, visitor policies, and any cultural or personal practices they wish to observe. These preferences help ensure the postpartum period aligns with your needs and promotes healing and bonding with your newborn.

Newborn Care and Procedures

Newborn care and procedures are crucial for ensuring your baby’s health and well-being immediately after birth. In The Bump Birth Plan PDF, you can outline preferences for initial procedures, such as delayed cord clamping, vitamin K injections, and eye ointment administration. Specify whether you want your baby to receive these standard treatments or if you prefer to delay them. Additionally, consider including preferences for the first bath, circumcision (if applicable), and feeding practices. You may also want to note your wishes for skin-to-skin contact, swaddling, or pacifier use. These details help guide healthcare providers in respecting your wishes while ensuring your newborn receives appropriate care. Discussing these preferences with your healthcare team ensures alignment with medical recommendations and your personal values.

Contact Information and Emergency Plans

In the The Bump Birth Plan PDF, it’s essential to include contact information and emergency plans to ensure smooth communication and preparedness. List your primary healthcare provider, pediatrician, and emergency contacts. Specify the nearest hospital and transportation arrangements in case of an emergency. Additionally, outline your preferences for unexpected situations, such as a change in delivery location or the need for a backup care provider. Including a contact list ensures that everyone involved in your care knows who to reach out to. Emergency plans provide peace of mind, knowing that you’re prepared for any scenario. This section is vital for maintaining clarity and organization during a time when decisions may need to be made quickly.

ace personal trainer manual

The ACE Personal Trainer Manual is a comprehensive guide for fitness professionals‚ offering insights into behavior change‚ exercise science‚ and business strategies. It serves as a valuable study tool for certification and a professional reference‚ providing trainers with the knowledge to design effective programs and make informed decisions to enhance client success and stay updated in the evolving fitness industry.

Overview of the Manual and Its Importance

The ACE Personal Trainer Manual is a comprehensive resource designed for aspiring and experienced fitness professionals. It covers essential topics such as behavior change‚ exercise science‚ and business strategies‚ providing a foundation for effective personal training. The manual is widely recognized as a valuable study tool for certification exams and a practical guide for real-world applications. Its importance lies in its ability to bridge theory and practice‚ offering evidence-based information to help trainers design safe and effective programs. By focusing on client-centered approaches‚ the manual equips trainers with the skills to enhance client outcomes and maintain long-term success in the fitness industry.

Key Features of the Fourth Edition

The fourth edition of the ACE Personal Trainer Manual offers enhanced content‚ including expanded coverage of behavior change theories‚ updated principles of adherence‚ and advanced functional assessments. It provides practical strategies for program design and emphasizes the application of exercise science to real-world training scenarios. New additions include detailed guidance on client motivation‚ ethical practices‚ and business development. The manual also includes study tools such as practice questions and case studies‚ making it an invaluable resource for both exam preparation and professional growth. These features ensure trainers are well-equipped to deliver effective‚ client-centered programs and stay current with industry standards and best practices.

Role and Scope of Practice for Personal Trainers

Personal trainers assess client fitness levels‚ design personalized programs‚ and provide guidance on exercise and nutrition. They motivate clients‚ ensure safety‚ and promote long-term adherence to healthy lifestyles.

Understanding the Role of a Certified Personal Trainer

A certified personal trainer guides clients toward their fitness goals by assessing needs‚ designing tailored programs‚ and providing ongoing support. They ensure exercises are performed safely and effectively‚ addressing proper form and technique. Trainers also motivate clients to adhere to their programs‚ helping them overcome barriers and maintain consistency. Their role extends beyond physical training‚ as they often offer nutrition advice and lifestyle guidance. Professional responsibilities include staying updated on industry trends‚ adhering to ethical standards‚ and fostering a positive client-trainer relationship. This comprehensive approach ensures clients achieve sustainable results and adopt healthier lifestyles‚ making trainers integral to the fitness journey.

Professional Responsibilities and Ethical Guidelines

Professional responsibilities of certified personal trainers include conducting thorough client assessments‚ designing personalized fitness plans‚ and ensuring safe exercise execution. Ethical guidelines emphasize confidentiality‚ informed consent‚ and maintaining professional boundaries. Trainers must stay within their scope of practice‚ avoiding medical advice unless qualified. They should promote realistic expectations‚ avoiding misleading claims. Continuous education is essential to stay updated on industry standards and research. Upholding ethical standards builds trust and credibility‚ fostering long-term client relationships and professional integrity. Adherence to these principles ensures trainers provide high-quality‚ client-centered services while maintaining the integrity of the fitness profession.

Theories of Behavior Change and Adherence

The ACE Personal Trainer Manual explores behavior change theories‚ such as Social Cognitive Theory‚ to motivate clients. Adherence is enhanced through goal-setting‚ social support‚ and positive reinforcement techniques.

Behavior Change Theories for Client Motivation

The ACE Personal Trainer Manual emphasizes behavior change theories to enhance client motivation. Social Cognitive Theory‚ focusing on observation‚ imitation‚ and reinforcement‚ is central. Trainers learn to set SMART goals‚ fostering accountability. Positive reinforcement and feedback encourage adherence. Understanding these principles helps trainers create personalized strategies‚ addressing barriers and promoting sustainable behavior change. The manual integrates these theories with practical techniques‚ equipping trainers to inspire and guide clients effectively toward their fitness goals. By aligning with these evidence-based approaches‚ trainers can build lasting motivation and support clients in achieving long-term success.

Principles of Adherence and Client Retention

The ACE Personal Trainer Manual outlines key principles to enhance client adherence and retention. Setting realistic goals and providing consistent feedback fosters motivation. Creating a supportive environment encourages long-term commitment. Understanding client preferences and barriers helps tailor programs‚ improving satisfaction. Regular progress monitoring and positive reinforcement sustain engagement. Building rapport and accountability strengthens the trainer-client relationship‚ ensuring clients stay dedicated to their fitness journey. These strategies‚ rooted in behavior change theories‚ empower trainers to design programs that promote lasting adherence and client loyalty‚ ultimately driving successful outcomes and retaining clients over time.

Functional Assessments and Program Design

Functional assessments guide trainers in designing personalized programs‚ ensuring exercises align with clients’ fitness goals and physical abilities while promoting safety and effectiveness in achieving desired outcomes.

Posture and Movement Analysis

Posture and movement analysis are crucial for identifying imbalances‚ misalignments‚ and inefficiencies in a client’s physical structure and movement patterns. This assessment helps trainers understand how clients move and where they may be at risk for injury. By evaluating static and dynamic postures‚ trainers can design programs that address specific issues‚ such as poor alignment or muscle imbalances. Proper analysis ensures exercises are tailored to improve posture‚ enhance movement efficiency‚ and reduce injury risk. This step is foundational for creating effective‚ client-centered training programs that promote long-term fitness and wellness. Accurate posture and movement analysis is key to achieving optimal results.

Designing Effective Exercise Programs

Designing effective exercise programs requires a personalized approach‚ tailoring workouts to meet clients’ specific goals‚ fitness levels‚ and preferences. Trainers should incorporate a variety of exercises to ensure well-rounded development‚ including cardiovascular‚ strength‚ flexibility‚ and functional training. Programs must align with clients’ lifestyles and motivations‚ fostering adherence and progress. Regular assessments and adjustments are essential to keep programs challenging and relevant. Incorporating principles of behavior change and adherence‚ trainers can create engaging routines that promote long-term commitment. A structured yet flexible approach ensures clients achieve their objectives while maintaining enjoyment and satisfaction in their fitness journey. This balance is key to sustainable success.

Principles of Exercise Science

The principles of exercise science are fundamental to creating safe and effective training programs‚ focusing on human anatomy‚ physiology‚ and biomechanics to optimize performance and prevent injury.

Understanding Human Anatomy and Physiology

Understanding human anatomy and physiology is essential for designing safe and effective exercise programs. The ACE Personal Trainer Manual explores skeletal muscle structure‚ joint movements‚ and the neuromuscular system‚ providing insights into how the body responds to exercise. This knowledge helps trainers identify imbalances‚ improve posture‚ and prevent injuries. By understanding energy systems and their roles in different types of exercise‚ trainers can tailor programs to meet specific fitness goals‚ such as endurance or strength. This foundational knowledge enables trainers to create personalized programs that enhance performance‚ promote longevity‚ and support overall client well-being‚ ensuring safe and effective training outcomes.

Applying Exercise Science to Training Programs

Applying exercise science to training programs involves using principles of anatomy‚ physiology‚ and biomechanics to create effective workouts. The ACE Personal Trainer Manual emphasizes understanding muscle balance‚ movement patterns‚ and energy systems to design programs that enhance performance and reduce injury risk. By incorporating concepts like progressive overload and periodization‚ trainers can help clients achieve specific fitness goals. The manual also highlights the importance of aligning exercises with individual needs‚ such as improving flexibility or building strength. This scientific approach ensures that training programs are both safe and efficient‚ empowering trainers to deliver personalized and impactful fitness experiences for their clients.

Business and Marketing Strategies for Trainers

The ACE Personal Trainer Manual provides insights into effective marketing‚ client acquisition‚ and retention strategies. It emphasizes building a strong professional brand and leveraging tools like social media and networking to attract and retain clients‚ ensuring long-term success in the competitive fitness industry.

Client Acquisition and Retention Techniques

Acquiring and retaining clients is crucial for a successful personal training business. The ACE Personal Trainer Manual emphasizes building strong relationships through effective communication and trust. Personalized fitness plans‚ regular progress tracking‚ and positive feedback foster client loyalty. Marketing strategies‚ such as social media engagement and networking‚ help attract new clients. Understanding client motivations and preferences ensures tailored approaches‚ enhancing satisfaction and retention rates. Ethical practices and professionalism further strengthen client-trainer relationships‚ ensuring long-term success in the competitive fitness industry.

Marketing Yourself as a Fitness Professional

Marketing yourself as a fitness professional is essential for building a successful career. The ACE Personal Trainer Manual highlights strategies like leveraging social media platforms to showcase expertise and engage with potential clients. Creating a professional website and utilizing online directories can increase visibility. Networking with healthcare providers and local businesses fosters partnerships and referrals. Offering free consultations or workshops demonstrates value and attracts clients. Highlighting certifications and success stories builds credibility. Consistent branding and a strong online presence help differentiate you in a competitive market‚ ensuring your services stand out to those seeking personalized fitness guidance.

Exam Preparation and Study Tips

The ACE Personal Trainer Manual is a key study tool‚ offering practice questions and strategies to help candidates prepare effectively for the certification exam.

Using the ACE Manual as a Study Tool

The ACE Personal Trainer Manual is an indispensable study tool for exam preparation‚ offering comprehensive coverage of fitness concepts‚ behavior change theories‚ and program design. It provides clear explanations‚ practical examples‚ and practice questions to reinforce learning. The manual’s structured format allows candidates to focus on key areas‚ ensuring a thorough understanding of essential topics. By aligning study habits with the manual’s content‚ aspiring trainers can efficiently prepare for the certification exam while gaining practical knowledge to apply in real-world scenarios. Its detailed insights and resources make it a cornerstone for successful exam preparation and professional development.

Practice Questions and Exam Strategies

The ACE Personal Trainer Manual includes practice questions and strategies to help candidates prepare effectively for the certification exam. These questions simulate real exam scenarios‚ allowing individuals to assess their knowledge and identify areas for improvement. The manual also provides tips on test-taking techniques‚ such as time management and minimizing errors. By utilizing these resources‚ aspiring trainers can approach the exam with confidence. The practice questions cover a wide range of topics‚ from behavior change theories to program design‚ ensuring a thorough understanding of key concepts. This section is designed to help candidates feel prepared and focused on exam day.