over under game manual

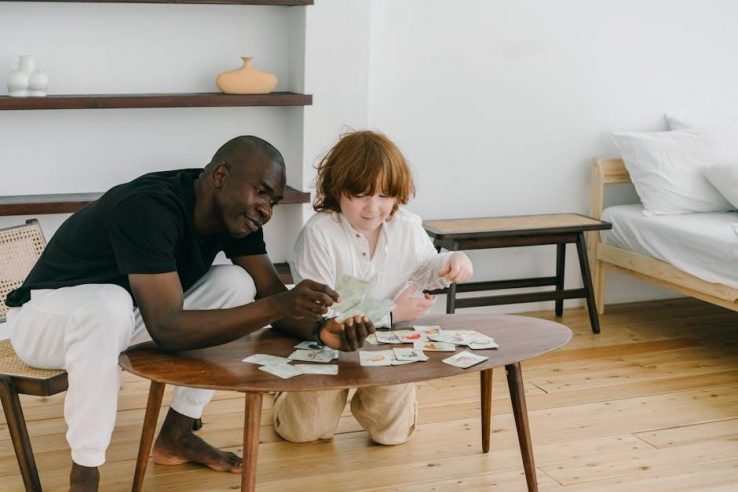
Over/Under is a trivia-based card game designed by Reiner Knizia, published by Gamewright in 2008. It combines guessing and strategy, making it a fun, portable party game for 2-4 players.

1.1 Overview of the Game

Over/Under is a trivia-based card game where players estimate whether answers to unusual questions are over or under a specific value. Designed by Reiner Knizia, it combines guessing, strategy, and social interaction. The game includes 200 cards with three questions each, offering diverse challenges. Players take turns reading questions and predicting answers, with the goal of collecting the most cards by guessing correctly. Its portable design and simple rules make it ideal for parties or casual gatherings. Over/Under encourages creative thinking and laughter, making it a engaging experience for 2-4 players. The game’s quick rounds and competitive nature ensure continuous fun, appealing to both trivia enthusiasts and casual gamers alike.

1.2 Brief History and Designer

Over/Under was created by renowned game designer Reiner Knizia and published by Gamewright in 2008. Knizia, a German mathematician turned game designer, is known for his innovative and strategic games. Over/Under is part of Gamewright’s Port-A-Party series, emphasizing portability and ease of play. The game was initially released as “Die Größe macht’s!” in German, later adapted for international markets. Its success stems from Knizia’s ability to blend trivia with betting mechanics, creating a unique party experience. Over/Under has since become a staple in many game collections, praised for its accessibility and entertainment value, making it a standout title in Knizia’s extensive portfolio of award-winning games.

Components of the Game

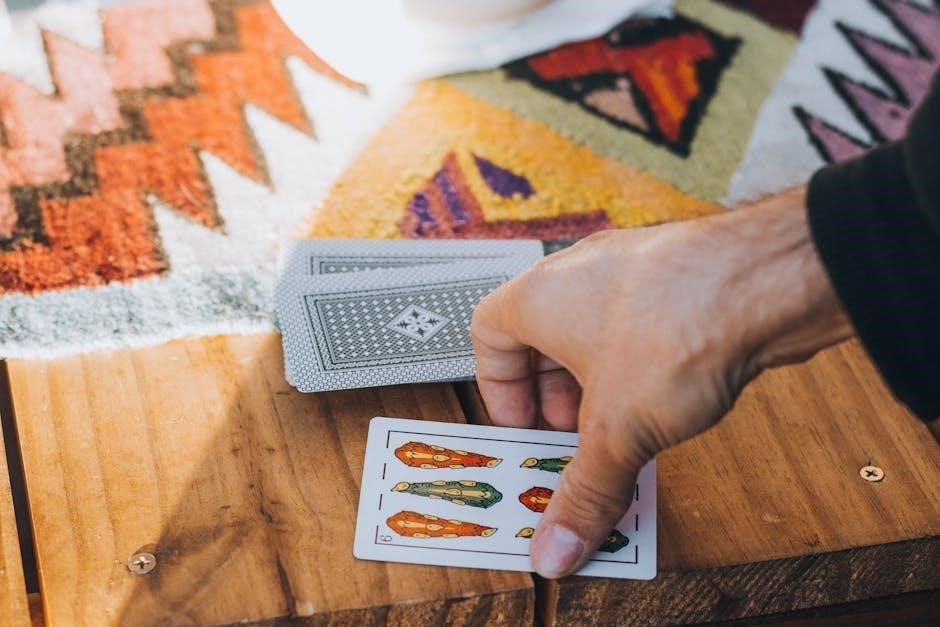
The game includes 200 question cards, each containing three unique trivia questions. Additional materials are minimal, making it lightweight and portable for easy gameplay anywhere.

2.1 Number of Cards and Questions

The Over/Under game consists of 200 unique question cards, each featuring three distinct trivia questions. This extensive library ensures varied and engaging gameplay, catering to diverse knowledge bases. The questions cover a wide range of topics, from historical facts to scientific data, designed to challenge players’ estimation skills. With 600 questions in total, the game offers countless opportunities for fun and learning. The card design is straightforward, with clear instructions and answers printed on the back, making it easy for players to verify their guesses. This setup ensures that each round is quick and seamless, keeping the game dynamic and entertaining for all participants.

2.2 Additional Materials Needed

Beyond the base game, minimal additional materials are required to enhance gameplay. Players may benefit from pens and paper for note-taking or tracking scores. Tokens or small objects can serve as betting markers for competitive play. A flat, stable surface is essential for laying out cards and managing the game flow. While not mandatory, a timer can be used to speed up decision-making. Ensuring all players have equal access to these materials ensures fairness and smooth gameplay. These simple additions complement the core components, enriching the overall experience without complicating the setup.

Setup and Initial Rules

Begin with 2-4 players, designating one as the initial dealer. Each player receives an equal number of cards. Place an ante bet to start the game. The dealer draws the first card, and the game proceeds with players guessing “over” or “under” for each question card presented.

3.1 How to Prepare for the Game

Start by gathering 2-4 players and shuffling the deck of 200 question cards. Designate one player as the initial dealer, who will manage the card distribution. Each player should place an ante bet to begin the game. The dealer then deals the first card face-up to themselves, determining the starting point. Players should organize their betting areas, ensuring space for “Over” and “Under” bets. The dealer will then draw the first question card, reading it aloud to initiate the guessing process. Ensure all players understand the rules and betting mechanisms before proceeding. This setup ensures a smooth and organized start to the game.

3.2 Determining the Starting Player

To determine the starting player, gather all players and have them discuss who last walked under a bridge. The player who did so most recently becomes the first question master. If no one has recently walked under a bridge, choose the player who last crossed a bridge. If neither applies, the youngest player starts. The question master shuffles the deck and begins the game by reading the first question. This method adds a fun, personal touch to initiating the game, ensuring everyone starts engaged and ready to play. The role then rotates clockwise after each round, maintaining fair participation.

Rules of Play

Players guess whether answers are over or under the correct value. Correct guesses win the card, while incorrect guesses remove it. Turns pass clockwise after each round.

4.1 Guessing Mechanism: Over or Under

The core of the game revolves around the “Over or Under” guessing mechanism. Players take turns acting as the question master, drawing a card and reading one of its three trivia questions aloud. The other players then collectively estimate the correct numerical answer. The question master decides whether the given answer is either “over” or “under” the actual value. If the guess is correct, the question master wins the card and their turn ends. If incorrect, the card is discarded, and the next player becomes the question master. This dynamic mechanism ensures quick turns and engaging gameplay for all participants.

4.2 Winning Conditions for Each Round

In the Over/Under game, a player wins a round by correctly guessing whether the answer to a trivia question is “over” or “under” the actual value. If the guess is correct, the question master wins the card, adding it to their collection. The turn then ends, and the next player becomes the question master. If the guess is incorrect, the card is discarded, and the next player takes over. The game continues until a predetermined number of cards are collected. The player with the most cards at the end is declared the winner, making card accumulation the ultimate objective of the game.

4.3 Turn Progression and Card Management

During each turn, the question master draws a card and reads one of its three questions. Players then guess whether the correct answer is over or under the value provided. The question master decides if the guess is correct, awarding the card to themselves if correct or discarding it if incorrect. The turn then passes to the next player, maintaining the flow of the game. Effective card management ensures that each card is used only once, preventing repetition and keeping the game dynamic and engaging for all participants.

Variations of the Game

Over/Under offers two main variations: a party version for casual play and a casino version with betting rules, each catering to different player preferences and settings.

5.1 Party Game Version

The party version of Over/Under is designed for casual play, emphasizing fun and interaction. Players take turns as the “question master,” reading a question from the card. Others estimate whether the correct answer is higher (over) or lower (under) than a target number. If the guess is correct, the player wins the card. The game encourages laughter and debate, making it ideal for groups. Its portability and simple rules allow it to be played anywhere, making it a great choice for gatherings or events. The party version focuses on entertainment, offering a lighthearted experience for players of all ages.

5.2 Casino Version Rules

The casino version of Over/Under introduces betting elements, adding excitement and stakes. Players wager on whether the sum of three cards will be under 18 or over 23. Four to eight decks are used, with card values similar to blackjack (aces always 11). Bets are placed on “Under” or “Over,” and players win even money if correct. The game debuted at Magnolia Bluffs Casino in 2016, offering a unique blend of chance and strategy. Its simplicity makes it accessible to casino-goers, while the betting mechanism adds a thrilling layer of risk and reward, appealing to both casual and experienced players.

Strategies for Success

Analyzing question difficulty and player behavior is key. Understanding trends and managing card flow can enhance guessing accuracy, while psychological insights help in outsmarting opponents effectively.

6.1 Understanding Question Difficulty

Success in Over/Under hinges on recognizing the difficulty of questions; Easier questions yield predictable answers, making it simpler to guess if responses are over or under. Conversely, harder questions often have more variable answers, requiring careful analysis. Players should assess the knowledge level of participants and adjust their strategies accordingly. For instance, if a question pertains to common knowledge, most answers may cluster around a specific number, making it easier to predict. However, obscure or complex questions can lead to more dispersed estimates, increasing uncertainty. By identifying question difficulty, players can make more informed decisions, enhancing their chances of winning.

6.2 Psychological Aspects of Guessing

Psychology plays a crucial role in Over/Under, as players must anticipate others’ estimates. Confidence and hesitation can influence group dynamics, often leading to second-guessing. Strategic players may bluff by expressing certainty to sway others’ decisions. Additionally, the tendency to anchor on initial guesses can lead to biases, affecting accuracy. Understanding these psychological elements allows players to manipulate perceptions and gain an edge. For instance, a confident prediction might pressure others to align their guesses, even if uncertain. Conversely, cautious behavior can create doubt and spread uncertainty. Mastering these interpersonal dynamics is key to outsmarting opponents and making smarter guesses.

Over/Under is an engaging, strategic game blending trivia and psychological insight. Perfect for parties, it fosters lively interaction and laughter, making it a must-have for any game collection.

7.1 Final Thoughts on Gameplay

Over/Under offers a unique blend of trivia, strategy, and social interaction, making it a standout party game. Its simplicity and portability ensure it’s easy to learn and play anywhere. Players enjoy the challenge of estimating answers and the thrill of guessing correctly. The game’s design encourages lively discussions and laughter, fostering a fun atmosphere for gatherings. With its quick rounds and competitive nature, Over/Under appeals to a wide audience, from casual gamers to trivia enthusiasts. It’s a great addition to any game collection, providing hours of entertainment and mental stimulation. The combination of trivia and strategic guessing keeps players engaged and eager for more.

7.2 Why Over/Under is a Great Party Game

Over/Under excels as a party game due to its simplicity, portability, and ability to spark lively interactions. Its trivia-based gameplay ensures that players of all knowledge levels can participate, making it inclusive and fun for diverse groups. The guessing mechanism adds an element of unpredictability, keeping everyone engaged and laughing. The game’s quick rounds and competitive nature make it ideal for social gatherings, allowing players to jump in and out effortlessly. Its compact design ensures it can be played anywhere, from small parties to larger events. Over/Under’s unique blend of trivia and strategy creates a dynamic, entertaining experience that appeals to a wide audience, solidifying its place as a standout party game.

berenstain bears pdf

The Berenstain Bears series, created by Stan and Jan Berenstain, features over 350 titles, following the adventures of Papa, Mama, Brother, and Sister Bear. These heartwarming stories address everyday challenges, promoting social skills and moral values, making them a timeless favorite in children’s literature.

1.1 Overview of the Beloved Children’s Book Franchise

The Berenstain Bears, created by Stan and Jan Berenstain, is a cherished children’s book franchise featuring Papa, Mama, Brother, and Sister Bear. With over 350 titles, the series addresses everyday challenges, fostering social skills and moral values. Its timeless themes and engaging storytelling have made it a favorite for generations, ensuring its lasting impact on children’s literature and entertainment.

1.2 Historical Background and Creation by Stan and Jan Berenstain

Stan and Jan Berenstain launched the Berenstain Bears series in 1962 with The Big Honey Hunt. Their collaboration blended humor with relatable family dynamics, creating a beloved franchise. After Stan’s passing in 2005, Jan continued until her death in 2012. Their son, Mike, now carries forward the legacy, ensuring the Bears remain a staple in children’s literature and entertainment.

Popular Berenstain Bears Books

The series includes over 350 titles, with bestsellers like The Berenstain Bears and the New Baby and The Berenstain Bears Go to School, addressing relatable childhood experiences.

2.1 Classic Titles and Their Impact on Children’s Literature

Classic titles like The Big Honey Hunt and The Berenstain Bears and the New Baby have captivated readers with their simple yet meaningful storytelling. These books address universal themes like responsibility and family changes, resonating with children and parents alike. With over 260 million copies sold, the series has become a cornerstone of children’s literature, offering timeless lessons and fostering a love for reading across generations.

2.2 Bestselling Books in the Series

Titles like The Big Honey Hunt, The Berenstain Bears and the New Baby, and The Berenstain Bears Go to School are among the bestsellers. These books have sold millions of copies worldwide, offering relatable stories that tackle everyday challenges. Their enduring popularity stems from their ability to connect with children and parents, making them cherished additions to home libraries and classrooms alike.

Themes and Lessons in Berenstain Bears Stories

The series emphasizes moral values like honesty, kindness, and responsibility, while addressing real-life challenges such as sharing, fear, and friendship, making it a valuable resource for children.

3.1 Moral Lessons and Social Skills Development

The Berenstain Bears series excels at teaching moral lessons and social skills through relatable stories. Themes like honesty, kindness, and responsibility are woven into tales of Papa, Mama, Brother, and Sister Bear’s everyday challenges. These stories help children navigate real-life situations, such as sharing, overcoming fears, and building friendships. The series emphasizes empathy, self-control, and problem-solving, making it a trusted resource for parents and educators fostering positive character development in young readers.

3.2 Addressing Real-Life Challenges for Kids

The Berenstain Bears series tackles real-life challenges faced by children, such as dealing with bullies, starting school, and managing sibling rivalry. Stories like The Berenstain Bears and the Trouble at School and The Berenstain Bears and the Sitter provide gentle guidance on overcoming common childhood anxieties. These relatable scenarios help kids develop resilience and confidence, making the series a valuable tool for addressing emotional and social growth in a comforting and accessible way.

The Evolution of the Series Over the Years

Created by Stan and Jan Berenstain, the series expanded from its 1962 debut, The Big Honey Hunt, to over 400 titles. Mike Berenstain continues the legacy, introducing new editions and digital formats like PDFs, ensuring the Bears’ timeless stories remain accessible to modern readers while maintaining their original charm and educational value.

4.1 Expansion of the Series and New Editions

Since the 1962 debut of The Big Honey Hunt, the series has grown to over 400 titles, including new editions and reprints. Recent releases in 2025 feature bold, original stories alongside classic reissues. Digital formats like PDFs have expanded accessibility, allowing modern readers to enjoy the Bears’ adventures. This evolution ensures the series remains fresh and engaging for new generations while honoring its beloved legacy.

4.2 Contribution of Mike Berenstain to the Franchise

Mike Berenstain, son of Stan and Jan, has seamlessly continued the legacy, introducing modern themes while maintaining the series’ core values. His contributions include new storylines, such as The Berenstain Bears Values and Virtues Treasury, and digital initiatives like PDF editions, ensuring the franchise remains relevant and accessible to contemporary readers, thus perpetuating the timeless appeal of the Bear family’s adventures.

Collecting Berenstain Bears Books and Memorabilia

Collectors seek rare editions like The Big Honey Hunt and memorabilia, including toys, artwork, and themed items, adding sentimental and monetary value to their collections.

5.1 Rare and First-Edition Books

Rare editions of Berenstain Bears books, such as first prints of The Big Honey Hunt, are highly sought after by collectors. These books, often in pristine condition, can command high prices due to their scarcity and historical significance. Collectors also hunt for limited editions and signed copies, which add unique value to any Berenstain Bears collection, making them treasured possessions for fans and enthusiasts alike.

5.2 Memorabilia and Ephemera for Fans

Berenstain Bears memorabilia, including plush toys, posters, and activity books, delights fans of all ages. Rare items like vintage toys and signed artwork are highly prized. Ephemera such as stickers, trading cards, and event-exclusive items add uniqueness to collections, allowing fans to celebrate their love for Papa, Mama, Brother, and Sister Bear beyond the books, creating a lasting connection to the beloved series.

Modern Adaptations and Media

The Berenstain Bears have expanded into TV shows, animated series, and live stage productions, bringing their timeless tales to new audiences while delighting long-time fans.

6.1 TV Shows and Animated Series

The Berenstain Bears have been adapted into several TV shows and animated series, bringing their charming stories to life. These adaptations faithfully capture the essence of the books, featuring the Bear family’s adventures and lessons. With vibrant animation and engaging storylines, the shows entertain and educate children, while appealing to parents who grew up with the series. They remain a beloved part of the franchise’s media expansion.

6.2 Stage Productions and Live Shows

The Berenstain Bears have also delighted audiences through stage productions and live shows, bringing their adventures to life with colorful costumes and engaging storylines. These performances often feature musical elements, making them a captivating experience for children and families. Live shows adapt popular book stories, emphasizing lessons on friendship and growing up, while maintaining the charm of the original tales.

Availability of Berenstain Bears in PDF Format

Berenstain Bears books are widely available in PDF format, offering convenient digital access to classic stories. Fans can find these eBooks on official platforms or popular bookstores.

7.1 Where to Find Digital Copies of the Books

Digital copies of Berenstain Bears books are readily available on platforms like Amazon, Barnes & Noble, and Google Books. Fans can also visit the official Berenstain Bears website for direct links to eBooks. Additionally, many online retailers offer PDF versions, ensuring easy access to these beloved stories for readers worldwide.

7.2 Benefits of Digital Versions for Readers

Digital versions of Berenstain Bears books offer convenience, accessibility, and space-saving benefits. Readers can carry multiple titles on devices like tablets or e-readers, making them ideal for travel. Adjustable font sizes and search features enhance readability and navigation. Additionally, digital formats allow fans to easily access and organize their favorite stories, ensuring timeless adventures remain just a click away.

Fan Engagement and Community

The official Berenstain Bears website offers resources, fostering a strong fan community. Enthusiasts connect through forums, sharing memories and discoveries, while staying updated on new releases and activities.

8.1 Official Website and Resources

The official Berenstain Bears website serves as a hub for fans, offering detailed information on books, videos, and series history. It provides links to purchase books, download resources, and explore the Bear family’s adventures. The site also features updates on new releases, events, and interactive content, making it a valuable resource for both collectors and young readers alike.

8.2 Fan Communities and Forums

Fans of the Berenstain Bears series actively engage in online communities and forums, sharing their love for the books and characters. These platforms offer discussions on favorite stories, character development, and even tips for finding rare editions or PDF versions of the books. Enthusiasts also share fan art, reviews, and insights, fostering a sense of belonging among readers of all ages who cherish the Bear family’s timeless adventures and lessons.

The Berenstain Bears’ legacy endures, charming new generations through timeless stories. Their availability in PDF format ensures accessibility, introducing the Bear family’s adventures to a digital audience.

9.1 The Legacy of the Berenstain Bears

The Berenstain Bears have left an indelible mark on children’s literature, with over 260 million copies sold. Their timeless stories, addressing real-life challenges, have guided generations, making them a beloved part of many readers’ childhoods. The series’ enduring popularity ensures its continued relevance, offering moral lessons and entertainment to new audiences, including those discovering the books in digital formats like PDF.

9.2 Future of the Series and Its Impact

The Berenstain Bears series continues to thrive with new releases and editions, ensuring its relevance for future generations. Mike Berenstain’s contributions keep the stories fresh, while digital formats like PDFs expand accessibility. The series remains a cornerstone of children’s literature, offering timeless lessons and entertainment that will inspire readers for years to come, solidifying its enduring legacy.

7 habits pdf

Stephen Covey’s The 7 Habits of Highly Effective People is a timeless guide to personal and professional success. Published in 1989, it remains a bestseller, offering a principle-centered approach to effectiveness, fairness, and integrity, empowering millions worldwide to achieve their full potential.

Overview of the 7 Habits and Their Importance

The 7 Habits of Highly Effective People by Stephen Covey is a comprehensive framework for personal and professional growth. These habits are timeless principles that focus on character development, guiding individuals to achieve their highest potential. The habits are divided into three categories: Private Victory (Habits 1-3), Public Victory (Habits 4-6), and Renewal (Habit 7). Together, they create a holistic approach to effectiveness, emphasizing proactive behavior, goal-setting, and self-improvement. By fostering integrity, fairness, and mutual benefit, the habits empower individuals to build strong relationships, achieve personal fulfillment, and succeed in their careers. Their importance lies in their universal applicability, making them invaluable for anyone seeking lasting change and success in both personal and professional life.

Private Victory: Habits 1-3

Private Victory (Habits 1-3) forms the foundation of personal effectiveness, focusing on self-discipline and personal growth. These habits help individuals build a strong character and direction in life, essential for lasting success.

Habit 1: Be Proactive

Be Proactive is the first habit, emphasizing personal responsibility and initiative. It encourages individuals to focus on their Circle of Influence, acting rather than reacting. Proactive people recognize their ability to choose responses to life’s challenges, fostering a mindset of accountability and empowerment. This habit promotes self-awareness, helping individuals avoid being influenced by external factors beyond their control. By being proactive, one can take charge of their personal and professional growth, leading to greater effectiveness and confidence. This foundational habit sets the stage for the subsequent habits, as it cultivates the self-discipline needed for lasting success.

Habit 2: Begin with the End in Mind

Habit 2, Begin with the End in Mind, focuses on setting long-term, personal, and professional goals. It encourages individuals to envision their desired outcomes and align their daily actions with these objectives. This habit emphasizes the importance of having a clear sense of direction and purpose, which helps prioritize efforts effectively. By creating a personal mission statement, individuals can guide their decisions and actions, ensuring they contribute to their ultimate goals. This habit builds on Habit 1 (Be Proactive) by giving direction to proactive efforts. It promotes a forward-thinking mindset, helping individuals avoid being distracted by less important tasks. Covey also introduces the concept of time management as a tool to prioritize activities that align with one’s values and long-term vision, fostering a sense of control and fulfillment in life.

Habit 3: Put First Things First

Habit 3, Put First Things First, focuses on effective time management and prioritization. It emphasizes organizing tasks based on importance and urgency, ensuring alignment with personal and professional goals. Covey introduces the Time Management Matrix, categorizing activities into four quadrants: urgent and important, important but not urgent, urgent but not important, and neither urgent nor important. By prioritizing Quadrant II (important but not urgent), individuals can focus on long-term goals, prevent crises, and reduce stress. This habit encourages delegation of less critical tasks and avoiding time-wasting activities. It also highlights the importance of scheduling personal time for self-care and renewal, fostering a balanced and productive lifestyle. By mastering Habit 3, individuals can achieve greater efficiency, reduce procrastination, and create a sense of control over their time and responsibilities. This habit builds on Habits 1 and 2 by providing practical tools for proactive goal achievement.

Public Victory: Habits 4-6

Public Victory: Habits 4-6 focuses on interpersonal success. Habit 4 encourages Win-Win outcomes, fostering mutual benefit. Habit 5 promotes empathy, seeking understanding before being understood. Habit 6 leverages synergy, combining strengths for greater results.

Habit 4: Think Win-Win

Habit 4, Think Win-Win, emphasizes the importance of creating mutually beneficial solutions. This habit shifts focus from a competitive, zero-sum mindset to one of collaboration and shared success. By valuing both personal and others’ goals, individuals build trust and strong relationships. Covey argues that Win-Win thinking fosters long-term success and integrity. It encourages seeking outcomes where all parties feel satisfied, leading to stronger networks and opportunities. This principle is key in both personal and professional contexts, ensuring sustainable and ethical results. Thinking Win-Win requires empathy, communication, and a commitment to fairness, making it a cornerstone of effective interpersonal dynamics. It’s about finding solutions that truly benefit everyone involved, creating a foundation for lasting success and harmony.

Habit 5: Seek First to Understand, Then to Be Understood

Habit 5, Seek First to Understand, Then to Be Understood, focuses on the importance of empathy and effective communication. Covey stresses the need to truly listen and comprehend others’ perspectives before seeking to express your own. This habit involves diagnostic listening, where you ask questions and seek clarification to fully grasp the other person’s point of view. By doing so, you build trust, resolve conflicts more effectively, and strengthen relationships. Covey also highlights the value of empathy in this habit, encouraging individuals to approach conversations with an open mind and a willingness to understand. This habit is foundational for effective collaboration and mutual understanding, fostering a deeper connection between individuals. It emphasizes that true communication begins with listening, not speaking, and that understanding others is the first step to being understood.

Habit 6: Synergize

Habit 6, Synergize, focuses on the power of teamwork and collaboration to achieve outcomes greater than individual efforts. Covey defines synergy as the idea that the whole is greater than the sum of its parts. This habit encourages individuals to value differences and combine strengths to create innovative solutions. Synergy goes beyond cooperation; it involves open communication, active listening, and a willingness to compromise. Covey emphasizes that synergy thrives in an environment of trust and mutual respect, where individuals feel comfortable sharing ideas. For example, in a team setting, synergizing can lead to creative breakthroughs and more effective problem-solving. By embracing synergy, individuals and teams can overcome challenges and achieve extraordinary results that surpass what could be accomplished alone. This habit is a cornerstone of public victory, fostering collaboration and collective success. It highlights the importance of unity and diversity in achieving shared goals.

Renewal: Habit 7

Habit 7, Sharpen the Saw, focuses on self-renewal and continuous improvement. It emphasizes maintaining and enhancing the four dimensions of human nature: physical, social/emotional, spiritual, and mental. Regular renewal ensures effectiveness and longevity in personal and professional life, fostering a balanced and fulfilling existence. Covey advocates for activities like exercise, meditation, and reflection to recharge and grow, ensuring sustained vitality and purpose. This habit is essential for long-term success and well-being, enabling individuals to adapt to change and maintain their effectiveness over time. By prioritizing renewal, individuals can sustainably apply the first six habits, leading to a life of integrity, harmony, and continuous progress.

Habit 7: Sharpen the Saw

Habit 7, Sharpen the Saw, focuses on self-renewal and continuous improvement. It emphasizes maintaining and enhancing the four dimensions of human nature: physical, social/emotional, spiritual, and mental. Regular renewal ensures effectiveness and longevity in personal and professional life, fostering a balanced and fulfilling existence. Covey advocates for activities like exercise, meditation, and reflection to recharge and grow, ensuring sustained vitality and purpose. This habit is essential for long-term success and well-being, enabling individuals to adapt to change and maintain their effectiveness over time. By prioritizing renewal, individuals can sustainably apply the first six habits, leading to a life of integrity, harmony, and continuous progress.

The Impact and Legacy of the 7 Habits

The 7 Habits of Highly Effective People has sold over 40 million copies worldwide, becoming one of the most influential self-help books in history. Its timeless principles have reshaped personal and professional development, inspiring millions to embrace integrity, fairness, and human dignity. Covey’s work remains a cornerstone of leadership and self-improvement, leaving a lasting legacy in global culture and business practices.

How the 7 Habits Have Influenced Personal and Professional Development

Stephen Covey’s 7 Habits has revolutionized personal and professional growth by providing a principle-centered framework for effectiveness. Its emphasis on proactive behavior, goal-setting, and ethical leadership has empowered individuals to achieve balance in their lives and careers. The book’s timeless principles, such as “Begin with the End in Mind” and “Think Win-Win,” have become integral to modern leadership and self-improvement practices. By focusing on character development, the 7 Habits has helped millions cultivate stronger relationships, improve communication, and enhance decision-making skills. Its holistic approach, addressing physical, emotional, spiritual, and mental well-being, has made it a cornerstone of personal development. Organizations worldwide have adopted these habits to foster collaboration and synergy, leading to sustained success. The book’s enduring influence is a testament to its universal relevance and transformative power in both personal and professional spheres.

silent knight 5208 programming manual

This manual provides a comprehensive guide for installing, operating, and programming the Silent Knight 5208 Fire Control/Communicator, ensuring optimal system performance and compliance with safety standards.

1.1 Overview of the Silent Knight 5208 Fire Control/Communicator

The Silent Knight 5208 is a versatile fire control and communicator panel designed for commercial fire alarm systems. It supports up to 10 zones, 4 NACs, and 4 relays, offering flexible configurations. The system is NFPA 72 compliant, ensuring reliable performance and safety. It features advanced programming options, including cross-alert groups for water systems and remote computer programming capabilities. Designed for ease of use, the SK-5208 provides clear display messages and system navigation, making it a robust solution for fire safety applications.

1.2 Key Features and Benefits of the SK-5208

The SK-5208 offers 10 zones, 4 NACs, and 4 relays, providing ample flexibility for system customization. Its advanced features include cross-alert groups for water systems and remote programming via SKSS. The system is NFPA 72 compliant, ensuring adherence to fire safety standards. It also supports silent knight software suite for remote monitoring and control. The SK-5208 is user-friendly, with clear display messages and intuitive navigation, making it a reliable and efficient choice for fire alarm control systems;

Importance of Proper Installation and Setup

Proper installation ensures system reliability and safety, avoiding damage from static charges. Follow manual instructions to comply with standards and maintain optimal fire alarm performance.

2.1 ESD Precautions and Handling

Handling components requires ESD precautions to prevent damage. Use static-suppressive packaging and discharge static electricity by grounding yourself before handling circuits. This ensures component protection and system reliability during installation and maintenance, aligning with best practices for electronic equipment setup and safeguarding against potential malfunctions caused by static discharge.

2.2 Following Installation and Programming Manuals

Adhering to the installation and programming manuals is crucial to ensure the Silent Knight 5208 operates correctly and safely. These guides provide detailed steps to avoid damaging the control panel or connected devices. Properly following instructions prevents system malfunctions and ensures compliance with safety standards. Manuals are available online for easy access, covering topics like zone configuration and troubleshooting. Always refer to the latest version for accurate information and optimal system performance.

Basic Operating Instructions for the SK-5208

The SK-5208 operates through display messages and system navigation, enabling users to test the system, understand alarms, and perform essential functions efficiently and safely.

3.1 Display Messages and System Navigation

The SK-5208 features a user-friendly interface with clear display messages, guiding operators through system navigation. The display provides real-time status updates, alarm notifications, and troubleshooting prompts, ensuring intuitive control. Users can easily access menus and functions, streamlining system operation and monitoring. The interface is designed to meet NFPA 72 standards, ensuring critical information is readily available for quick response during emergencies.

3.2 Testing the System and Understanding Alarms

Regular system testing ensures the SK-5208 operates correctly, verifying all components function as intended. The system performs a display lamp test and self-diagnostic checks. Alarms are categorized into priority levels, with visual and audible alerts. Understanding alarm types, such as fire, trouble, and supervisory, is crucial for prompt responses. The system history log tracks events for review, aiding in maintenance and compliance with fire safety standards.

Programming the Silent Knight 5208

Programming the SK-5208 involves configuring user codes, zones, outputs, and cross alert groups. Remote access via SKSS enables advanced customization for tailored fire safety solutions.

4.1 User Code Programming Menu Overview

The SK-5208 User Code Programming Menu allows setup of up to 100 unique user codes, enabling secure system access. Codes can be assigned varying authority levels, such as basic user or administrator, to control system operations. The menu provides options for adding, editing, or deleting codes, ensuring customized security management. This feature enhances system flexibility and ensures only authorized personnel can perform specific functions, maintaining robust security protocols for fire safety systems. Proper code management is essential for system integrity and user accountability.

4.2 Programming Zones and Outputs (Figure 4-13)

Figure 4-13 details the SK-5208’s zone and output programming process. Zones 1-10 can be configured to trigger outputs during alarms or troubles. The menu allows selection of specific zones or all zones, enabling tailored responses. Outputs are programmed to activate based on zone conditions, ensuring precise control over system reactions. Proper configuration ensures reliable operation, with detailed steps outlined in the manual for accurate setup and customization of zone and output behaviors.

4.3 Cross Alert Groups for Water Systems

The SK-5208 supports two cross alert groups, designed to integrate with water-based suppression systems. These groups, Cross Alert A and B, ensure synchronized activation during alarms. When specific conditions are met, the panel signals the release of water, preventing fire escalation. Proper configuration in the programming menu is essential for reliable operation, as detailed in the manual, ensuring compliance with fire safety standards and effective system response.

Remote Computer Programming and SKSS

The Silent Knight Software Suite (SKSS) enables remote programming and monitoring of the SK-5208, facilitating system management and ensuring compliance with fire safety regulations.

5.1 Silent Knight Software Suite (SKSS) Overview

The Silent Knight Software Suite (SKSS) is a powerful tool designed to enhance the programming and monitoring capabilities of the SK-5208 fire control/communicator. It allows users to remotely access and configure system settings, ensuring efficient management of fire safety systems. SKSS supports various fire panels, including the SK-5208, and provides features for troubleshooting, updating software, and generating reports. This software is essential for installers and technicians to streamline operations and maintain compliance with fire safety standards.

5.2 Remote Computer Location Programming

Remote computer location programming allows technicians to configure the SK-5208 system from a distant location, enhancing convenience and efficiency. Using the Silent Knight Software Suite (SKSS), users can access and modify system settings, monitor events, and update software. This feature is particularly useful for managing multiple panels across different sites. The SKSS tool ensures seamless communication between the remote computer and the SK-5208, enabling real-time adjustments and troubleshooting without physical access to the control panel.

Technical Support and Resources

Silent Knight provides 24/7 technical support and online resources, including downloadable manuals and user guides, ensuring assistance is always available for the SK-5208 system.

6.1 24/7 Technical Support from Silent Knight

Silent Knight offers round-the-clock technical support to address any issues with the SK-5208 system. Their dedicated team is available via phone, website, or email to provide expert assistance. Whether troubleshooting errors, resolving false alarms, or guiding through complex programming tasks, the support team ensures minimal downtime and optimal system performance. This service is complemented by online resources, including downloadable manuals and user guides, making it a comprehensive support solution for all SK-5208 users.

6.2 Accessing Manuals and User Guides Online

The Silent Knight 5208 manuals and user guides are readily available online, providing easy access to installation, operation, and programming instructions. Users can download free PDF versions from the official Silent Knight website or authorized distributors. These resources include detailed diagrams, troubleshooting tips, and compliance information, ensuring users can manage their systems effectively. Online access simplifies maintenance and updates, keeping the SK-5208 running smoothly and in line with safety standards.

Troubleshooting Common Issues

Address false alarms, system errors, and connectivity problems by resetting the system and checking connections. Refer to the manual for detailed diagnostic procedures and solutions.

7.1 Addressing False Alarms and System Errors

False alarms and system errors can often be resolved by identifying and addressing the root cause. Check zones and devices connected to the system for proper functionality. Silence alarms by entering the user code and pressing ENTER. Reset detectors and verify connections to ensure reliable operation. Refer to the manual for specific error codes, such as E01 or E02, and follow the recommended troubleshooting steps to restore system stability and accuracy.

7.2 Resetting the System and Clearing History

To reset the system, press the 5 key followed by ENTER. Enter your user code if prompted. This clears acknowledged alarms and resets detectors. To clear history, navigate to the panel history menu, select the desired entry, and press CLEAR. This ensures the system operates without residual alerts, maintaining accurate monitoring and reporting functionality. Always refer to the manual for specific reset procedures to avoid data loss or system instability.

Compliance and Safety Standards

The Silent Knight 5208 complies with NFPA 72 fire code standards, ensuring reliable fire alarm system operation. Proper display of operating instructions next to the panel is mandatory for compliance and user safety.

8.1 NFPA 72 Fire Code Compliance

The Silent Knight 5208 adheres to NFPA 72 standards for fire alarm systems, ensuring reliable performance and compliance. This includes proper installation, testing, and maintenance procedures. Users must display operating instructions next to the panel, as required by the code, to ensure quick access during emergencies. Compliance with these standards guarantees the system’s effectiveness in safeguarding lives and property. Proper training and adherence to guidelines are essential for maintaining certification and system integrity.

8.2 Proper Display of Operating Instructions

The Silent Knight 5208 requires operating instructions to be framed and displayed next to the panel, as per NFPA 72 standards. This ensures quick access during emergencies, aiding users and first responders. Proper display guarantees compliance and ease of use, maintaining system reliability and user safety. Instructions must be visible, legible, and up-to-date to guide operators effectively. This setup ensures all personnel can respond swiftly and accurately, aligning with safety protocols and best practices for fire alarm systems. Compliance is non-negotiable for optimal functionality.

heritage studies 5 answer key pdf

The Heritage Studies 5 Answer Key PDF is a vital resource for students and educators, providing detailed solutions to textbook questions and activities․ It ensures accurate grading and reinforces learning by offering clear, structured answers aligned with the curriculum․ This tool supports effective study habits and helps students master key concepts in heritage studies, fostering academic success and deeper understanding of historical and cultural topics․

Overview of Heritage Studies 5 Curriculum

The Heritage Studies 5 curriculum is designed to provide students with a comprehensive understanding of cultural, historical, and social concepts․ It is structured into units that cover foundational topics, encouraging critical thinking and engagement with diverse perspectives․ The curriculum emphasizes the importance of heritage in shaping identities and communities, while also fostering skills in analysis, research, and effective communication․ Activities and assessments are tailored to help students apply theoretical knowledge to real-world scenarios, promoting a deeper appreciation of cultural diversity and historical events․ The curriculum is supported by resources such as activity manuals and answer keys, which aid both students and educators in achieving learning objectives and ensuring academic success․ This structured approach ensures that students gain a well-rounded education that prepares them for further studies and lifelong learning․

Importance of Answer Keys in Academic Studies

Answer keys play a crucial role in academic studies by providing students and educators with a clear reference for assessing learning outcomes․ They offer immediate feedback, enabling students to identify strengths and areas for improvement․ Answer keys also ensure consistency in grading, maintaining fairness and transparency in evaluations․ For subjects like Heritage Studies, they help students understand complex concepts and reinforce retention of historical and cultural content․ Additionally, answer keys facilitate self-study and review, allowing students to track their progress independently․ Educators benefit from these resources as they streamline the grading process and align assessments with curriculum objectives․ Overall, answer keys are indispensable tools that enhance learning effectiveness, promote academic integrity, and support the development of critical thinking and problem-solving skills․

Key Features of the Heritage Studies 5 Answer Key

The Heritage Studies 5 Answer Key provides overprinted answers for convenient grading, aligns with curriculum standards, and offers detailed explanations to support student understanding and academic progress effectively․

Structure and Organization of the Answer Key

The Heritage Studies 5 Answer Key is meticulously organized to align with the textbook’s structure, ensuring ease of use for both educators and students․ Divided into clear units, each section corresponds to specific chapters or lessons, making it simple to locate answers․ The answer key features numbered pages and labeled sections, such as multiple-choice answers, short-answer responses, and activity solutions, all presented in a logical sequence․ This systematic approach allows teachers to grade assignments efficiently and students to review their work effectively․ The clear alignment with the curriculum ensures that all answers are relevant and comprehensive, providing a reliable resource for academic support and self-study․ The structured format also enables quick reference, making it an indispensable tool for understanding and mastering heritage studies concepts․

Types of Questions and Answers Covered

The Heritage Studies 5 Answer Key encompasses a wide range of question types, ensuring comprehensive coverage of the curriculum․ It includes multiple-choice questions with clear answers, short-answer responses with detailed explanations, and essay prompts with model answers․ Additionally, it provides solutions to activity-based questions, such as maps, charts, and critical thinking exercises․ The answer key also addresses true/false statements, fill-in-the-blank exercises, and matching questions, offering precise and accurate answers․ Each type of question is designed to reinforce understanding of key concepts, historical events, and cultural significance․ The variety of question formats caters to different learning styles, making it an invaluable resource for both students and educators․ This diverse approach ensures that learners can assess their knowledge effectively and identify areas for further study․

How to Use the Heritage Studies 5 Answer Key Effectively

Use the answer key for regular review, self-assessment, and to track progress․ Integrate it into study routines to reinforce concepts, identify gaps, and improve retention of heritage studies content effectively․

Strategies for Self-Study and Review

Effective self-study and review with the Heritage Studies 5 Answer Key involve setting a consistent routine and breaking down material into manageable sections․ Start by identifying key concepts and questions from each chapter․ Use the answer key to verify responses, ensuring understanding and accuracy․ Regularly review incorrect answers to address gaps in knowledge․ Incorporate active learning techniques, such as summarizing lessons in your own words or creating flashcards for tricky terms․ Schedule periodic assessments to track progress and reinforce retention․ Additionally, integrate the answer key into group study sessions to foster collaborative learning and discuss challenging topics․ By combining these strategies, students can maximize their learning outcomes and build a strong foundation in heritage studies․

Integrating the Answer Key into Lesson Plans

Incorporating the Heritage Studies 5 Answer Key into lesson plans enhances teaching effectiveness and student engagement․ Teachers can align the answer key with specific learning objectives, ensuring activities and assessments directly support curriculum goals․ Use the key to create model answers for in-class exercises, providing students with clear expectations․ Pre-assigned review sessions can be structured around the answer key, allowing focused discussions on common misconceptions․ Additionally, educators can design differentiated instruction by using the answer key to identify areas where students may need extra support․ Regularly referencing the answer key helps maintain consistency in grading and instruction, fostering a fair and productive learning environment․ By integrating this resource thoughtfully, teachers can streamline their planning and improve student outcomes in heritage studies․

Common Challenges and Solutions

Common challenges in heritage studies include understanding complex historical concepts and addressing student misconceptions․ Solutions involve using the answer key to clarify difficult topics and provide accurate feedback, ensuring deeper comprehension and improved learning outcomes․

Understanding Difficult Concepts in Heritage Studies

Heritage studies often involve complex historical and cultural concepts that can be challenging for students to grasp․ The Heritage Studies 5 Answer Key PDF plays a crucial role in breaking down these difficult topics by providing clear explanations and examples․ It helps students identify key themes, such as historical timelines, cultural influences, and societal changes, making abstract ideas more tangible․ Additionally, the answer key offers insights into how to approach critical thinking questions, enabling students to connect theoretical knowledge with practical application․ For educators, it serves as a valuable tool to design engaging lessons and assess student understanding effectively․ By leveraging the answer key, both students and teachers can overcome learning obstacles and foster a deeper appreciation for heritage studies․

Addressing Misconceptions in Student Answers

The Heritage Studies 5 Answer Key PDF is an invaluable tool for identifying and correcting misconceptions in student responses․ It provides clear, correct answers that help students recognize errors in their understanding of historical events, cultural practices, and societal developments․ By comparing their answers with the key, students can pinpoint areas where they may have misinterpreted information or overlooked critical details․ Educators can also use the answer key to address common misunderstandings and tailor their teaching strategies to clarify difficult concepts․ This resource not only enhances academic accuracy but also fosters a deeper understanding of heritage studies, enabling students to approach complex topics with confidence and precision․ Regular use of the answer key encourages self-reflection and improves overall performance in heritage studies․

Additional Resources for Heritage Studies 5

The Heritage Studies 5 Answer Key PDF complements the Activity Manual and online tools, offering supplementary materials for deeper learning and engagement with cultural and historical content effectively․

Supplementary Materials for Deeper Learning

Supplementary materials for Heritage Studies 5 include activity manuals, teacher editions, and digital resources that enhance learning․ The Activity Manual provides interactive exercises, while the Teacher Edition offers lesson plans and strategies for effective instruction․ Digital tools, such as educational apps and interactive websites, allow students to engage with historical and cultural content in a dynamic way․ These resources are designed to cater to diverse learning styles, ensuring students can explore topics in depth․ Additionally, primary sources like historical documents and cultural artifacts provide practical learning experiences․ By integrating these materials, students gain a richer understanding of heritage studies, fostering critical thinking and a deeper appreciation for cultural and historical contexts․

Online Tools and Platforms for Heritage Studies

Online tools and platforms have become essential for enhancing learning in Heritage Studies 5․ Educational apps like Duolingo offer language learning tied to cultural heritage, while platforms like Khan Academy provide free history lessons․ YouTube channels dedicated to historical documentaries and cultural explorations offer engaging visual content․ Additionally, digital archives such as Google Arts & Culture provide access to primary sources and interactive exhibits․ These tools allow students to explore heritage studies in a dynamic and immersive way․ Specialized platforms, such as the BJU Press digital hub, offer interactive activities and quizzes aligned with the curriculum․ By leveraging these resources, students can engage with heritage studies beyond the textbook, fostering a deeper understanding of cultural and historical contexts․ These tools also encourage collaborative learning through forums and shared resources, making them invaluable for modern education․

The Heritage Studies 5 Answer Key PDF is a cornerstone for academic success, offering precise solutions and fostering a deeper understanding of cultural and historical contexts․ Its role in curriculum development ensures continued relevance and effectiveness in education․

The Role of Answer Keys in Enhancing Academic Performance

Answer keys play a pivotal role in enhancing academic performance by providing students with clear and concise solutions to textbook questions․ These resources enable learners to assess their understanding, identify gaps in knowledge, and refine their problem-solving skills․ By reviewing correct answers, students can address misconceptions and strengthen their grasp of complex concepts․ The structured format of answer keys also helps learners develop critical thinking and analytical abilities, which are essential for academic success․ Furthermore, answer keys save time by offering immediate feedback, allowing students to focus on areas that require improvement․ Regular use of answer keys fosters a culture of self-directed learning, empowering students to take charge of their education and achieve better outcomes in heritage studies and beyond․ This tool is invaluable for both independent study and classroom instruction, ensuring that learners are well-prepared for assessments and future challenges․

Future of Heritage Studies Curriculum Development

The future of heritage studies curriculum development lies in integrating modern educational technologies and diverse perspectives to create engaging and inclusive learning experiences․ Digital tools, such as interactive textbooks and online platforms, will play a crucial role in making heritage studies more accessible and dynamic․ Additionally, incorporating global case studies and interdisciplinary approaches will enrich the curriculum, fostering a deeper understanding of cultural and historical contexts․ Collaborations between educators, historians, and technology experts will ensure that the curriculum remains relevant and innovative․ By embracing these advancements, heritage studies will continue to inspire students to explore and appreciate their cultural legacy while preparing them for a rapidly changing world․

cub cadet 5x65mub engine manual

The Cub Cadet 5X65MUB engine manual is a comprehensive guide for users, providing detailed specifications, maintenance tips, and troubleshooting solutions. It ensures optimal performance and longevity of the engine. Download it for free using the model number or purchase a printed copy for convenience. This manual is essential for understanding the engine’s operation, safety practices, and repair procedures, making it a vital resource for both professionals and DIY enthusiasts.

1.1 Overview of the Cub Cadet 5X65MUB Engine

The Cub Cadet 5X65MUB engine is a 159cc, air-cooled, single-cylinder OHV engine designed for reliability and durability. It powers lawn mowers and small outdoor equipment, offering consistent performance. With a vertical shaft, it ensures efficient power transfer. The engine’s compact design and fuel efficiency make it a top choice for residential and light commercial use, supported by comprehensive maintenance guides.

1.2 Importance of the Engine Manual for Maintenance and Repair

The Cub Cadet 5X65MUB engine manual is crucial for proper maintenance and repair. It provides detailed instructions, safety guidelines, and troubleshooting tips, ensuring optimal engine performance. Regular maintenance tasks, like oil changes and air filter cleaning, are outlined to prevent damage. The manual also helps diagnose issues accurately, reducing costly repairs. It’s an essential resource for extending the engine’s lifespan and ensuring safe operation.

Key Features of the Cub Cadet 5X65MUB Engine

The Cub Cadet 5X65MUB engine features a powerful 159cc OHV design, vertical shaft, and reliable performance. It’s ideal for lawn mowers and small tractors, ensuring durability and efficiency.

2.1 Engine Specifications and Technical Details

The Cub Cadet 5X65MUB engine features a 159cc overhead valve (OHV) design, delivering reliable power for lawn mowers and tractors. With a vertical shaft configuration, it ensures efficient operation and durability. The engine’s technical specifications include a robust build, optimal fuel efficiency, and a design tailored for residential and light commercial use, making it a top choice for performance and reliability.

2.2 Designed Applications for the 5X65MUB Engine

The Cub Cadet 5X65MUB engine is primarily designed for lawn mowers, garden tractors, and other small to medium-sized outdoor power equipment. Its compact and durable design makes it ideal for residential and light commercial applications, ensuring efficient performance in various mowing and landscaping tasks. The engine’s versatility and reliability make it a top choice for homeowners and professionals seeking dependable power solutions.

How to Obtain the Cub Cadet 5X65MUB Engine Manual

Access the Cub Cadet 5X65MUB engine manual by downloading it for free from official sources using your model number. Printed copies are also available for purchase, ensuring you have the necessary information for maintenance, troubleshooting, and repair. This resource is vital for optimizing engine performance and ensuring longevity, making it easily accessible for all users.

3.1 Downloading the Manual from Official Sources

Downloading the Cub Cadet 5X65MUB engine manual from official sources is straightforward. Visit the Cub Cadet website and enter your model number to find the specific manual. Most manuals are available as free PDFs, ensuring easy access. Additionally, platforms like Sears Parts Direct and MTD offer downloadable versions, providing instant access to essential information for maintenance and repair. This method is convenient and cost-effective.

3.2 Purchasing a Printed Copy of the Manual

A printed copy of the Cub Cadet 5X65MUB engine manual can be purchased for a fee, typically under $20, from official retailers or online marketplaces like Amazon. This option is ideal for those who prefer a physical reference. Ensure compatibility by verifying the model number and serial number before ordering. Printed manuals offer durability and ease of use for long-term maintenance and repair projects.

Installation and Assembly Guidelines

The manual provides a detailed general assembly diagram and step-by-step instructions for installing the Cub Cadet 5X65MUB engine. Use the parts lookup tool for accuracy and efficiency.

4.1 General Assembly Diagram and Instructions

The Cub Cadet 5X65MUB engine manual includes a detailed general assembly diagram to guide users through the installation process. Step-by-step instructions ensure proper alignment and secure fitting of components. Use the provided parts lookup tool to identify and assemble each part correctly. Refer to the model-specific instructions for accuracy and safe assembly, ensuring optimal engine performance and reliability.

4.2 Step-by-Step Installation Process

The Cub Cadet 5X65MUB engine manual provides a detailed, step-by-step installation guide. Begin by removing the motor-generator drive belt and loosening the bolts on the frame and clutch shaft bearing support. Carefully follow the instructions to ensure proper alignment and secure fitting of components. Refer to the assembly diagram for visual guidance and use the specified torque values for a safe and accurate installation process. Always prioritize safety practices and use proper tools to avoid damage or injury.

Maintenance and Servicing Schedule

Regular maintenance is crucial for the Cub Cadet 5X65MUB engine. Ensure to check oil levels, inspect air filters, and replace spark plugs as recommended. Follow the manual’s schedule for optimal performance and longevity. Always refer to the servicing guidelines provided to maintain engine health and efficiency throughout the year.

5.1 Routine Maintenance Tasks

Regular maintenance ensures the Cub Cadet 5X65MUB engine runs efficiently; Check oil levels, inspect air filters, and replace spark plugs as recommended. Clean or replace the air filter every 50 hours of use. Inspect the fuel system for leaks or blockages. Refer to the manual for specific intervals to ensure optimal performance and longevity of the engine.

5.2 Winterizing the Engine

Winterizing the Cub Cadet 5X65MUB engine is crucial for cold weather storage. Drain the fuel tank and lines, and add a fuel stabilizer to prevent degradation. Change the oil to a winter-grade viscosity for better cold-weather performance. Clean or replace the air filter and inspect the cooling system for proper antifreeze levels. Disconnect the battery and store it in a dry, cool place to maintain its charge.

Troubleshooting Common Issues

The Cub Cadet 5X65MUB engine manual provides solutions for common problems like difficulty starting, reduced performance, or overheating. Refer to the troubleshooting section for diagnostic steps and repairs.

6.1 Identifying and Diagnosing Problems

Identify issues with the Cub Cadet 5X65MUB engine by checking for symptoms like poor performance or unusual noises. Use diagnostic steps in the manual to pinpoint problems. Start with visual inspections of key components such as the carburetor, air filter, and spark plug. Consult the troubleshooting section for guidance on common issues and follow step-by-step instructions to ensure accurate diagnosis. This helps in addressing problems effectively and safely.

6.2 Solutions for Frequently Encountered Issues

Common issues with the Cub Cadet 5X65MUB engine include poor performance, starting problems, or excessive vibration. Check the carburetor for blockages and ensure proper air filter maintenance. Refer to the manual’s troubleshooting section for specific solutions. Clean or replace parts as needed, and consult the repair guide for step-by-step instructions to resolve issues safely and effectively, ensuring optimal engine function. Regular maintenance can prevent many of these problems.

Repair and Replacement Parts Lookup

Use the Cub Cadet 5X65MUB parts diagrams and lookup tools to identify and order genuine repair parts. Ensure compatibility by referencing the engine manual or official sources. Same-day shipping options are available for standard components, making repairs efficient and convenient. Visit the Cub Cadet website or authorized dealers for accurate parts identification and quick delivery solutions.

7.1 Using Diagrams for Parts Identification

Diagrams in the Cub Cadet 5X65MUB manual provide a visual guide for identifying engine parts. Users can navigate through detailed illustrations to locate components accurately. These diagrams are essential for ordering the correct replacement parts. They are available online or through tools like Sears Parts Direct, ensuring efficient and precise parts identification and procurement for maintenance and repairs.

7.2 Same-Day Shipping Options for Standard Parts

Cub Cadet offers same-day shipping for standard parts, ensuring quick access to components. Online retailers like Sears Parts Direct provide efficient delivery options. This service minimizes downtime for repairs and maintenance. Users can easily track their orders and receive parts promptly, making it a convenient solution for maintaining the 5X65MUB engine’s performance and extending its lifespan.

Performance Upgrades for the 5X65MUB Engine

Upgrade the carburetor and air filtration system for enhanced performance. These modifications boost power and efficiency, ensuring optimal engine output. Consult the manual for compatibility and installation guidance.

8.1 Upgrading the Carburetor for Optimal Performance

Upgrading the carburetor enhances engine performance and fuel efficiency. Models like KH-20-853-33-S and 651P08475 are popular choices for the 5X65MUB engine. Ensure compatibility by referencing the manual. Proper installation is crucial for optimal results. Always follow the manufacturer’s guidelines to avoid operational issues and maintain warranty compliance. This upgrade can significantly improve power output and overall engine reliability.

8.2 Enhancing Air Filtration for Better Engine Efficiency

Enhancing air filtration boosts engine efficiency by ensuring clean air intake. Upgrade to a high-quality air filter designed for the 5X65MUB engine. Proper installation and regular maintenance prevent dust and debris from compromising performance. Improved air filtration can increase horsepower and reduce wear on engine components, ensuring optimal operation and longevity.

Safety Practices and Precautions

Always wear protective gear and ensure the engine is cool before maintenance. Disconnect the spark plug to prevent accidental start-ups.

Follow safety guidelines to avoid hazards and ensure a secure working environment when handling the 5X65MUB engine.

9.1 Essential Safety Measures During Maintenance

Always wear protective gear, including gloves and safety glasses, when performing maintenance. Ensure the engine is cool and disconnect the spark plug to prevent accidental start-ups. Use proper tools to avoid injury and keep loose clothing tied back. Maintain good ventilation and avoid smoking near flammable materials. Follow all safety guidelines outlined in the manual to ensure a secure working environment.

9.2 Precautions to Avoid Common Hazards

When working with the Cub Cadet 5X65MUB engine, handle fuel and chemicals carefully to prevent spills and fires. Avoid touching hot engine components to prevent burns. Use tools appropriately and ensure the engine is stable before starting repairs. Keep children and pets away from the work area. Always check for loose parts and ensure proper grounding to avoid electrical hazards. Follow the manual’s guidelines to minimize risks.

Comparison with Similar Engine Models

The Cub Cadet 5X65MUB engine stands out among similar models for its reliability and performance in lawn mowers and small equipment, offering comparable horsepower and durability.

10.1 Differences Between 5X65MUB and Other Cub Cadet Engines

The Cub Cadet 5X65MUB engine, with its 159cc displacement, stands out for its OHV design and vertical shaft, making it ideal for lawn mowers. Compared to other models, it offers a balance of power and efficiency, with specific applications in residential equipment. Its unique carburetor and air filtration system enhance performance, distinguishing it from similar engines in the Cub Cadet lineup.

10.2 Unique Features of the 5X65MUB Model

The 5X65MUB model features a reliable 159cc OHV engine, designed for vertical shaft applications, ensuring efficient power delivery. Its compact design and lightweight construction make it ideal for residential lawn mowers. Enhanced air filtration and a durable carburetor contribute to its longevity and performance. These features position it as a versatile and efficient choice for small to medium-sized landscaping tasks, offering excellent value for homeowners seeking dependable equipment.

Environmental Considerations and Compliance

The Cub Cadet 5X65MUB engine complies with strict emissions standards, ensuring eco-friendly performance. Its design incorporates energy-efficient technologies, promoting environmental sustainability while maintaining reliability and power output for various applications.

11.1 Emissions Standards and Engine Compliance

The Cub Cadet 5X65MUB engine is designed to meet strict emissions standards, ensuring minimal environmental impact. It incorporates advanced technologies to reduce emissions while maintaining performance. Compliance with these standards guarantees eco-friendly operation, aligning with global sustainability goals and regulations. The engine’s efficient design promotes cleaner energy use, making it a responsible choice for both residential and commercial applications.

11.2 Eco-Friendly Practices for Engine Usage

Adopting eco-friendly practices with the Cub Cadet 5X65MUB engine involves regular maintenance to optimize fuel efficiency and reduce emissions. Proper air filtration and carburetor upgrades enhance performance while minimizing environmental impact. Using the correct fuel type and avoiding excessive idling are recommended. Additionally, responsible disposal of waste materials and fluids ensures compliance with eco-friendly standards, promoting sustainable engine operation and reducing its carbon footprint effectively.

Additional Resources and Support

The Cub Cadet 5X65MUB engine manual is supported by online communities, forums, professional repair services, and downloadable resources like manuals and parts diagrams easily available.

12.1 Online Communities and Forums for Engine Enthusiasts

Online communities and forums dedicated to Cub Cadet engines provide valuable resources, troubleshooting tips, and expert advice. Enthusiasts can share experiences, ask questions, and access downloadable manuals. These platforms foster collaboration, offering solutions for maintenance, repairs, and performance upgrades. Active discussions ensure users stay informed about the latest trends and best practices for optimizing their 5X65MUB engine.

12.2 Professional Repair Services and Technical Support

For expert assistance, Cub Cadet offers professional repair services and technical support. Certified technicians provide detailed troubleshooting and repair solutions. Genuine parts, including carburetors and engine components, are available with same-day shipping. Official Cub Cadet support ensures reliable and efficient service, helping users maintain optimal engine performance and address complex issues effectively. Sears Parts Direct and authorized dealers offer comprehensive assistance.

The Cub Cadet 5X65MUB engine manual is indispensable for optimal performance and longevity. Regular maintenance, troubleshooting, and professional support ensure reliability. Continuous learning and proper care will enhance your engine experience.

13.1 Summarizing the Importance of Proper Engine Maintenance

Proper maintenance is crucial for the Cub Cadet 5X65MUB engine’s performance, longevity, and reliability. Regular tasks like oil changes, filter replacements, and adhering to the manual’s guidelines ensure optimal functionality. Neglecting maintenance can lead to premature wear, reduced efficiency, and costly repairs. By following the manual’s recommendations, users can prevent issues, extend the engine’s lifespan, and maintain environmental compliance, ensuring sustainable operation for years to come.

13.2 Encouragement for Continuous Learning and Improvement

Continuous learning and improvement are key to maximizing the Cub Cadet 5X65MUB engine’s potential. Stay informed through downloadable manuals, online forums, and repair guides to enhance your maintenance and troubleshooting skills. Engaging with enthusiast communities and accessing technical support can provide valuable insights and tips for optimal performance. Embrace lifelong learning to ensure your engine runs efficiently and reliably for years to come.

nando’s allergy menu pdf

Nando’s allergy menu provides detailed allergen and nutritional information, ensuring safe dining for those with dietary restrictions. It highlights common allergens and offers transparent food safety guidelines.

Overview of Nando’s Commitment to Food Safety

Nando’s demonstrates a strong commitment to food safety by providing detailed allergen information and ensuring transparency. Staff are trained to handle allergens carefully, minimizing cross-contamination risks. The restaurant offers comprehensive resources, including allergen matrices and nutritional guides, to help customers make informed decisions. This dedication reflects Nando’s priority to create a safe and enjoyable dining experience for all, especially those with food allergies or sensitivities.

Importance of the Allergy Menu for Customers with Dietary Restrictions

Nando’s allergy menu is crucial for customers with dietary restrictions, offering transparency and empowerment. It allows individuals to identify safe options, avoiding allergens like gluten, dairy, and nuts. The detailed guide ensures that those with specific needs can make informed choices, enabling them to enjoy their dining experience confidently while adhering to their health requirements.

Key Features of the Nando’s Allergy Menu PDF

Nando’s Allergy Menu PDF features a comprehensive allergen matrix, clear indicators for common allergens (Y, T, blank), and detailed nutritional information for informed dining decisions.

Comprehensive Allergen Matrix

Nando’s allergen matrix provides a detailed breakdown of allergens present in each menu item, using clear indicators (Y, T, or blank space) to signal the presence or potential trace of allergens. This matrix covers all 14 major allergens, including gluten, milk, eggs, tree nuts, and soy, ensuring customers can make informed decisions. The organized format allows for quick identification of safe options, making it an essential tool for diners with specific dietary needs.

Clear Indicators for Common Allergens (Y, T, Blank Space)

Nando’s allergy menu uses simple yet effective indicators: Y for “contains,” T for “may contain traces,” and a blank space for “does not contain.” This system helps customers quickly identify safe options, ensuring clarity and ease of use. The consistent application of these indicators across all menu items allows diners with allergies to make informed choices confidently, enhancing their dining experience while prioritizing safety and transparency. This approach aligns with global allergen disclosure standards, providing uniform guidance for all customers.

Detailed Nutritional Information

Nando’s allergy menu includes comprehensive nutritional details, such as calories, fats, proteins, carbohydrates, sugars, and salts, for each menu item. This information helps customers make informed dietary choices, aligning with their health goals. The data is readily available both in restaurants and online, ensuring accessibility. By providing clear nutritional breakdowns, Nando’s supports transparency, enabling diners to manage their intake effectively while enjoying their meals.

Common Allergens Covered in the Menu

Nando’s allergy menu addresses common allergens like gluten, dairy, nuts, eggs, and soy. It provides clear details on their presence, helping customers with specific dietary needs.

Gluten-Free Options

Nando’s offers a variety of gluten-free options, including their signature PERi-PERi chicken, select sides, and sauces. The allergen matrix clearly identifies gluten-free choices, ensuring safe dining. Customers with gluten intolerance can enjoy meals like grilled chicken, corn on the cob, and rice. The menu provides detailed information, and staff are trained to handle dietary needs. This commitment to transparency makes Nando’s a welcoming choice for gluten-free diners.

Dairy-Free Alternatives

Nando’s provides a variety of dairy-free options, including PERi-PERi chicken, selected sides, and sauces. The allergen menu clearly marks dairy-free choices, ensuring customers can make informed decisions. Popular options include sweet potato fries and certain sauces like Lemon & Herb. Staff are trained to assist with dietary needs, making Nando’s a welcoming choice for those avoiding dairy. This transparency ensures a safe and enjoyable dining experience.

Tree Nut and Peanut Allergies

Nando’s allergen menu clearly identifies dishes containing tree nuts or peanuts, using ‘Y’ for presence and ‘T’ for potential traces. Popular options like PERi-PERi chicken and certain sides are nut-free. Customers with these allergies should inform staff to ensure safe preparation. The menu also highlights nut-free sauces and sides, providing flexible choices. Nando’s commitment to transparency helps guests with tree nut and peanut allergies dine confidently and enjoy their meals safely.

Egg and Soy Allergies

Nando’s allergen menu provides clear guidance for customers with egg or soy allergies. Dishes containing eggs or soy are marked, with detailed ingredient lists available. Many menu items, like PERi-PERi chicken, are egg-free. Soy allergies are also addressed, with dedicated fryers for fries to prevent cross-contamination. Nando’s transparent approach ensures guests with these allergies can make informed choices and enjoy their meals safely while adhering to their dietary needs.

How to Access the Nando’s Allergy Menu

Nando’s allergy menu is accessible in restaurants via books or tablets and online as a downloadable PDF, ensuring transparency and convenience for all customers.

In-Restaurant Resources (Books and Tablets)

Nando’s provides detailed Food Allergy and Nutritional Information books in every restaurant, listing all ingredients for transparency. Some locations also offer digital access via tablets, ensuring customers can review allergen details. These resources empower guests with dietary restrictions to make informed choices. Staff are trained to assist with menu navigation, ensuring a safe and enjoyable dining experience while minimizing cross-contamination risks.

Online Availability and PDF Downloads

Nando’s Allergy Menu is available online as a downloadable PDF, providing easy access to allergen information. The PDF includes a detailed allergen matrix, indicating whether items contain (Y), may contain traces (T), or are free from common allergens. Customers can also filter menu items by allergens on the website, ensuring a smooth and informed dining experience. This digital accessibility complements in-restaurant resources, offering convenience for planning meals ahead.

Filtering Menu Items by Allergens on the Website

Nando’s website offers a convenient feature to filter menu items based on specific allergens. Customers can easily customize their search by selecting common allergens like gluten, dairy, nuts, and more. This tool, alongside the allergen matrix in the PDF, helps users quickly identify safe options, ensuring a seamless and informed dining experience tailored to their dietary needs.

Nutritional Information and Calorie Counts

Nando’s provides detailed nutritional information, including calorie counts, for all menu items. This transparency helps customers make informed choices aligned with their dietary needs and preferences.

Popular Menu Items’ Nutritional Breakdown

Nando’s provides a detailed nutritional breakdown for its popular menu items, ensuring transparency for customers. For example, a 1/4 Chicken with Medium Chips contains approximately 540 calories, 34g of fat, and 35g of protein. Other favorites like the Chicken Wrap (560 calories, 25g fat, 32g protein) and Sweet Potato Fries (280 calories, 12g fat) are also highlighted. This information helps customers make informed decisions based on their dietary needs and preferences.

Understanding the Importance of Calorie Transparency

Calorie transparency empowers customers to make informed choices about their meals. Nando’s commitment to providing detailed nutritional information ensures diners can manage their intake effectively. By sharing calorie counts, the restaurant supports health-conscious decisions without compromising on flavor, fostering trust and satisfaction among its diverse customer base.

Steps to Ensure Safe Dining for Allergy Sufferers

Informing staff about allergies, careful food preparation, and minimizing cross-contamination are key steps Nando’s takes to ensure a safe dining experience for all customers.

Communication with Restaurant Staff

Informing staff about allergies is crucial for safe dining. Nando’s encourages customers to disclose allergies when ordering, ensuring meals are prepared with care to minimize cross-contamination. Restaurants provide detailed allergen information in books or tablets, allowing staff to guide customers effectively. This proactive approach ensures transparency and safety, making dining enjoyable for those with dietary restrictions.

Cross-Contamination Prevention Measures

Nando’s implements strict cross-contamination measures to protect customers with allergies. Staff are trained to handle allergens carefully, using separate utensils and surfaces. Ingredients are clearly labeled, and preparation areas are sanitized. These practices ensure that each meal is prepared safely, minimizing risks for those with food allergies. Transparency and care are prioritized to deliver a secure dining experience.

Global Consistency in Allergy-Friendly Dining

Nando’s ensures consistent allergy-friendly practices worldwide, providing clear allergen information and safe preparation methods across all locations, maintaining high food safety standards globally.

Nando’s Approach Across Different Countries

Nando’s maintains a consistent approach to allergy-friendly dining globally, ensuring uniform allergen disclosure and safety measures. Each country adopts standardized allergen identification, using “Y,” “T,” or blank spaces for clarity. Restaurants worldwide provide detailed ingredient information and cross-contamination prevention, ensuring a safe dining experience. This global consistency builds trust and ensures customers with allergies can enjoy Nando’s safely, regardless of location.

Uniform Allergen Disclosure Practices Worldwide

Nando’s upholds consistent allergen disclosure practices globally, using standardized “Y,” “T,” or blank space indicators. Detailed allergen matrices are available in PDF format, ensuring uniformity across regions. This approach guarantees customers with allergies can make informed decisions safely, regardless of location, fostering trust and accessibility worldwide.

Resources and Support for Customers

Nando’s offers extensive resources, including allergen guides, nutritional information, and customer support. In-store allergy books and tablets are available, while online access provides downloadable PDFs and assistance for diners with specific needs.

Additional Information on Food Allergies

Nando’s provides detailed allergen guides, nutritional facts, and resources to help customers manage food allergies. The menu includes indicators for common allergens like gluten, dairy, and nuts, ensuring transparency. Customers can access this information in restaurants via books or tablets and online through downloadable PDFs. Nando’s also offers customer support and resources to educate diners on food allergies, promoting safe and informed dining experiences globally.

Customer Service and Assistance

Nando’s offers extensive customer support to ensure safe dining experiences. Staff are trained to assist with allergy-related queries, and resources like allergy books and tablets are available in restaurants. Customers can also access detailed information online or through downloadable PDFs. For further assistance, Nando’s provides customer service contact options, including email and phone support, to address any concerns or questions about allergens and menu items.

Nando’s allergy menu exemplifies commitment to transparency and customer safety, ensuring inclusive dining experiences for all. It empowers guests to make informed choices, fostering trust and satisfaction.

Final Thoughts on Nando’s Allergy Menu

Nando’s allergy menu showcases a commitment to transparency and customer safety, providing detailed allergen information. It empowers diners with dietary restrictions to make informed choices confidently. The menu’s clear indicators and comprehensive allergen matrix ensure a safe and inclusive dining experience. By prioritizing communication and cross-contamination prevention, Nando’s sets a high standard for allergy-friendly dining, making it a trusted choice for those with food sensitivities.

Encouragement to Explore the Menu Safely

Nando’s allergy menu invites customers to enjoy their PERi-PERi favorites with confidence. By utilizing the allergen guide and communicating with staff, diners can explore the menu safely. Whether dining in or ordering online, Nando’s resources ensure a worry-free experience. Embrace the flavors knowing your dietary needs are prioritized, making every meal a delightful and secure choice for all.

generac one wash owner’s manual

Welcome to the Generac One Wash, a high-performance power washer designed for efficient cleaning. This guide covers its features, operation, and maintenance for optimal use and longevity.

1.1 Product Overview

The Generac One Wash is a high-performance pressure washer designed for versatile cleaning tasks. With models ranging from 2000 to 3100 PSI, it offers powerful cleaning capabilities for driveways, decks, and siding. Featuring a compact design, it includes a detergent tank, multiple nozzle options, and an easy-start engine. Built for reliability and ease of use, the One Wash is ideal for both residential and light-commercial applications, ensuring efficient cleaning with minimal effort.

1.2 Importance of Reading the Manual

Reading the manual is essential for safe and effective operation of the Generac One Wash. It provides critical safety precautions, operating instructions, and maintenance tips to ensure optimal performance. Understanding the warranty details, troubleshooting common issues, and proper usage of nozzles and detergent is vital. Failure to follow guidelines may void the warranty or cause equipment damage. Always contact Generac Customer Service for clarification if any section is unclear. Proper usage ensures longevity and safety, making the manual your key resource for hassle-free operation.

Safety Precautions

Ensure a safe operating environment by keeping the area clean and clear of debris. Avoid contact with hot mufflers or engines. Operate on a stable, level surface for optimal performance.

2.1 General Safety Guidelines

Always maintain a clean and clear workspace around the Generac One Wash. Keep the area free from debris to prevent accidents and ensure proper ventilation. Avoid touching hot mufflers or engine components during operation. Ensure the unit is placed on a stable, level surface to prevent tipping. Wear protective gear, including gloves and safety glasses, when operating the pressure washer. Follow all safety symbols and instructions provided in the manual to ensure safe and effective use of the equipment.

2.2 Safety Symbols and Their Meanings

Familiarize yourself with safety symbols on the Generac One Wash. The warning triangle indicates potential hazards, while the caution symbol signals specific precautions. The danger symbol highlights critical risks that could cause injury. These symbols are designed to ensure safe operation and maintenance. Refer to the manual for detailed explanations of each symbol and their respective meanings. Understanding these symbols is crucial for preventing accidents and ensuring proper use of the equipment. Always follow the guidance provided alongside these symbols for optimal safety.

2.3 Handling and Storage Tips

Always handle the Generac One Wash with care to avoid damage. Store the unit in a clean, dry, and well-ventilated area, away from flammable materials. Ensure the area is clear of debris and maintain a 5-foot clearance for proper ventilation. Regularly inspect hoses and connections for damage before storage. Avoid exposure to extreme temperatures. For winter storage, drain water and protect the pump from freezing. Keep the unit stable and level during storage to prevent tipping. Use only genuine Generac parts for replacements to ensure safety and performance. Proper handling and storage will extend the life of your power washer. Always follow the manufacturer’s guidelines for safe handling and storage practices to maintain optimal functionality and safety. Regular cleaning of the filter and checking oil levels before storage are also recommended. Store the unit in an upright position to prevent oil leakage. Never store the power washer near open flames or sparks, and ensure all safety precautions are followed. Proper storage will help maintain the unit’s performance and longevity. Keep the power washer out of reach of children and unauthorized users. Always refer to the manual for specific storage instructions tailored to your model. By following these tips, you can ensure your Generac One Wash remains in excellent condition and operates safely. Remember to check for any damage or wear before storing the unit for an extended period. If you notice any issues, contact Generac customer support for assistance. Proper handling and storage are essential for maintaining the warranty and ensuring continued reliability. Always prioritize safety when handling and storing your power washer to prevent accidents and maintain its effectiveness. Follow all guidelines provided in the manual for handling and storage to get the most out of your Generac One Wash. If unsure about any aspect, consult the manual or contact customer service for clarification. Proper care will ensure your power washer remains a reliable tool for years to come. Always handle the unit with care, and store it in a secure, dry location to prevent damage. Keep all accessories organized and protected during storage to avoid loss or damage. Regularly check for signs of wear and tear before storing the unit for an extended period. Addressing any issues promptly will help maintain the unit’s performance and longevity. Store the power washer in a location that is not susceptible to freezing temperatures to protect the engine and pump. Always follow the manufacturer’s recommendations for handling and storage to ensure your Generac One Wash continues to perform at its best. Proper handling and storage are crucial for maintaining the safety and efficiency of your power washer. By adhering to these guidelines, you can enjoy consistent and reliable performance from your Generac One Wash for many years. Remember to always handle the unit with care and store it properly to prevent any damage or malfunctions. If you plan to store the power washer for an extended period, follow the winter storage tips outlined in the manual to protect the engine and pump from damage. Always ensure the unit is clean and dry before storing it to prevent rust or corrosion. Check all connections and hoses for tightness and inspect for any signs of wear. Store the power washer in a well-ventilated area, away from direct sunlight and moisture. Keep the unit away from children and pets to ensure safety. Follow all safety precautions when handling and storing the Generac One Wash to maintain its performance and longevity. Regular maintenance and proper storage will ensure your power washer remains in excellent condition and continues to deliver reliable results. Always refer to the manual for specific handling and storage instructions for your model. By following these tips, you can protect your investment and ensure your Generac One Wash continues to meet your cleaning needs effectively. Proper handling and storage are essential for maintaining the quality and performance of your power washer. Always handle the unit with care and store it in a safe, dry location to prevent damage. Check for any damage or wear before storing the unit for an extended period. Address any issues promptly to ensure the longevity of your Generac One Wash. Store the power washer in an upright position to prevent oil leakage and maintain the integrity of the engine. Keep the unit away from flammable materials and ensure proper ventilation during storage. Follow all safety guidelines provided in the manual to ensure safe handling and storage of your Generac One Wash. Proper care will help extend the life of your power washer and ensure it continues to perform at its best. Always prioritize safety when handling and storing your Generac One Wash to prevent accidents and maintain its effectiveness. Follow the manufacturer’s recommendations for handling and storage to get the most out of your power washer. Store the unit in a clean, dry, and well-ventilated area, away from direct sunlight and moisture. Regularly inspect the power washer for any signs of damage or wear before storing it for an extended period. Addressing any issues promptly will help maintain its performance and longevity. Always handle the Generac One Wash with care and store it properly to prevent damage and ensure continued reliability. Follow all safety precautions and guidelines outlined in the manual for safe handling and storage of your power washer. Proper handling and storage will help maintain the quality and performance of your Generac One Wash, ensuring it remains a reliable tool for years to come. Always refer to the manual for specific instructions on handling and storing your Generac One Wash to ensure optimal performance and safety. By following these tips, you can protect your investment and enjoy consistent results from your power washer. Proper handling and storage are crucial for maintaining the safety and efficiency of your Generac One Wash. Always handle the unit with care and store it in a secure, dry location to prevent damage. Keep all accessories organized and protected during storage to avoid loss or damage; Regularly check for signs of wear and tear before storing the unit for an extended period. Addressing any issues promptly will help maintain the unit’s performance and longevity. Store the power washer in a location that is not susceptible to freezing temperatures to protect the engine and pump. Always follow the manufacturer’s recommendations for handling and storage to ensure your Generac One Wash continues to perform at its best. Proper handling and storage are essential for maintaining the safety and efficiency of your power washer. By adhering to these guidelines, you can enjoy consistent and reliable performance from your Generac One Wash for many years. Remember to always handle the unit with care and store it properly to prevent any damage or malfunctions. If you plan to store the power washer for an extended period, follow the winter storage tips outlined in the manual to protect the engine and pump from damage. Always ensure the unit is clean and dry before storing it to prevent rust or corrosion. Check all connections and hoses for tightness and inspect for any signs of wear. Store the power washer in a well-ventilated area, away from direct sunlight and moisture. Keep the unit away from children and pets to ensure safety. Follow all safety precautions when handling and storing the Generac One Wash to maintain its performance and longevity. Regular maintenance and proper storage will ensure your power washer remains in excellent condition and continues to deliver reliable results. Always refer to the manual for specific handling and storage instructions for your model. By following these tips, you can protect your investment and ensure your Generac One Wash continues to meet your cleaning needs effectively. Proper handling and storage are essential for maintaining the quality and performance of your power washer. Always handle the unit with care and store it in a safe, dry location to prevent damage. Check for any damage or wear before storing the unit for an extended period. Address any issues promptly to ensure the longevity of your Generac One Wash. Store the power washer in an upright position to prevent oil leakage and maintain the integrity of the engine. Keep the unit away from flammable materials and ensure proper ventilation during storage. Follow all safety guidelines provided in the manual to ensure safe handling and storage of your Generac One Wash. Proper care will help extend the life of your power washer and ensure it continues to perform at its best. Always prioritize safety when handling and storing your Generac One Wash to prevent accidents and maintain its effectiveness. Follow the manufacturer’s recommendations for handling and storage to get the most out of your power washer. Store the unit in a clean, dry, and well-ventilated area, away from direct sunlight and moisture. Regularly inspect the power washer for any signs of damage or wear before storing it for an extended period. Addressing any issues promptly will help maintain its performance and longevity. Always handle the Generac One Wash with care and store it properly to prevent damage and ensure continued reliability. Follow all safety precautions and guidelines outlined in the manual for safe handling and storage of your power washer. Proper handling and storage will help maintain the quality and performance of your Generac One Wash, ensuring it remains a reliable tool for years to come. Always refer to the manual for specific instructions on handling and storing your Generac One Wash to ensure optimal performance and safety.

Assembly and Setup

Unpack and inventory all components carefully. Follow the manual for initial assembly, ensuring proper connection of hoses and accessories. Double-check all parts for secure fitting.

3.1 Unpacking and Inventory of Components

Begin by carefully unpacking the Generac One Wash from its box. Inspect each component for damage or defects. Compare the items with the parts list in the manual to ensure everything is included. Pay special attention to smaller parts like bolts, nozzles, and adapters, which can be easily misplaced. Store all components in a safe, organized manner to avoid losing any pieces. Verify that all accessories, such as hoses and detergent tanks, are present and undamaged before proceeding with assembly.

3.2 Initial Assembly Steps

Start by unpacking and organizing all components. Attach the handle to the main frame using the provided bolts. Next, secure the wheels to the base for stability. Connect the detergent tank to the designated bracket. Ensure all hoses are properly attached to the pump and spray gun. Double-check that all connections are tight and free from leaks; Refer to the manual for specific torque values and alignment instructions. Finally, inspect the entire unit for any missing or loose parts before proceeding to the next step.

3.3 Connecting Hoses and Accessories

Attach the high-pressure hose to the pump and spray gun, ensuring secure connections. Select the appropriate nozzle for your task and twist it onto the spray gun until it clicks. Connect the detergent hose to the designated port on the pump. Tighten all fittings by hand to prevent over-tightening. Inspect all connections for leaks before use. For specific nozzle types and accessory compatibility, refer to the manual. Properly securing hoses and accessories ensures safe and efficient operation of the Generac One Wash.

Operating the Generac One Wash

Start the engine, let it warm up briefly, and choose the correct nozzle for your cleaning task. Apply detergent if needed, following the manual’s guidelines precisely.

4.1 Starting the Engine

To start the Generac One Wash engine, ensure the fuel valve is in the “on” position and the oil level is sufficient. For electric start models, simply turn the ignition switch and press the start button. For manual recoil, pull the starter cord firmly with a steady motion until the engine engages. Allow the engine to warm up briefly before adjusting pressure settings. Always wear protective equipment and ensure the area is clear of debris. Follow the manual’s specific instructions for a smooth startup.

4.2 Selecting the Right Nozzle

Selecting the correct nozzle is crucial for effective cleaning. The Generac One Wash comes with interchangeable nozzles, each designed for specific tasks. The 40-degree nozzle is ideal for delicate surfaces like windows and siding, while the 25-degree nozzle is better for general cleaning. The 15-degree nozzle is perfect for heavy-duty tasks like concrete, and the 0-degree nozzle is for high-pressure, precise cleaning. Always use the recommended nozzle for your task to ensure optimal results and prevent damage to surfaces.

Additional Resources

4.3 Using Detergent

For optimal cleaning results, use Generac-approved detergents specifically designed for pressure washers. Attach the black detergent nozzle to the lance and ensure the detergent tank is filled. Start the engine, then pull the trigger to draw detergent. Avoid using household cleaners or abrasive chemicals, as they may damage surfaces or the washer. Always follow the detergent manufacturer’s instructions for proper dilution and application rates. This ensures effective cleaning without causing harm to materials or the equipment.

prince lionheart wipes warmer instructions

The Prince Lionheart Wipes Warmer is a convenient baby care essential designed to keep wipes warm and moist, ensuring comfortable diaper changes. It features the Ever-Fresh System to maintain freshness and even warmth, making it a trusted solution for parents seeking efficiency and comfort for their babies.

Overview of the Product and Its Benefits

The Prince Lionheart Wipes Warmer is a must-have for parents, offering a convenient way to keep baby wipes warm and moist. Its patented Ever-Fresh System ensures wipes stay fresh and prevent browning, while the integrated nightlight provides visibility during late-night changes. Designed for safety and efficiency, it warms wipes evenly and maintains optimal moisture levels. The anti-microbial properties and easy setup make it a hygienic and practical solution for diaper care. This product enhances comfort for babies and streamlines the changing process for parents, making it a trusted choice for everyday use.

Key Features of the Prince Lionheart Wipes Warmer

The Prince Lionheart Wipes Warmer boasts an Ever-Fresh System to keep wipes moist and fresh, while its anti-microbial properties ensure cleanliness. The integrated nightlight offers convenience during nighttime changes, and the unit warms wipes evenly to a comfortable temperature. Designed with safety in mind, it features secure cord placement options and a stable design to prevent accidents. With a capacity for 80-100 wipes, it’s perfect for busy parents seeking a reliable and efficient solution for diaper care, ensuring every change is comfortable and hassle-free.

Unboxing and Initial Setup

The Prince Lionheart Wipes Warmer includes a main unit, power cord, and instruction manual. Place it on a stable, flat surface for safe and convenient use.

What’s Included in the Box

The Prince Lionheart Wipes Warmer box contains the main unit, a power cord, and an instruction manual. Some models, like the Ultimate Wipes Warmer (Model 0231N), include an Ever-Fresh pillow to maintain moisture. The package ensures you have everything needed for setup and operation. No additional purchases are required, making it a convenient solution for parents. The unit is designed to hold 80-100 wipes, and the included components facilitate easy installation and use, ensuring your baby wipes stay warm and fresh at all times.

Placing the Wipes Warmer on a Stable Surface

Place the Prince Lionheart Wipes Warmer on a stable, flat, and dry surface to ensure safe operation. Avoid uneven or wet areas to prevent accidents. Position the unit away from water sources and out of your baby’s reach; Ensure the cord is arranged neatly to avoid tripping hazards. This setup guarantees optimal performance and safety, keeping your baby wipes warm and ready for use while maintaining a secure environment for your little one.

Step-by-Step Setup Guide

Fill the Ever-Fresh pillow with water, place it in the warmer, add wipes, and plug in the unit. Allow three hours for it to warm up fully.

Filling the Ever-Fresh Pillow with Water

Begin by removing the Ever-Fresh pillow from its packaging and thoroughly saturating it with clean water. Ensure the pillow is damp but not soaking wet, as excess water can hinder performance. Gently place the pillow at the bottom of the wipes warmer, ensuring it lies flat and evenly. This step is crucial for maintaining the moisture of the wipes and preventing them from drying out. Once the pillow is in place, you can add your preferred brand of wipes on top of it. The Ever-Fresh System is designed to keep wipes fresh and moist, ensuring optimal performance.

Adding Wipes to the Warmer

After placing the Ever-Fresh pillow, add your preferred brand of baby wipes on top of it. The warmer is designed to hold approximately 80 to 100 wipes, depending on their size and thickness. Ensure the wipes are evenly stacked and not compressed, allowing the lid to close completely. For optimal performance, avoid mixing partial packs or folding the wipes, as this may disrupt even heating. Once the wipes are in place, the warmer will begin to gently heat them, ensuring they are ready for use whenever needed.

Plugging in the Unit and Allowing It to Warm Up

Once the Ever-Fresh pillow and wipes are in place, plug the unit into a nearby electrical outlet. Ensure the cord is positioned safely away from water and other hazards. Allow the warmer approximately three hours to reach its optimal temperature. During this time, avoid opening the lid to maintain consistent heating. The unit will gently warm the wipes, ensuring they are ready for comfortable and efficient diaper changes. Always follow the manufacturer’s guidelines for proper electrical safety and usage. This step ensures your baby wipes are warm and fresh when needed.

Safety Instructions

Place the wipes warmer on a stable, flat surface and keep the cord away from water to prevent accidents. Avoid submerging the unit or its components in liquid.

General Safety Precautions

Always place the Prince Lionheart Wipes Warmer on a stable, flat surface to prevent tipping. Ensure the cord is positioned away from water and out of reach of children. Avoid submerging the unit or its components in any liquid. Never leave the warmer unattended during operation. Do not use if the cord or plug is damaged. Keep the warmer out of children’s reach to avoid accidental ingestion of wipes or tampering. Regularly inspect the unit for damage and ensure proper ventilation to maintain safety and functionality.

Proper Cord Placement and Electrical Safety

Ensure the Prince Lionheart Wipes Warmer is placed on a stable surface, away from water sources. Keep the power cord away from direct contact with liquids and avoid submerging it. Use the warmer with a GFCI-protected outlet to prevent electrical shock. Never wrap the cord tightly around the unit or other objects, as this may cause damage. Avoid using frayed or damaged cords, and ensure the plug is securely inserted into the outlet. Do not use the warmer if the cord or plug shows signs of wear or damage. Always follow electrical safety guidelines to prevent hazards.

Maintenance and Cleaning

Regularly clean the Prince Lionheart Wipes Warmer with a non-abrasive wipe to prevent dust buildup. Avoid harsh chemicals. Check the Ever-Fresh Pillow’s moisture levels and replace as needed;

Cleaning the Wipes Warmer

To maintain the Prince Lionheart Wipes Warmer, regularly clean it with a soft, non-abrasive wipe. Dampen the wipe with water, but avoid submerging the unit in liquid. Gently wipe down the exterior and interior, removing any residue or dust. Do not use harsh chemicals or abrasive cleaners, as they may damage the surface. After cleaning, ensure the warmer is dry before plugging it back in. Cleaning periodically helps prevent bacterial growth and ensures optimal performance. Replace the Ever-Fresh Pillow if it becomes discolored or worn. Cleaning every 1-2 weeks is recommended for best results.

Replacing the Ever-Fresh Pillow

To replace the Ever-Fresh Pillow in your Prince Lionheart Wipes Warmer, first, unplug the unit for safety. Remove the old pillow and discard it. Take a new Ever-Fresh Pillow, saturate it with clean water until it’s damp but not soaking wet. Place the new pillow at the bottom of the warmer, ensuring it lies flat. Add your preferred wipes on top. Allow the unit to warm up for a few hours before use. Replace the pillow every 2-3 months or when it becomes discolored or worn to maintain freshness and prevent mold growth.

Troubleshooting Common Issues

If wipes are too hot, reduce water or unplug briefly. If too cold, check cord connection and ensure lid is closed properly for consistent warmth.

What to Do If the Wipes Are Too Hot or Too Cold

If the wipes are too hot, reduce the water in the Ever-Fresh pillow or unplug the unit briefly to cool down. For cold wipes, ensure the lid is closed properly and the cord is securely connected. Allow the unit to warm up for 3 hours initially. Adjust water levels as needed to maintain optimal temperature. Always follow the manufacturer’s guidelines to ensure safety and efficiency.

Addressing Issues with the Ever-Fresh System

If the Ever-Fresh System stops maintaining moisture, check the water level in the pillow and ensure it’s saturated but not overflowing. Replace the pillow every 3-6 months or when showing signs of wear. If wipes dry out, adjust the water amount or clean the system with a damp cloth. Ensure the lid closes properly to retain moisture. For persistent issues, refer to the instruction manual or contact customer support. Regular maintenance ensures the system functions optimally, keeping wipes fresh and ready for use.

Using the Integrated Nightlight

The integrated nightlight provides a gentle glow, making nighttime diaper changes easier by illuminating the wipes without disrupting your baby’s sleep or your own workflow.

How the Nightlight Enhances Convenience

The integrated nightlight in the Prince Lionheart Wipes Warmer offers unparalleled convenience during late-night diaper changes. Its soft, gentle glow illuminates the wipes without needing to turn on harsh overhead lights, making it easier to navigate in the dark. This feature ensures you can quickly access warm, moist wipes while minimizing disruptions to your baby’s sleep. The nightlight also helps you see clearly, reducing fumbling and stress during nighttime care, making it an essential tool for parents seeking efficiency and comfort.

Adjusting the Nightlight for Optimal Use

The Prince Lionheart Wipes Warmer’s nightlight is designed for easy customization. Users can adjust the brightness to their preferred level, ensuring it provides enough light without being too harsh. Additionally, the nightlight can be turned off if desired, offering flexibility based on personal preference or the baby’s sensitivity to light. This feature enhances the overall usability of the warmer, making nighttime diaper changes more convenient and stress-free. Proper adjustment ensures the nightlight complements the warming function, providing a seamless and efficient experience for parents.

Tips for Optimal Use

Ensure the Ever-Fresh pillow is consistently moist, and monitor water levels to maintain optimal wipe warmth and freshness. Always use high-quality wipes for best results.

Choosing the Right Type of Wipes

Selecting the correct wipes is crucial for optimal performance. Use standard baby wipes, avoiding flushable or extra-thick varieties, as they may not dispense properly. Ensure wipes are designed for warmers to prevent drying out or sticking. The Ever-Fresh System works best with moist, breathable wipes. Avoid soaking wipes in water before adding them, as this can lead to mold or mildew. For best results, use 80-100 wipes at a time, ensuring the lid closes securely. Proper wipe selection ensures consistent warmth and freshness, enhancing the overall experience for both you and your baby.

Monitoring Water Levels in the Ever-Fresh Pillow

Regularly check the Ever-Fresh Pillow’s water level to ensure optimal moisture. The pillow should be damp but not soaking wet. If it’s dry, add a small amount of clean water. Avoid over-saturating, as this can lead to mold or mildew. Replace the pillow every 2-3 months or when it shows signs of wear. Proper water management keeps wipes fresh and prevents bacterial growth, ensuring the system functions efficiently and safely. Always follow the manufacturer’s guidelines for water levels to maintain hygiene and effectiveness.

The Prince Lionheart Wipes Warmer is a reliable, convenient solution for keeping baby wipes fresh and warm, enhancing diaper-changing experiences with its innovative design and ease of use.

Final Thoughts on Using the Prince Lionheart Wipes Warmer

The Prince Lionheart Wipes Warmer is a practical and efficient solution for parents, ensuring baby wipes remain warm and fresh. Its Ever-Fresh System prevents browning and keeps wipes moist, while the integrated nightlight offers convenience during late-night changes. Easy setup, safety features, and low maintenance make it a trusted choice. Overall, it enhances diaper-changing comfort and hygiene, making it a worthwhile investment for any caregiver seeking to provide the best for their baby.

clicker keypad instruction manual

Welcome to the Clicker Keypad instruction manual. This guide provides comprehensive instructions for installing‚ programming‚ and maintaining your universal wireless keypad for secure‚ keyless garage access.

Purpose and Scope of the Manual

This manual serves as a detailed guide for the Clicker Keypad‚ covering installation‚ programming‚ and maintenance. It ensures seamless integration with compatible garage door openers and provides troubleshooting tips. The manual outlines the steps for setting up your 4-digit PIN and brand ID‚ syncing the keypad‚ and resolving common issues. Designed for both new and experienced users‚ it offers clear instructions to maximize the keypad’s functionality and security. Follow this guide to optimize your Clicker Keypad experience.

Key Features of the Clicker Keypad

The Clicker Keypad offers universal compatibility with major garage door opener brands‚ including Chamberlain‚ Genie‚ and LiftMaster. It features a wireless design‚ eliminating the need for wires‚ and operates with a 4-digit PIN for secure access. The keypad includes LED indicators for status updates and error codes‚ ensuring easy troubleshooting. Its compact‚ weather-resistant design ensures durability‚ while the backlit keys provide visibility in low-light conditions; These features make the Clicker Keypad a reliable and convenient solution for keyless garage access.

Compatibility and Requirements

The Clicker Keypad is compatible with most garage door openers‚ including Chamberlain‚ Genie‚ and LiftMaster. It requires a 9V battery and the provided instruction manual for setup.

Compatible Garage Door Openers

The Clicker Keypad is designed to work with a wide range of garage door openers‚ including Chamberlain‚ LiftMaster‚ Genie‚ and Craftsman. It supports over 90% of systems in North America‚ ensuring universal compatibility. However‚ it is not compatible with certain rotating code systems like Genie Overhead Door Co. For optimal performance‚ ensure your opener uses a fixed code or Smart-Learn technology. Always consult the manual to verify compatibility with your specific model.

Necessary Tools and Information for Programming

To program your Clicker Keypad‚ ensure you have the following: a ladder to access the garage door opener’s Program/Learn button‚ your desired 4-digit PIN‚ and the brand ID for your opener (refer to the provided chart). Keep the manual handy for guidance. Ensure the garage door is closed before starting. Test your PIN after programming to confirm functionality. Additional tools or information may vary depending on your specific garage door opener model;

Installation and Setup

Mount the Clicker Keypad securely outside your garage‚ ensuring easy access. Install the provided battery and power on the device. Follow manual instructions for proper placement and initial setup.

Physical Installation of the Keypad

Mount the Clicker Keypad outside your garage‚ ensuring it’s weather-resistant and securely fastened. Use the provided screws to attach it to a sturdy surface. Position it at a convenient height for easy access. Ensure the keypad is within clear line-of-sight of the garage door opener for proper signal reception. Avoid direct sunlight exposure to prevent overheating. Follow the manual’s guidelines for precise placement and installation to ensure reliable performance and durability.

Initial Power-On and Battery Installation

Insert the included 9V battery into the keypad‚ ensuring the terminals align correctly. Replace the battery cover securely. Upon initial power-on‚ the keypad will perform a self-test. Press any button to activate the backlight. Test the keypad by entering your PIN to ensure proper functionality. If the keypad does not respond‚ check the battery connections and ensure it is installed correctly. For optimal performance‚ use a high-quality alkaline battery and avoid mixing old and new batteries.

Programming the Clicker Keypad

Press the learn button on your garage door opener. Enter your 4-digit PIN on the keypad. Input the brand ID for your opener. Test the new PIN.

Setting Up the PIN and Brand ID

Start by entering your chosen 4-digit PIN on the keypad. Next‚ locate the brand ID for your garage door opener from the provided chart. Press the learn button on your opener‚ then input the brand ID. Confirm by re-entering your PIN. The keypad will flash to indicate successful programming. Test the PIN to ensure proper function. If issues arise‚ refer to the troubleshooting section. This process ensures secure and personalized access to your garage.

Syncing with Your Garage Door Opener

After setting your PIN and brand ID‚ press the learn button on your garage door opener. Enter the brand ID using the keypad‚ then press the learn button again. The opener will flash to confirm syncing. Test the keypad by entering your PIN to ensure the door operates correctly. If the door doesn’t respond‚ verify the brand ID and retry the process. Ensure your opener is compatible with the Clicker Keypad for successful syncing. Proper syncing ensures reliable and secure operation.

Troubleshooting Common Issues

Troubleshooting common issues with your Clicker Keypad involves checking LED indicators and error codes for diagnosis. Ensure proper syncing and battery function for optimal performance;

Keypad Not Responding or Syncing

If your Clicker Keypad isn’t responding or syncing‚ check the battery level and ensure it’s installed correctly. Verify that the brand ID matches your garage door opener. Press and hold the learn button on your opener‚ then enter your PIN on the keypad. If issues persist‚ reset the keypad by removing the battery for 30 seconds and retry syncing. Ensure no interference from other devices. Always refer to the manual for specific instructions.

LED Indicators and Error Codes

The Clicker Keypad uses LED indicators to signal status and errors. A steady blue LED indicates successful syncing‚ while a flashing red LED signals a failed attempt. Common error codes include “01” for low battery‚ “02” for an incorrect PIN‚ and “03” for an invalid brand ID. To resolve issues‚ ensure the PIN and brand ID are correct. If problems persist‚ reset the keypad by removing the battery for 30 seconds and retry programming. Refer to the manual for specific error code solutions.

Maintenance and Care

Regularly clean the keypad with a soft cloth and mild detergent. Avoid exposing it to harsh chemicals. Replace batteries annually or when the LED dims. Store the manual for future reference.

Cleaning the Keypad

To maintain functionality‚ clean the keypad regularly. Use a soft‚ dry cloth to wipe away dirt and debris. For stubborn marks‚ dampen the cloth with mild soap and water‚ but avoid submerging the device. Do not use harsh chemicals or abrasive cleaners‚ as they may damage the keypad’s surface or harm the electronics. Regular cleaning ensures optimal performance and longevity of your Clicker Keypad. Always dry the keypad thoroughly after cleaning to prevent moisture damage.

Battery Replacement and Care

Replace the 9V battery when the keypad’s responsiveness decreases. Open the battery compartment‚ remove the old battery‚ and insert a new alkaline 9V battery‚ ensuring correct polarity. Avoid extreme temperatures and store spare batteries in a dry place. Replace batteries every 3-5 years or as needed. Proper care ensures reliable operation and prevents corrosion. Always use a compatible battery type to maintain optimal performance and longevity of your Clicker Keypad.

Security Considerations

Ensure your Clicker Keypad’s PIN is unique and confidential. Regularly update your PIN and avoid using easily guessable codes. Store the manual securely to prevent unauthorized access.

Best Practices for PIN Security

To ensure maximum security‚ choose a unique 4-digit PIN for your Clicker Keypad. Avoid using sequential or repetitive numbers‚ such as 1234 or 1111. Keep your PIN confidential and avoid sharing it with unauthorized individuals. Regularly update your PIN to maintain security. Never use easily guessable information like birthdates or addresses. If you suspect unauthorized access‚ reset your PIN immediately. Store your PIN in a secure location‚ separate from the keypad‚ to prevent theft or misuse.

Resetting the Keypad to Factory Settings

To restore your Clicker Keypad to factory settings‚ press and hold the “0” button until the LED flashes. Release and press “0” again; the LED will flash twice‚ confirming the reset. This process erases all programmed PINs and brand IDs‚ returning the keypad to its original state. After resetting‚ reprogram your PIN and brand ID to resume operation. Ensure you have your brand ID available before resetting‚ as it will be required for reprogramming the device.

Successfully program and maintain your Clicker Keypad for secure‚ keyless access. For further assistance‚ refer to the Chamberlain support website or consult the user manual.

Final Tips for Optimal Use

For optimal performance‚ regularly test your PIN and ensure the keypad is clean. Replace batteries promptly when low to avoid signal issues. Always secure your PIN and keep it confidential. If moving or upgrading‚ reset the keypad to factory settings. Store the manual for future reference and visit the Chamberlain support website for additional resources or troubleshooting guides.

Where to Find Additional Support

For further assistance‚ visit the Chamberlain Group support website‚ which offers detailed articles‚ FAQs‚ and troubleshooting guides. Contact their customer service for personalized help. You can also refer to the myQ app resources or the product’s registered user section for updated instructions and maintenance tips.