baseball gloves pdf

Baseball gloves are essential equipment, evolving from basic hand protection to specialized tools enhancing performance. Their history, materials, and craftsmanship highlight their significance in the game.

Overview of Baseball Gloves and Their Importance

Baseball gloves are essential for players, offering protection and enhancing performance. They evolved from basic palm protection to specialized tools, with designs tailored for specific positions and skills. A well-fitted glove ensures better control, accuracy, and safety, making it a critical piece of equipment. Proper sizing and material quality are vital, as they impact both comfort and functionality. Whether for infield, outfield, or pitching, the right glove maximizes a player’s ability to field, throw, and catch effectively during games.

Historical Development of Baseball Gloves

Baseball gloves have evolved significantly since their introduction in the late 19th century. Early models were simple, fingerless designs offering minimal protection. The first padded glove emerged in 1895, and innovations like the Bill Doak model revolutionized the game. Spalding and Rawlings became pioneers, crafting gloves with improved materials and designs. Over time, gloves became position-specific, with catchers and pitchers requiring specialized mitts. Today, they blend tradition with modern technology, ensuring optimal performance, comfort, and protection for players of all skill levels.

Choosing the Right Baseball Glove

Selecting the right baseball glove involves considering size, position, and material. Proper fit and comfort ensure optimal performance, with variations catering to infielders, outfielders, and pitchers.

Key Considerations: Size, Position, and Material

When selecting a baseball glove, size, position, and material are crucial. Gloves vary by length and pocket depth, catering to infielders, outfielders, and pitchers. High-quality leather ensures durability and grip, while synthetic materials offer affordability. Proper fit is essential for control and comfort, with youth sizes differing from adult options. Each position demands specific features, making these factors vital for optimal performance.

How to Measure Your Hand for the Perfect Fit

Measuring your hand ensures a proper baseball glove fit. Start by measuring the width of your palm, excluding the thumb, using a tape measure or ruler. Compare this to size charts provided by manufacturers. A secure fit allows flexibility and control. Youth gloves typically run smaller, while adult gloves accommodate larger hands. Proper measurement ensures optimal performance and comfort, tailored to your specific needs and position requirements.

Baseball Glove Materials and Craftsmanship

Baseball gloves are crafted from high-quality leathers, ensuring durability and performance. Premium materials and meticulous stitching enhance the glove’s structure, providing a reliable tool for players.

Types of Leather and Their Durability

Baseball gloves are made from various types of leather, each offering unique durability and feel. Full-grain leather is the most durable, while top-grain leather provides a softer yet sturdy option. Kip leather is lightweight and flexible, ideal for younger players. Synthetic leathers are cost-effective and low-maintenance but lack the longevity of genuine leather. The choice of leather significantly impacts the glove’s performance, comfort, and lifespan, making it a critical factor in selecting the right mitt for any player.

Innovative Features in Modern Gloves

Modern baseball gloves incorporate cutting-edge technology to enhance performance. Features like adjustable wrist straps ensure a secure fit, while cushioned palms reduce impact. Some gloves feature breathable mesh backs for ventilation, preventing moisture buildup. Others utilize advanced stitching patterns for durability and a snug fit. Innovative materials, such as hybrid leather blends, combine traditional feel with modern strength. These advancements ensure gloves meet the demands of today’s players, offering both comfort and reliability during gameplay.

Baseball Glove Sizing Charts and Guides

Baseball gloves vary by size, position, and age. Charts guide measurements, ensuring proper fit and performance. Youth gloves are smaller, while adult sizes range from 11.25 to 12.25 inches.

Age and Skill-Level Specific Gloves

Baseball gloves are tailored to fit various age groups and skill levels. Youth gloves, designed for younger players, are smaller and lighter, typically ranging from 10.75 to 11.75 inches. High school and adult gloves are larger, ranging from 11.25 to 12.25 inches. Fastpitch infield gloves are slightly smaller, measuring 11 to 12 inches. Gloves for advanced players often feature premium materials, while synthetic options suit beginners. Proper sizing ensures optimal performance and comfort, with guides and charts available for precise selection.

Position-Specific Glove Requirements

Baseball gloves are designed for specific positions, ensuring optimal performance. Infield gloves are smaller with shallower pockets for quicker transfers, while outfield gloves are longer for catching fly balls. Pitchers’ gloves have closed webbing to conceal grips, and catcher’s mitts are larger with extra padding. First basemen’s gloves are longer with a deeper pocket for scooping throws. Each position requires unique features, making proper selection crucial for fielding excellence and player confidence.

Different Types of Baseball Gloves

Infield gloves are smaller with shallower pockets for quick transfers. Outfield gloves are longer for catching fly balls. Pitcher’s gloves have closed webbing to conceal pitches, and catcher’s mitts are larger with extra padding for protection.

Infield, Outfield, and Pitcher Gloves

Infield gloves are smaller with shallower pockets for quick ball transfers. Outfield gloves are longer for catching fly balls. Pitcher’s gloves have closed webbing to conceal pitches. Infielders prioritize control and agility, while outfielders need reach and durability. Pitchers rely on secure grip and concealment. Each design caters to specific field demands, ensuring optimal performance. These gloves are tailored to meet the unique needs of their positions, enhancing gameplay efficiency and player confidence.

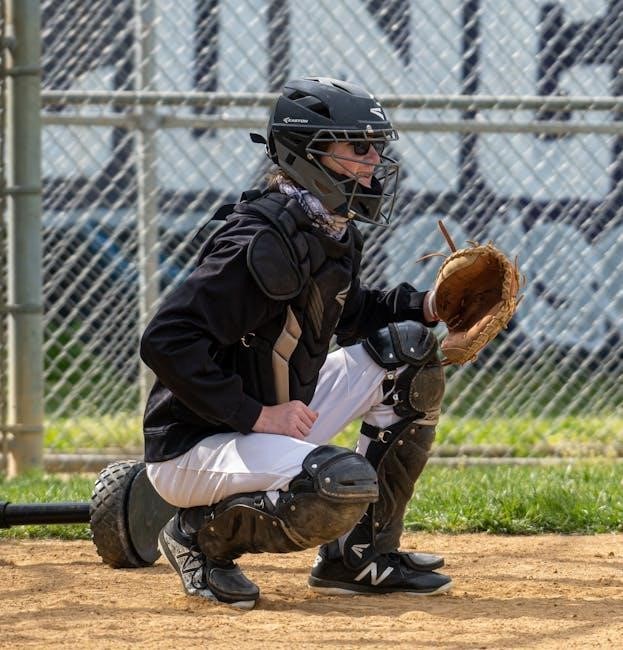
Catcher’s Mitts and Their Unique Features

Catcher’s mitts are larger, with extra padding and a deep pocket to handle high-speed pitches. They feature reinforced palms and fingers for added protection. Unlike fielding gloves, mitts lack individual fingers, allowing for better control of wild pitches. Their thick leather and cushioning absorb impact, ensuring durability and comfort. Catcher’s mitts are crucial for safeguarding the hand during intense plays, making them a vital tool for players behind the plate. Their design prioritizes protection and grip security.

Buying Guide for Baseball Gloves

Top brands like Spalding, Rawlings, and Wilson offer high-quality gloves. Choose based on position, size, and material. Use reliable reviews and retailers for informed decisions.

Top Brands and Their Specialties

Leading brands like Rawlings, Wilson, and Spalding dominate the market with innovative designs. Rawlings is renowned for its Bill Doak model and premium craftsmanship. Wilson offers durability and modern features, while Spalding provides a wide range of models for all skill levels. Louisville Slugger is another trusted name, catering to both traditional and contemporary players. Each brand specializes in meeting specific needs, ensuring high performance and comfort for infield, outfield, and pitching roles.

Where to Find Reliable Reviews and Retailers

Reliable reviews and retailers for baseball gloves can be found through trusted sources like Dick’s Sporting Goods, Academy Sports + Outdoors, and Amazon. These retailers offer detailed product descriptions, customer reviews, and sizing guides. Additionally, official brand websites such as Rawlings and Wilson provide authentic information and downloadable resources. Independent sports equipment blogs and forums also share unbiased opinions, helping you make informed decisions. Always verify the credibility of the source before making a purchase.

Maintenance and Care of Baseball Gloves

Regular cleaning, conditioning, and proper storage extend the life of baseball gloves. Avoid harsh chemicals and ensure the leather remains moisturized for optimal performance and durability.

Breaking In a New Glove

Breaking in a new baseball glove requires patience and proper technique. Start by conditioning the leather with oil or conditioner to soften it. Use a mallet or hammer to gently pound the pocket and fingers, loosening the stiffness. Place a ball in the pocket and wrap the glove tightly with a rubber band overnight. Repeat this process several times to deepen the pocket and improve flexibility. Finally, wear the glove during practice to mold it to your hand for a personalized fit.

Cleaning and Conditioning Leather Gloves

Cleaning and conditioning leather gloves is crucial for maintaining their quality and longevity. Use a soft cloth to wipe away dirt and debris. Apply a mild soap solution to stains, avoiding harsh chemicals. Rinse thoroughly and let air dry. Condition the leather with a high-quality leather conditioner to restore flexibility and prevent cracking. Regular maintenance ensures the glove remains supple and performs optimally, extending its lifespan and providing consistent performance on the field.

Downloadable Resources for Baseball Gloves

Access free PDF patterns, DIY guides, and interactive tools for crafting and understanding baseball gloves. These resources help create or customize your perfect mitt.

Free PDF Patterns and DIY Guides

Download free PDF patterns and DIY guides to craft your ideal baseball glove. These resources provide step-by-step instructions, from measuring your hand to selecting materials. Customize your mitt with detailed templates and tips for stitching, padding, and shaping. Perfect for enthusiasts and craftsmen, these guides simplify the process of creating a personalized glove. Additionally, an interactive vocabulary guide helps you understand key terms and equipment, ensuring a professional finish for your DIY project.

Interactive Vocabulary and Equipment Guides

Enhance your understanding with interactive guides that detail baseball terminology and equipment. These resources feature visual aids, quizzes, and definitions to help you master key terms. Learn about glove types, materials, and their roles in the game. Perfect for players, coaches, and enthusiasts, these guides ensure a comprehensive grasp of baseball essentials. They also simplify the process of selecting the right gear for optimal performance and confidence on the field.

Choosing the right baseball glove involves understanding size, position, and material. Proper care and fit ensure durability and performance. Follow guides for optimal selection and maintenance.

Final Tips for Selecting and Caring for Your Baseball Glove

When selecting a glove, prioritize fit, position-specific design, and material quality. Break in your glove gradually for optimal comfort and performance. Regularly condition the leather to maintain durability. Avoid using harsh chemicals, and store the glove properly to prevent deformation. Consult sizing charts and seek professional advice if unsure. Proper care ensures longevity and enhances your gameplay experience.

uncheck a box in pdf

How to Uncheck a Box in a PDF

Unchecking a box in a PDF can be done using Adobe Acrobat Pro DC or other PDF editors․ For fillable PDFs, simply click the checkbox to toggle its state․ In flat or scanned PDFs, tools like “Prepare Form” or manual deletion may be required․

Unchecking boxes in PDFs is a common task, especially when working with forms or documents that require editing․ PDFs can be fillable, flat, or scanned, and each type may require different approaches to uncheck boxes․ Fillable PDFs typically allow direct interaction with checkboxes, making it easy to toggle their state․ However, flat or scanned PDFs may not support direct editing, necessitating the use of tools like Adobe Acrobat Pro DC or alternative editors․ Understanding the type of PDF you’re working with is crucial for determining the best method to uncheck boxes effectively․

In some cases, checkboxes may be part of a form field, allowing users to simply click and uncheck them․ For scanned PDFs, manual editing or overlaying tools might be needed․ Keyboard shortcuts like Ctrl+Z can also help revert changes, but this depends on the PDF editor being used․ Whether you’re working with fillable forms or static documents, unchecking boxes can be achieved with the right tools and techniques, ensuring your PDFs are edited precisely as needed․

Understanding the Types of PDFs and Their Editability

PDFs come in different forms, each with varying levels of editability․ Fillable PDFs are designed for user interaction, allowing individuals to check or uncheck boxes easily․ These PDFs typically have form fields created using tools like Adobe Acrobat Pro DC, making it straightforward to edit checkboxes by simply clicking on them․

Flat PDFs, on the other hand, are static documents where checkboxes are part of the page layout․ These cannot be edited directly and may require additional software or workarounds to modify․ Scanned PDFs are images of documents, offering no native editability․ To uncheck boxes in such PDFs, users often need to overlay new content or use advanced tools to erase or cover existing checkmarks․

Understanding these distinctions is essential for choosing the right approach to uncheck boxes․ While fillable PDFs are user-friendly, flat and scanned PDFs may demand more effort and specialized tools to achieve the desired result․ Knowing the type of PDF you’re working with ensures you can edit checkboxes efficiently and effectively․

Methods to Uncheck a Box in a PDF

Several methods exist to uncheck a box in a PDF, depending on the document type․ For fillable PDFs, simply click the checkbox․ In flat PDFs, use tools like “Prepare Form” to toggle states․ Scanned PDFs may require overlaying or deleting checkmarks using advanced editors like Adobe Acrobat Pro DC․

Using Adobe Acrobat Pro DC

Adobe Acrobat Pro DC is a powerful tool for editing PDFs, including checkboxes․ To uncheck a box, open the PDF file in Acrobat Pro DC and navigate to the checkbox you wish to modify․ Click on the checkbox to select it, then toggle its state by clicking again or using the properties panel․ For form fields, select the checkbox and press the Delete key to remove it․ In “Prepare Form” mode, you can edit form fields, changing their state from checked to unchecked․ This method works for both fillable and flat PDFs․ Additionally, keyboard shortcuts like Ctrl+Z can undo recent changes, helping you manage edits efficiently․ Acrobat Pro DC offers precise control, making it ideal for professional PDF editing needs․ Always save your changes to ensure the updated state of the checkbox is preserved․ This approach ensures clarity and accuracy when modifying checkboxes in PDF documents․

Editing Checkboxes in Fillable PDFs

Filling and editing checkboxes in fillable PDFs is a straightforward process․ Open the PDF in Adobe Acrobat Pro DC and navigate to the checkbox you want to edit․ Click the checkbox to toggle its state—it will change from checked to unchecked or vice versa․ If the PDF is interactive, you can also use the Fill & Sign tool to interact with form fields directly․ For multiple checkboxes, repeat the process for each one․ To ensure your changes are saved, click the Save icon or press Ctrl+S․ This method is efficient for fillable PDFs created with form fields, allowing quick and precise editing․ Always verify that the PDF is not password-protected or restricted, as this may limit editing capabilities․ By following these steps, you can easily uncheck boxes in fillable PDFs and maintain the document’s professionalism and clarity․

Unchecking Boxes in Flat PDFs

Flat PDFs, which are non-interactive and not fillable, require a different approach to uncheck boxes․ Since these PDFs do not have form fields, you cannot simply click to toggle the checkbox․ Instead, you can use editing tools to remove or cover the checkmark․ Open the PDF in Adobe Acrobat Pro DC and select the Prepare Form tool under the Tools tab․ This allows you to edit the PDF as if it were a form․ Click on the checkbox and press the Delete key to remove it․ Alternatively, you can use the Snippet Tool to cut out the checked area and replace it with a blank space or overlay it with a white square․ While this method doesn’t truly “uncheck” the box, it visually removes the checkmark․ For scanned PDFs, similar techniques apply, as the checkboxes are part of the image․ Always save your changes to ensure the edits are preserved․ This approach is ideal when you need to modify static PDFs without form fields․

Removing Checkmarks in Scanned PDFs

Scanned PDFs are essentially images of text and cannot be edited like fillable or flat PDFs․ To remove a checkmark from a scanned PDF, you can use tools like Adobe Acrobat Pro DC or other PDF editors․ Open the PDF and select the Touchup Tool or Snippet Tool to manually remove the checkmark by cutting or covering it․ Alternatively, you can overlay the checked area with a white square or rectangle to hide the checkmark․ This method doesn’t delete the checkmark but makes it invisible․ For more precise edits, use the Prepare Form tool to treat the scanned PDF as a form field, allowing you to delete or modify the checkbox․ If the PDF is password-protected, ensure you have permission to make edits․ After making changes, save the file to preserve your work․ This approach is ideal for PDFs that are scanned images and lack interactive form fields, ensuring the checkmark is visually removed for a cleaner appearance․

Advanced Techniques

Advanced techniques include using keyboard shortcuts like Ctrl+Z to uncheck boxes or radio buttons instantly․ Additionally, understanding the difference between deleting and unchecking helps in maintaining form integrity while editing PDFs efficiently․

Using Keyboard Shortcuts to Uncheck Boxes

Keyboard shortcuts can streamline the process of unchecking boxes in PDFs․ In Adobe Acrobat Pro DC, after selecting the checkbox, pressing Ctrl+Z (Windows) or Cmd+Z (Mac) will toggle its state․ This method works for checkboxes and radio buttons in fillable forms․ For scanned PDFs, keyboard shortcuts may not apply, requiring manual editing․ Regularly saving your work ensures changes are preserved․ This technique enhances efficiency, especially when multiple checkboxes need adjustment․ Utilizing shortcuts can save time, making document editing more productive․

Deleting vs․ Unchecking: What’s the Difference?

When working with PDF checkboxes, it’s important to distinguish between deleting and unchecking․ Unchecking a box removes the checkmark while keeping the checkbox intact, allowing it to be toggled again․ This is useful for maintaining form functionality․ Deleting, however, permanently removes the checkbox from the document, which can be necessary for design or layout adjustments․ In Adobe Acrobat Pro DC, unchecking is done by toggling the checkbox’s state, while deletion involves selecting the checkbox and pressing the Delete key․ Understanding this difference is crucial for preserving form usability or making permanent changes․ Always consider the intended outcome when deciding between these actions to ensure your PDF remains functional or visually appealing as needed․

clinical documentation cheat sheet pdf

Clinical documentation is the systematic recording of patient care, providing a clear, accurate, and accessible account of treatment. A clinical documentation cheat sheet offers a concise guide.

1.1 Importance of Accurate Clinical Documentation

Accurate clinical documentation is vital for patient safety, legal compliance, and continuity of care. It ensures clear communication among healthcare providers, preventing errors and promoting consistency. The American Nursing Association emphasizes its role in evidence-based practice. Proper records support reimbursement and compliance with regulations. They also guide treatment decisions and are crucial for clinical supervision, fostering trust between providers and patients.

1.2 Overview of a Clinical Documentation Cheat Sheet

A clinical documentation cheat sheet is a concise tool designed to streamline the recording process. It includes sections for patient profiles, histories, assessments, and treatment plans. These guides ensure accuracy and efficiency, providing healthcare professionals with quick access to essential documentation elements. They often feature templates and checklists, making it easier to maintain compliance and consistency in patient records. This resource is invaluable for both new and experienced practitioners.

Essential Components of a Clinical Documentation Cheat Sheet

A clinical documentation cheat sheet typically includes patient profiles, medical histories, assessment templates, and treatment plans. These elements ensure comprehensive and standardized recording of patient care.

2.1 Patient Profile and Demographic Information

A patient profile includes demographic details such as age, gender, and occupation, along with cognitive and behavioral status. This section ensures accurate identification and tailored care planning, providing essential context for treatment decisions and continuity of care.

2.2 History and Patient Self-Report

The patient’s history and self-report provide essential insights into their medical background, symptoms, and experiences. This section captures past illnesses, medications, and lifestyle factors, along with the patient’s narrative of their condition. Accurate documentation ensures a comprehensive understanding of the patient’s health status, aiding in diagnosis and treatment planning while maintaining continuity of care.

2.3 Assessment and Clinical Judgment

Assessment and clinical judgment involve evaluating patient data to form diagnoses and guide care. This step synthesizes subjective and objective information, applying professional expertise to determine the patient’s condition and appropriate interventions. Clear documentation of clinical reasoning ensures transparency, supports decision-making, and maintains accountability in patient care.

SOAP Notes: A Fundamental Documentation Tool

SOAP notes are a standardized method for documenting patient interactions, organizing information into subjective, objective, assessment, and plan sections for clear communication and effective care coordination.

3.1 Subjective Data Collection

Subjective data collection involves gathering patient-reported information, such as symptoms, feelings, and medical history. This includes the chief complaint, history of present illness, and past medical history. It is essential for understanding the patient’s perspective and forming an accurate diagnosis. Documenting this information clearly ensures effective communication and informed decision-making in patient care.

3.2 Objective Data Recording

Objective data recording involves documenting measurable, observable information, such as vital signs, physical examination findings, and diagnostic test results. This data is crucial for assessing the patient’s condition and monitoring progress. Accurate and timely recording ensures consistency in care and supports clinical decision-making, making it a cornerstone of effective clinical documentation practices in healthcare settings.

3.3 Assessment and Diagnosis

Assessment and diagnosis involve evaluating patient data to identify health issues. This step requires clinical judgment, analysis of symptoms, and test results. Documenting differential diagnoses and rationale ensures clarity. The primary diagnosis should align with evidence and guide the treatment plan, reflecting the patient’s condition and care needs. Accuracy is key to effective patient outcomes and continuity of care.

3.4 Plan of Action

The plan of action outlines the next steps in patient care, including medications, therapies, and follow-up appointments. It should be clear, actionable, and tailored to the patient’s needs. Documenting this plan ensures continuity of care and serves as a reference for future treatments. Clarity and specificity are key to effective implementation and patient outcomes.

Clinical Documentation for Treatment Plans

Clinical documentation for treatment plans involves summarizing diagnoses, outlining medications, therapies, and scheduling follow-ups. It ensures a structured approach to patient care and monitoring progress effectively.

4.1 Summarizing Diagnoses

Summarizing diagnoses in clinical documentation involves clearly stating the patient’s confirmed conditions, including ICD-10 codes, relevant comorbidities, and the rationale for treatment. This concise overview ensures clarity and serves as a reference for future care, aiding in tracking progress and facilitating coordinated treatment plans.

4.2 Outlining Medications and Therapies

Clearly outline prescribed medications, including dosages, frequency, and duration, along with rationale for selection. Document all therapies, such as physical, occupational, or speech therapy, detailing type, intensity, and goals. Include monitoring parameters and expected outcomes to ensure continuity of care and adherence to treatment plans.

4.3 Follow-Up and Monitoring

Document scheduled follow-ups and monitoring plans, including frequency and methods of assessment. Record patient progress, any changes in condition, or concerns. Note adjustments to treatment plans based on monitoring results. Ensure documentation reflects clear communication with patients and healthcare teams, maintaining continuity of care and adherence to established protocols.

Legal and Compliance Considerations

Accurate documentation ensures compliance with legal standards, supports patient care, and protects healthcare providers from potential liabilities, maintaining trust and accountability in clinical practices.

5.1 Maintaining Documentation for Clinical Supervision

Maintaining thorough documentation for clinical supervision ensures accountability and continuity of care. Records must be kept for at least seven years, verified by non-family members, and include accurate assessments, care plans, and progress notes. This ensures compliance with legal standards and supports effective clinical oversight, fostering trust and accountability in healthcare practices.

5.2 Ensuring Timeliness and Accuracy

Timely and accurate documentation is crucial for effective patient care and legal compliance. Records must be verified for legibility, completeness, and consistency. Delays or errors can compromise care quality and lead to legal issues. Regular reviews and adherence to best practices ensure documentation meets standards, supporting seamless communication and accountability in healthcare settings. This is vital for maintaining trust and professionalism.

Specialized Clinical Documentation Tools

Specialized tools enhance documentation efficiency, such as progress notes and examples of medical necessity, ensuring precise and organized patient records for improved care coordination and compliance.

6.1 Progress Notes and Ongoing Care

Progress notes document ongoing patient care, tracking changes in condition and treatment response. They ensure continuity of care and accountability, providing clear communication among healthcare providers. Regular updates in these notes help monitor progress, adjust treatment plans, and maintain accurate records for future reference and legal compliance. They are essential for skilled care and medical necessity documentation.

6.2 Examples of Medical Necessity and Skilled Care

Documentation must clearly justify medical necessity and skilled care, such as interventions for progressive diseases or complex comorbidities. Examples include detailed records of therapy adjustments or specialized treatments. This ensures services are medically justified, supporting billing and compliance. Skilled care is demonstrated through specific, measurable patient outcomes and interventions that require professional expertise, as outlined in clinical guidelines and cheat sheets.

Best Practices for Effective Documentation

Adhere to clear, concise, and accurate documentation practices. Use standardized guidelines to ensure consistency and compliance. Regular training and reviews enhance documentation quality and patient care outcomes.

7.1 Practical Tips for Healthcare Professionals

Use clear and concise language, avoiding abbreviations. Document patient information promptly and accurately. Stay organized with templates and checklists; Regularly review and update records to ensure compliance and quality care. Leveraging technology, such as digital tools and cheat sheets, can streamline the documentation process and improve efficiency in clinical settings.

7.2 Avoiding Common Documentation Errors

Avoid incomplete or unclear information by using precise language. Ensure timely updates and verify accuracy to prevent errors. Use templates and checklists to maintain consistency. Regularly review records for omissions or discrepancies. Stay informed about compliance standards to avoid legal issues. Proper training and awareness can significantly reduce documentation mistakes, ensuring high-quality patient care and adherence to professional guidelines.

Digital Tools and Templates for Clinical Documentation

Digital tools and templates, such as downloadable PDFs and specialized software, streamline clinical documentation processes, enhancing efficiency and accuracy in patient care records management.

8.1 Downloadable PDF Resources

Downloadable PDF resources, such as progress notes templates and clinical documentation guides, provide healthcare professionals with accessible tools to streamline patient record-keeping. These resources often include customizable forms, cheat sheets, and examples tailored for specific clinical settings, ensuring accurate and efficient documentation practices while maintaining compliance with industry standards and regulations.

8.2 Software and Apps for Streamlined Documentation

Software and apps designed for clinical documentation offer efficient tools to streamline the process. Examples include platforms with voice-to-text capabilities, real-time data syncing, and integrated templates. These solutions reduce documentation time, improve accuracy, and enhance accessibility. Many apps are tailored for specific healthcare settings, ensuring compliance with regulations and seamless integration with electronic health records (EHR) systems for better patient care management.

Clinical documentation is vital for patient care continuity and legal compliance. This cheat sheet provides essential tools and strategies to enhance accuracy, efficiency, and effectiveness in documentation practices.

9.1 Final Thoughts on Mastering Clinical Documentation

Mastering clinical documentation ensures continuity of care, supports legal compliance, and enhances patient outcomes. By leveraging the cheat sheet, healthcare professionals can streamline processes, improve accuracy, and maintain organized records. Effective documentation practices are essential for clear communication, informed decision-making, and accountability in healthcare settings. Consistent effort and adherence to guidelines will foster proficiency and confidence in documenting patient care effectively and efficiently.

9.2 Encouragement to Use the Cheat Sheet Effectively

Embrace the clinical documentation cheat sheet as a valuable resource to enhance efficiency and accuracy in your practice. Regular use will help streamline processes, ensuring compliance and comprehensive patient records. Encourage your team to adopt this tool, fostering consistency and confidence in documentation. By doing so, you’ll not only improve patient care but also support professional growth and accountability in healthcare settings.

manual for kenmore sewing machine 385

The Kenmore Sewing Machine 385 is a versatile and reliable device designed for household use, offering a 25-year limited warranty on its die-cast metal internal frame.

With a maximum sewing speed of over 550 stitches per minute, it features adjustable stitch length and width, making it ideal for various sewing tasks. The manual provides detailed guidance on setup, operation, and maintenance to ensure optimal performance and longevity.

1.1 Overview of the Machine

The Kenmore Sewing Machine 385 is a mechanical sewing machine designed for household use, featuring a durable die-cast metal internal frame. It offers a variety of stitch options, including straight and zigzag stitches, with adjustable stitch length and width. The machine is user-friendly, suitable for both beginners and experienced sewists, and comes with essential accessories to enhance sewing efficiency. Its compact design and robust construction ensure long-lasting performance.

1.2 Importance of the Manual

The manual is essential for understanding the Kenmore Sewing Machine 385’s features, operation, and maintenance. It provides step-by-step instructions for setting up, threading, and troubleshooting, ensuring safe and effective use. The manual also covers warranty details, maintenance schedules, and parts identification, serving as a comprehensive guide to maximize the machine’s performance and extend its lifespan. Referencing it regularly helps users optimize their sewing experience.

Safety Precautions

Avoid using damaged cords or plugs, and never operate the machine if it’s malfunctioning or exposed to water. Ensure proper ventilation and follow maintenance guidelines to prevent accidents and ensure safe operation.

2.1 General Safety Guidelines

Avoid using the machine with damaged cords or plugs, and ensure proper ventilation by keeping lint and dust from accumulating in openings. Never operate the machine near water or if it has been dropped or damaged. Always unplug the machine when not in use or during maintenance to prevent accidents. Refer to the manual for detailed safety protocols to ensure safe and effective operation.

2.2 Electrical Safety

Ensure the machine’s voltage and frequency match your power supply. Use only the original power cord provided and avoid power surges. Keep cords away from heat sources and never overload electrical outlets. Disconnect the machine when not in use or during maintenance to prevent electrical hazards. Always follow the manual’s guidelines for safe electrical operation to protect both the machine and user.

2.3 Maintenance and Inspection

Regularly clean the machine to remove lint and dust, ensuring smooth operation. Lubricate internal components as specified to prevent friction. Inspect the power cord and plugs for damage, and replace them if necessary. Schedule annual preventive maintenance checks to maintain performance and extend the machine’s lifespan. Always refer to the manual for detailed maintenance procedures to keep your Kenmore 385 sewing machine in optimal condition.

Parts and Accessories

The Kenmore 385 sewing machine includes essential parts like the stitch selector, bobbin winder, and presser foot. Additional accessories, such as spool pins and special feet, are available for enhanced functionality.

3;1 Identifying Machine Parts

The Kenmore 385 sewing machine features key components such as the stitch selector, bobbin winder, and presser foot. The stitch selector allows choosing from various stitch options, while the bobbin winder is used for threading. The presser foot lifter raises and lowers the presser foot, ensuring fabric moves smoothly. Additional parts include the spool pin, thread take-up lever, and handwheel. Refer to the manual’s diagrams for precise locations and functions of each part.

3.2 Available Attachments and Accessories

The Kenmore 385 sewing machine offers various attachments and accessories to enhance sewing efficiency. These include zigzag feet, overcasting stitches, and specialized presser feet. Accessories like extension tables and additional bobbins are available for purchase. Users can order parts by contacting Sears Parts Direct, ensuring compatibility and optimal performance. These attachments expand the machine’s capabilities, catering to diverse sewing needs and projects.

Setting Up the Machine

Unpack the machine, ensuring all parts are included. Connect the power cord to a compatible outlet, ensuring the voltage matches the machine’s specifications for safe operation.

4.1 Unpacking and Initial Setup

Begin by carefully unpacking the Kenmore Sewing Machine 385, ensuring all components are included. Locate the machine on a stable, flat surface away from direct sunlight. Before first use, inspect the machine for any damage or defects. Remove any packaging materials and protective covers. Refer to the manual for identifying parts and accessories to ensure proper setup and functionality.

4.2 Connecting to Power Supply

Before connecting the Kenmore Sewing Machine 385 to a power supply, ensure the voltage and frequency match your electrical power. Plug the machine into a grounded outlet to prevent electrical hazards. Avoid using adapters or extension cords. Inspect the power cord for damage or frays. If damaged, do not use the machine and contact Sears for repair or replacement to ensure safe operation.

Threading and Bobbin

Properly thread the machine and wind the bobbin to ensure smooth stitching. Follow the manual’s guidance for inserting the bobbin and threading the upper thread correctly.

5.1 Winding the Bobbin

Wind the bobbin by placing the thread on the bobbin winder spindle. Secure the thread end under the felt and wind evenly, ensuring the thread is tight but not overfilled. Once full, cut the excess thread and insert the bobbin into the machine, following the manual’s guidance for proper alignment and tension.

5.2 Threading the Machine

Thread the machine by placing the spool on the spool pin and guiding the thread through the upper needle thread guide. Pass the thread through the tension dial and take-up lever, ensuring it is seated properly. Pull gently to check tension and trim any excess thread. Proper threading ensures smooth stitching and prevents machine jamming during operation.

Basic Sewing Operations

Start with straight stitch for simple seams and zigzag for stretchy fabrics. Use the presser foot to guide fabric smoothly and maintain even tension for consistent results.

6.1 Straight Stitch Sewing

For straight stitch sewing, select the basic stitch option on your Kenmore 385. Thread the machine as instructed, ensuring proper tension. Place fabric under the presser foot, aligning edges. Gently guide the fabric as it moves, maintaining steady pressure. Use the handwheel to control stitching speed. Start with a scrap piece to test stitch length and tension before sewing actual fabric. This stitch is ideal for straight seams and basic repairs.

6.2 Zigzag Stitch Sewing

To use the zigzag stitch on your Kenmore 385, select the appropriate stitch option. Adjust the stitch width and length as needed for your fabric type. Guide the fabric smoothly under the presser foot, maintaining consistent tension. This stitch is ideal for stretchy fabrics and decorative edging. Always test settings on a scrap piece before sewing your final project.

Advanced Features

The Kenmore 385 offers advanced features like monogramming and customizable stitches, allowing for personalized sewing projects. It also includes special stitches for decorative and functional sewing needs.

7.1 Stitch Selection and Customization

The Kenmore 385 sewing machine offers a variety of built-in stitches, including straight, zigzag, and decorative options. Users can easily select stitches using the stitch selector. The machine allows for customization of stitch length and width, providing flexibility for different fabrics and projects. Additionally, the 4-step built-in buttonhole feature simplifies creating professional-looking buttonholes. These features enable users to tailor their sewing experience to their specific needs, ensuring precise and creative results.

7.2 Monogramming and Special Stitches

The Kenmore 385 sewing machine supports monogramming, allowing users to create custom lettering and designs. It features a range of special stitches, including overcasting and blind hem stitches, for professional-looking finishes. The machine’s stitch selector enables easy access to these options, with a maximum stitch width of 5mm for versatility. These features make it ideal for both decorative and functional sewing projects.

Maintenance and Troubleshooting

Regular cleaning and lubrication are essential for smooth operation. Check bobbin tension and thread alignment to prevent issues. Refer to the manual for solutions to common problems like thread breakage or improper stitching.

8.1 Routine Cleaning and Lubrication

Regular cleaning is crucial for maintaining your Kenmore 385 sewing machine. Use a soft brush to remove lint and debris from the bobbin area and feed dogs. Lubricate moving parts periodically, following the manual’s instructions for oil application. Clean the needle and presser foot regularly to ensure smooth operation. Proper maintenance prevents dust buildup and ensures consistent stitching quality. Refer to the manual for specific cleaning and lubrication schedules;

8.2 Common Issues and Solutions

Common issues with the Kenmore 385 often relate to thread tension or improper setup. If the thread bunches, check tension settings and rethread the machine. Skipped stitches may indicate a dull needle or incorrect tension—replace the needle and adjust settings. Fabric not moving? Ensure feed dogs are clean and functioning. Regular cleaning and lubrication can prevent many of these issues. Refer to the manual for detailed troubleshooting.

Warranty and Support

The Kenmore 385 sewing machine comes with a 25-year limited warranty covering parts and fabrication defects. Sears offers customer support, including phone assistance and repair scheduling.

9.1 Warranty Information

The Kenmore Sewing Machine 385 is backed by a 25-year limited warranty covering defects in parts and fabrication. This warranty ensures repair or replacement of faulty components, excluding normal wear and tear. The warranty period begins from the date of purchase, providing long-term protection for the machine’s internal mechanisms. Retaining the model and serial numbers is essential for warranty claims and future reference.

9.2 Customer Service and Resources

For assistance with your Kenmore Sewing Machine 385, Sears offers comprehensive customer service. Contact their support hotline at 1-800-361-6665 for repair scheduling and technical help. Additionally, online resources, including user manuals and troubleshooting guides, are available on Sears’ official website. Visit their service centers for professional maintenance and repairs, ensuring your machine operates optimally throughout its warranty period and beyond.

The Kenmore Sewing Machine 385 is a reliable, versatile tool for sewing tasks. Always refer to the manual for optimal use, and contact Sears for support.

10.1 Final Tips for Effective Use

  • Regularly clean and lubricate the machine to maintain performance.
  • Use the correct needle and thread for your fabric type.
  • Always follow the manual’s threading and bobbin-winding instructions.
  • Test stitches on scrap fabric before sewing your final project.
  • Store the machine in a dry, cool place to prevent damage.

By following these tips, you can maximize the lifespan and efficiency of your Kenmore Sewing Machine 385.

income statement pdf sample

An income statement PDF sample provides a structured template to outline a company’s revenues, expenses, and net income over a specific period. These documents are essential for assessing financial performance and ensuring compliance with accounting standards. By using pre-designed PDF templates, businesses can streamline their financial reporting processes, maintaining clarity and professionalism in their statements. Explore various samples to find the one that best suits your organizational needs and goals.

Understanding the Purpose and Importance

An income statement is a critical financial document that summarizes a company’s revenues, expenses, and profits over a specific period. It provides insights into a business’s financial performance, helping stakeholders assess profitability and make informed decisions. The income statement PDF sample serves as a structured template, ensuring clarity and compliance with accounting standards like GAAP/IFRS. Its importance lies in its ability to track financial health, identify trends, and support strategic planning, making it indispensable for businesses of all sizes.

Key Components of an Income Statement

An income statement includes revenue, cost of goods sold (COGS), gross profit, operating expenses, and net income. These elements provide a clear overview of a company’s financial performance.

Revenue and Income Streams

Revenue and income streams represent the total income earned by a business from its core operations, including sales, services, and other sources. These are categorized in the income statement PDF sample to reflect both operating and non-operating income. The top line of the statement, known as total revenue, provides insight into a company’s profitability before expenses. Analyzing these streams helps identify key drivers of financial performance and ensures accurate reporting.

Cost of Goods Sold (COGS) and Gross Profit

Cost of Goods Sold (COGS) represents the direct costs associated with producing goods or services, such as materials, labor, and overhead. It is a critical component of the income statement PDF sample, as it directly impacts gross profit, calculated as total revenue minus COGS. This metric provides insight into a company’s production efficiency and profitability before accounting for operating expenses, making it essential for financial analysis and decision-making.

Operating Expenses and Net Income

Operating expenses include costs like salaries, rent, and marketing, which are essential for running the business but not directly tied to production. These expenses are subtracted from gross profit to determine operating income. Further deductions for interest and taxes lead to net income, the final measure of profitability. Accurately tracking these components in an income statement PDF sample is vital for assessing a company’s financial health and making informed business decisions.

How to Prepare an Income Statement

Preparing an income statement involves gathering financial data, categorizing revenues and expenses, calculating profits, and ensuring accuracy. Use templates for a structured approach to simplify the process.

Step-by-Step Guide to Creating an Income Statement

Creating an income statement begins with identifying the reporting period. Next, list all revenue streams, including sales and other income. Subtract the cost of goods sold (COGS) to determine gross profit. Then, deduct operating expenses, such as salaries and rent, to calculate operating income. Finally, account for taxes and non-operating items to arrive at net income. Use PDF templates for a clear and organized format.

Using Templates for Simplified Preparation

Using income statement templates simplifies preparation by providing a pre-designed structure. These templates, available in PDF formats, streamline data entry and ensure compliance with accounting standards like GAAP and IFRS. They allow customization to fit specific business needs while maintaining a professional appearance. By leveraging templates, businesses save time and reduce errors, focusing on accurate financial reporting and analysis. This approach is ideal for both small and large organizations aiming for efficiency and clarity in their financial statements.

Income Statement PDF Sample Overview

An income statement PDF sample offers a customizable template to streamline financial reporting. These documents provide a clear structure for detailing revenue, expenses, and net income over specific periods, ensuring accuracy and professionalism in presenting financial data.

Example of a Basic Income Statement

A basic income statement outlines a company’s financial performance over a specific period. It typically includes:

– Revenue: Total income from sales or services.

– Cost of Goods Sold (COGS): Direct costs related to production.

– Gross Profit: Revenue minus COGS.

– Operating Expenses: Costs like salaries, rent, and utilities.

– Net Income: Profit after all expenses and taxes.

This structure provides a clear snapshot of profitability and financial health, essential for decision-making and accountability.

Breakdown of Each Section in the Sample

A basic income statement is divided into key sections: revenue, cost of goods sold (COGS), gross profit, operating expenses, and net income. Each section clearly outlines financial components, such as sales, production costs, and overheads, providing a detailed view of profitability. This structured format ensures transparency and helps stakeholders understand the company’s financial standing and performance over the reported period.

Common Formats and Structures

Income statements are typically presented in single-step or multi-step formats, with vertical layouts being the most common. These structures organize revenues, expenses, and profits clearly and concisely.

Single-Step vs. Multi-Step Income Statements

A single-step income statement simplifies financial reporting by listing all revenues and expenses in one step, directly calculating net income. In contrast, a multi-step income statement breaks down the calculation into multiple sections, such as gross profit, operating income, and net income, providing a more detailed view of financial performance. Both formats are widely used, with the choice depending on the company’s complexity and reporting needs.

Vertical vs. Horizontal Layouts

In income statement PDF samples, vertical layouts present data in a top-to-bottom format, listing each line item sequentially, making it easier to follow for straightforward financials. Horizontal layouts display data side by side, often for period comparisons, aiding in trend analysis. The choice between layouts depends on the business’s complexity, the need for comparison, and the audience’s familiarity with financial statements, balancing readability and analytical value.

Analysis and Interpretation of an Income Statement

Analyzing an income statement involves understanding profitability, identifying trends, and monitoring expense ratios. Key metrics like net income growth and expense ratios help assess financial health and performance.

Key Metrics and Ratios to Focus On

When analyzing an income statement, focus on key metrics like net income growth, gross profit margin, and operating expense ratios. Calculate return on equity (ROE) and debt-to-equity ratios to assess financial health. Track trends in revenue and expense categories to identify anomalies. Use ratios like the current ratio and quick ratio to evaluate liquidity. These metrics provide insights into profitability, efficiency, and overall financial performance, helping stakeholders make informed decisions.

How to Identify Trends and Anomalies

To identify trends and anomalies in an income statement, compare historical data and benchmark against industry standards. Look for consistent revenue growth or declining margins. Spot unusual spikes in expenses or unexplained variations in income streams. Use vertical analysis to compare percentages of each line item to total revenue. Investigate any significant deviations from budgeted figures or past performance. This helps in detecting potential issues or opportunities for improvement.

Legal and Compliance Requirements

An income statement must comply with GAAP or IFRS standards, ensuring accurate and transparent reporting. It should include proper revenue recognition, expense disclosure, and accounting policies. Required disclosures may involve tax obligations, contingent liabilities, and significant financial events. Adherence to these standards ensures the document is legally valid and suitable for audits, loans, or investor reviews.

GAAP and IFRS Standards for Income Statements

Income statements must adhere to GAAP (U.S. standards) or IFRS (international standards) for consistency and comparability. GAAP requires specific revenue recognition rules, while IFRS allows more flexibility. Both mandate clear disclosure of expenses, tax obligations, and significant accounting policies. Compliance ensures transparency and accuracy, enabling stakeholders to assess financial performance reliably. These standards also guide the classification of income and expenses, ensuring uniformity across income statement PDF samples.

Necessary Disclosures and Notes

Income statements must include necessary disclosures to ensure transparency and compliance with accounting standards. Notes to the financial statements provide context for figures, explaining accounting policies, revenue recognition methods, and significant assumptions. Disclosures may include contingencies, lease obligations, or unusual transactions. These notes help stakeholders interpret the financial data accurately and understand the company’s financial position and performance. They are essential for a comprehensive understanding of the income statement.

Best Practices for Creating and Using Income Statements

Adhere to GAAP or IFRS standards, ensuring accuracy and consistency. Regularly review and update financial data, and use clear, concise language in income statement PDF samples for transparency.

Ensuring Accuracy and Transparency

Accurate and transparent financial reporting is critical for building trust. Use income statement PDF samples that clearly outline revenue, expenses, and profits. Regularly audit and verify data to ensure compliance with accounting standards. Provide detailed notes and disclosures to avoid ambiguities. Utilize standardized templates to maintain consistency across all financial documents, fostering credibility and clarity in your reporting processes.

Integrating with Other Financial Statements

An income statement PDF sample should seamlessly integrate with other financial documents like the balance sheet and cash flow statement. This ensures a comprehensive view of a company’s financial health. The income statement connects to the balance sheet through retained earnings and equity. It also aligns with the cash flow statement by reflecting operating, investing, and financing activities. Using standardized templates helps maintain consistency and facilitates a holistic financial analysis.

Resources for Downloading and Learning

Access income statement PDF samples and templates from trusted websites like Template.net or ExcelTemplates.com. Utilize tools like QuickBooks or Excel to generate tailored financial statements efficiently.

Recommended Websites for Income Statement Templates

Several websites offer high-quality income statement PDF samples and templates. Template.net provides a wide range of professional and customizable templates. ExcelTemplates.com offers downloadable Excel formats for easy editing. Additionally, Docsity features a variety of financial document examples, including income statements. These platforms cater to different business needs, ensuring you find the perfect template for your financial reporting requirements.

Suggested Tools for Generating Income Statements

Use Excel or Google Sheets for creating customizable income statements with pre-built formulas. QuickBooks and Xero offer automated tools for generating accurate financial reports. Wave and Zoho Books provide user-friendly interfaces for small businesses. These tools simplify data entry, calculations, and formatting, ensuring professional-looking income statements. They also support collaboration and integration with other financial systems, making them ideal for businesses of all sizes.

ffxi rdm gear guide

Welcome to the FFXI RDM Gear Guide! This guide is essential for optimizing your Red Mage’s performance. Designed for both new and experienced players, it covers gear progression by level brackets, specific roles, and advanced setups to enhance your magical and combat capabilities. Stay tuned for detailed insights!

1.1 Overview of Red Mage (RDM) Class in FFXI

The Red Mage (RDM) is a versatile hybrid class in Final Fantasy XI, combining elements of both offense and defense. Known for their adaptability, RDMs excel in enfeebling enemies, enhancing allies, and dealing moderate damage. They can dual-wield weapons and access spells from both White and Black Magic, making them valuable in diverse party roles. Their ability to perform multiple functions makes them a popular choice for players seeking flexibility. This guide focuses on optimizing gear for RDMs, ensuring they can perform at their best in various scenarios. Gear selection is crucial for maximizing their enfeebling, enhancing, and dualcasting capabilities, making this guide an essential resource for players aiming to master the RDM class in FFXI.

1.2 Importance of Gear for RDM in FFXI

Gear plays a pivotal role in maximizing the effectiveness of a Red Mage in Final Fantasy XI. As a hybrid class, RDMs rely on equipment to enhance their magical and physical capabilities. Proper gear ensures optimal performance in enfeebling, enhancing, and dealing damage. It directly impacts magic accuracy, attack power, and casting speed, which are critical for dualcasting and spell potency. Without suitable gear, RDMs struggle to maintain their versatility and efficiency in both solo and party settings. This guide emphasizes the importance of selecting the right equipment to unlock the full potential of the RDM class, ensuring they can adapt to various combat scenarios effectively. Investing time in gear progression is essential for any RDM aiming to excel in Vana’diel.

Core Roles and Responsibilities of RDM in FFXI

Red Mages are versatile hybrids, excelling in both magic and melee combat. They specialize in enfeebling enemies, enhancing allies, and dealing damage through dualcasting. Their adaptability makes them invaluable in parties, capable of supporting and contributing offense simultaneously, ensuring effective combat strategies and team synergy across various challenges in Vana’diel.

2.1 Enfeebling Magic and Gear Considerations

Enfeebling magic is a cornerstone of the RDM class, focusing on weakening enemies through spells like Slow and Paralyze. To maximize effectiveness, gear should prioritize magic accuracy, MND, and INT. Key pieces include the Atrophy Armor set, which offers significant improvements for enfeebling spells, and i119 gear from Adoulin for early-game setups. Accessories like the Mindurious Crown and Enfeebling Torque enhance magic accuracy, ensuring your spells land reliably. Additionally, weapons with enfeebling magic bonuses, such as the Divine Crescent, can further bolster your magical efficacy. Properly equipping for enfeebling ensures your spells are both potent and consistent, making you an invaluable asset to your party.

2.2 Enhancing Magic and Gear Synergy

Enhancing magic plays a vital role for RDMs, boosting party performance through spells like Protect, Shell, and Teleport. Gear selection should emphasize MND, INT, and HP to maximize the duration and potency of these spells. The Atrophy Armor set is particularly effective, offering enhancements that directly benefit enhancing magic. Accessories like the Mindurious Crown and Enfeebling Torque further boost MND, ensuring stronger buffs. Weapons with INT or MND bonuses, such as the Divine Crescent, synergize well with enhancing magic. Additionally, gear from Adoulin, such as the i119 set, provides a solid foundation for early-game enhancing needs. Properly equipping for enhancing magic ensures your spells provide lasting benefits, making you a cornerstone of party support.

2.3 Dualcasting and Weapon Selection

Dualcasting is a cornerstone of RDM gameplay, enabling rapid spellcasting and enhancing efficiency in both combat and support roles. Weapon selection is critical, as it directly impacts dualcasting performance. Weapons with high magic accuracy and INT or MND bonuses, such as the Divine Crescent or Joyeuse, are ideal for dualcasting setups. Additionally, weapons like the Aeneas or Claustrum offer versatile stats that support both magic and melee capabilities. Accessories like the Duelist’s Cape and Mindorious Crown further enhance dualcasting efficiency by boosting INT and reducing spell interruption rates. Pairing these weapons with appropriate gear ensures smooth dualcasting, allowing RDMs to maintain a steady flow of spells in high-pressure situations. Optimizing your weapon and gear setup is essential for maximizing dualcasting potential and overall RDM effectiveness in FFXI.

Gear Progression for RDM by Level Brackets

Optimize your RDM gear from levels 1-30 to 75-85. Early game focuses on basic upgrades, mid-game introduces key pieces, and late game refines endgame setups.

3.1 Levels 1-30: Early Game Gear Setup

For RDMs between levels 1-30, focus on acquiring gear that balances magic and defense. The Destrier Beret is a great starting piece, boosting EXP gain. Early on, prioritize gear with INT and MND stats to enhance your spells. The Adoulin i119 gear set is a solid foundation, offering balanced attributes. Accessories like the Selene Earring can provide additional MP and magic accuracy. Weapons such as the Mythril Staff or Crossbow are excellent choices for early-game versatility. As you progress, gradually replace starter gear with pieces offering higher INT, MND, and accuracy to improve enfeebling and enhancing magic efficiency. This period is crucial for building a strong magical foundation.

3.2 Levels 30-60: Mid-Game Gear Upgrades

Between levels 30-60, RDMs should focus on upgrading to gear that enhances both magic and combat efficiency. The Atrophy Armor set becomes a key upgrade, offering improved stats for enfeebling and enhancing magic. Weapons like the Grioavolr Halberd or Aeneas provide balanced attack and magic bonuses. Accessories such as the Witching Hat and Orison Cap can boost MP and spellcasting accuracy. Additionally, consider swapping to gear with higher INT and MND stats to improve spell potency. Mid-game sets like the Adoulin i119 gear can be further refined or replaced with drops from higher-level zones. This period is ideal for experimenting with hybrid setups, ensuring a balance between damage dealing and support capabilities. Prioritize gear that complements your primary role while maintaining flexibility.

3.3 Levels 60-75: Late Game Gear Optimization

Between levels 60-75, RDMs should focus on optimizing gear for peak performance. The Atrophy Armor set remains a cornerstone, but consider upgrading to Relic Weapons like Gungnir or improved artifact sets. Accessories from Nyzul Isle or high-level mission rewards can significantly enhance stats. Prioritize gear with INT, MND, and MP for stronger spellcasting. Weapons like the Aeneas or upgraded staves provide superior magic attack bonuses. Additionally, refine your gear with augments or Empyrean sets for boosted enfeebling and enhancing magic efficiency. This phase is crucial for fine-tuning your setup, ensuring optimal balance between damage output and support capabilities. Experiment with hybrid configurations to maximize versatility in endgame content.

3.4 Levels 75-85: Endgame Gear and Refinements

At levels 75-85, RDMs focus on refining their gear for peak performance. The Atrophy Armor set remains a staple, but players can further enhance it with augments or transition to Empyrean sets for superior stats. Accessories from Nyzul Isle or high-level mission rewards are crucial, offering boosts to INT, MND, and MP. Weapon upgrades like the Relic Weapons or trial weapons can significantly enhance spellcasting and dualcasting efficiency. Refinements such as elemental obi or high-tier ammunition can further optimize your setup. Experiment with gear combinations to balance enfeebling, enhancing, and damage-dealing roles. This phase is about fine-tuning for endgame content, ensuring your RDM is versatile and powerful in any scenario.

Advanced Gear Setups for Specific Roles

Advanced RDM setups focus on specialized roles: DD for damage, enfeebling for accuracy, and hybrid for balance. Each requires tailored gear, optimizing weapons, armor, and accessories for peak performance.

4.1 DD RDM Gear for Dealing Damage

For a damage-dealing RDM, focus on gear that enhances Strength (STR), Agility (AGI), and weapon skills. The Atrophy Armor set is ideal, offering balanced stats for offense. Weapons like the Mythic Weapons or Relic Weapons are excellent choices, providing high attack power and additional effects. Accessories such as the Warrior’s Ring or Rogue’s Ring can further boost melee capabilities. Dualcasting gear, such as the Duelist’s Cape, enhances spellcasting speed, allowing for faster skillchain setups. Prioritize gear with high attack bonuses and accuracy to maximize damage output. This setup ensures RDM can effectively contribute to parties as a versatile damage dealer while maintaining magical support capabilities. Optimize your weapon selection based on your playstyle and party needs for maximum efficiency;

4.2 Enfeebling RDM Gear for Magic Accuracy

Enfeebling RDM Gear for Magic Accuracy focuses on enhancing your ability to land debilitating spells. Key pieces include the Atrophy Armor Set, which boosts magic accuracy and enfeebling magic potency. The Enfeebling Mantle is a cornerstone, providing exceptional magic accuracy and reducing spell interruption rates. Accessories like the Loricate Torque and Orison Gloves further enhance your enfeebling capabilities. Dualcasting gear, such as the Duelist’s Cape, complements this setup by speeding up spellcasting. Prioritize gear with high magic accuracy and enfeebling magic bonuses to ensure your spells land effectively. This setup is crucial for controlling enemies and supporting your party, making it a cornerstone of RDM strategy in FFXI.

4.3 Hybrid RDM Gear for Balanced Play

Hybrid RDM Gear for Balanced Play combines offensive and defensive capabilities, making it versatile for various scenarios. The Atrophy Armor Set is ideal, offering balanced stats for both magic and melee. Pair this with weapons like the Khondriot Belt for enhanced versatility. Accessories such as the Killer Earrings and Staunch Ring provide a mix of attack and defense. Dualcasting gear like the Duelist’s Cape ensures efficient spellcasting while maintaining melee readiness. This setup excels in dynamic situations, allowing seamless transitions between dealing damage and supporting allies. By blending enfeebling, enhancing, and dualcasting gear, hybrid RDMs can adapt to any battle scenario, making this setup a cornerstone of flexible playstyles in FFXI.

Mastering RDM gear requires adaptability and continuous optimization. Stay updated with the meta, experiment with setups, and utilize resources like the All Jobs Gear Sets page for refinement.

5.1 Summary of Key Gear Choices

5.2 Resources for Further Gear Optimization

For further gear optimization, explore official FFXI forums, community-driven resources like BG Wiki, and dedicated Discord servers. These platforms offer detailed gear lists, player insights, and strategies tailored to RDM roles. Additionally, events like the FFXIV crossover provide unique gear opportunities, such as the Amatsu set. Utilize tools like FFXIArena or Reddit communities for real-time discussions and updates. Cross-referencing with trusted guides ensures you stay informed about the latest optimizations. Experiment with gear setups based on these resources to refine your playstyle and maximize efficiency in both solo and party settings. Remember, gear optimization is a continuous process, so stay engaged with the community for the best results.

iv hydration business plan pdf

Executive Summary

The IV hydration business plan outlines a strategic approach to launching and growing a successful IV therapy clinic. It includes market analysis, pricing strategies, and marketing tactics to meet the growing demand for IV hydration therapy, focusing on service offerings and customer acquisition. The plan provides a comprehensive guide to creating a profitable business in this rapidly expanding wellness industry.

1.1 Overview of IV Hydration Business

IV hydration therapy has emerged as a popular wellness solution, offering personalized treatments for hydration, vitamin replenishment, and beauty enhancement. This business focuses on providing safe, medically supervised IV infusions tailored to individual needs. With growing demand for alternative health solutions, IV hydration clinics are becoming increasingly popular, appealing to health-conscious individuals seeking convenient, effective wellness treatments.

1.2 Mission and Vision Statements

Our mission is to empower individuals to achieve optimal wellness through personalized IV hydration therapy. We aim to deliver safe, effective, and accessible treatments that enhance overall health and beauty. Our vision is to become a leader in the IV hydration industry, revolutionizing wellness by providing innovative, medically supervised therapies that cater to diverse needs and preferences.

1.3 Objectives and Goals

The primary objectives include establishing a prominent market presence, achieving a customer satisfaction rate of 95%, and offering affordable, medically supervised IV hydration treatments. Goals involve expanding service locations, launching a mobile IV therapy program, and forming strategic partnerships with wellness centers. We aim to educate consumers on the benefits of IV hydration while maintaining high safety and efficacy standards.

Market Analysis

The IV hydration market is rapidly growing, driven by increasing demand for convenient, effective wellness solutions. Target demographics include health-conscious individuals, athletes, and beauty-focused clients seeking optimal hydration and nutrient absorption;

2.1 Industry Overview

The IV hydration industry is experiencing rapid growth, driven by increasing demand for wellness and beauty treatments. Popular among health-conscious individuals, athletes, and beauty-focused clients, IV hydration offers customized treatments for optimal hydration, nutrient absorption, and anti-aging benefits. The market expansion is fueled by advancements in mobile IV services and the rise of wellness clinics.

2.2 Target Market and Customer Segmentation

The primary target market includes health-conscious individuals, athletes, and beauty-focused clients seeking wellness and anti-aging benefits. Secondary segments are busy professionals and partygoers needing hydration. The business caters to these groups by offering customizable IV treatments that enhance wellness, improve physical performance, and support beauty goals, ensuring accessibility and convenience for all customer segments.

2.3 Competitive Analysis

The IV hydration market is growing rapidly, with key competitors offering similar services. Direct competitors include mobile IV providers and luxury spas, while indirect competitors are vitamin shops and wellness centers. Our business differentiates through customizable treatments, experienced medical staff, and a focus on safety and convenience, ensuring a superior customer experience in the IV hydration space.

Service Offerings

Our IV hydration services include standard and premium drips, customizable packages, and add-ons like vitamin boosts. Services cater to health, beauty, and recovery needs, ensuring personalized wellness solutions.

3.1 Types of IV Hydration Treatments

We offer various IV hydration treatments, including standard hydration drips, vitamin-infused therapies, and specialized options for beauty and recovery. These treatments are designed to address specific needs, promoting overall wellness and addressing skin, nail, and hair health. Customizable packages allow clients to tailor treatments to their personal goals, ensuring a personalized experience.

3.2 Customizable Treatment Options

Our clinic offers fully customizable IV hydration treatments, empowering clients to choose ingredients and therapies tailored to their needs. From vitamin C boosts to collagen additives, each treatment can be personalized for optimal results. This flexibility enhances client satisfaction and ensures treatments address specific wellness goals effectively.

3.3 Add-On Services and Enhancements

Our clinic offers a variety of add-on services to enhance the IV hydration experience, including vitamin injections, nutrient-rich infusions, and beauty-focused drips. Clients can also opt for wellness packages that combine IV treatments with additional therapies, such as pain relief or immune-boosting supplements, creating a holistic approach to health and wellness.

Pricing Strategy

The pricing strategy includes tiered packages, discounts for memberships, and à la carte options to cater to diverse customer needs and budget preferences effectively.

4.1 Pricing Models and Packages

Pricing models include single-session, multi-session packages, and subscription plans. Packages range from basic hydration to premium options with add-ons. Discounts are offered for bulk purchases and long-term commitments, ensuring affordability and encouraging customer loyalty. Payment plans are also available to accommodate different budgets and preferences, making IV hydration accessible to a wider audience.

4.2 Discounts and Promotions

Offer first-time customer discounts, referral incentives, and limited-time promotions to attract clients. Seasonal specials and loyalty programs reward repeat customers, enhancing retention. Discounts for students, seniors, or military personnel also encourage broader market penetration. These strategies create a competitive edge and drive customer engagement while maintaining profitability.

4.3 Payment Options and Financing

To ensure accessibility, offer multiple payment options: credit cards, debit cards, and digital wallets. Provide financing options or payment plans for customers seeking affordability. Clear pricing transparency and flexible payment terms enhance customer trust and satisfaction, making IV hydration treatments more accessible to a broader audience while maintaining financial stability for the business.

Marketing and Sales Strategy

Our marketing strategy focuses on digital platforms, social media campaigns, and local partnerships to attract health-conscious clients. Customizable templates enhance brand visibility and customer engagement effectively.

5.1 Branding and Marketing Channels

The brand emphasizes wellness and rejuvenation, targeting health-conscious individuals. Marketing channels include social media campaigns, influencer partnerships, and content marketing to promote customizable IV treatments and beauty drips. Digital platforms and downloadable templates enhance visibility, ensuring consistent engagement and attracting a loyal customer base focused on beauty and health from within.

5.2 Customer Acquisition Strategies

The IV hydration business employs customer acquisition strategies such as promotions, referral programs, and partnerships with local wellness centers. Offering discounts for first-time clients and loyalty rewards encourages retention. Collaborations with gyms and spas target health-conscious individuals. Educational content and workshops attract those seeking wellness solutions, driving engagement and building a loyal and expanding customer base.

5.3 Sales Funnel and Conversion Optimization

The sales funnel is designed to guide potential clients from awareness to purchase. Strategies include targeted social media ads, email marketing campaigns, and personalized offers. Conversion optimization focuses on streamlining the booking process, offering limited-time discounts, and upselling additional services. Follow-up communication ensures customer retention, while analytics track funnel performance to refine strategies and maximize ROI.

Operations Plan

The operations plan outlines the clinic’s setup, including location selection, facility design, and essential equipment. Staff training ensures high-quality service delivery, while efficient supply chain management maintains treatment availability.

6.1 Location and Facility Requirements

Selecting a prime location with high visibility and accessibility is crucial. The facility should include private treatment rooms, a waiting area, and storage for equipment and supplies. Ensure compliance with local health regulations and create a welcoming ambiance to attract clients.

6.2 Staffing and Training

Hiring licensed medical professionals, such as nurses, is essential for administering IV treatments safely. Comprehensive training programs should focus on IV therapy protocols, customer service, and maintaining high standards of hygiene and patient care. Ongoing education ensures staff stay updated on the latest techniques and industry regulations.

6.3 Equipment and Supply Chain Management

Investing in high-quality IV equipment, such as sterile drips and nutrient-rich solutions, is crucial. Building relationships with reliable suppliers ensures consistent access to medical-grade supplies. Regular maintenance and quality control checks are essential to uphold safety standards. A well-organized supply chain ensures timely restocking and minimizes disruptions in service delivery.

Financial Projections

Financial projections outline the expected revenue, expenses, and profitability of the IV hydration business, providing a roadmap for sustainable growth and informed decision-making.

7.1 Revenue Forecast

The revenue forecast projects steady growth over three years, with initial revenues driven by basic IV treatments and increasing demand for premium packages and add-ons. Year one anticipates $250,000, rising to $500,000 by year three, reflecting market adoption and service expansion.

7.2 Expense Budget

The expense budget outlines initial start-up costs, including facility setup, equipment, and staffing. Ongoing expenses cover supplies, marketing, and personnel. Allocation is prioritized to ensure operational efficiency and profitability, with regular budget reviews to adapt to market changes and optimize financial performance.

7.3 Break-Even Analysis

The break-even analysis calculates the point where revenue equals total costs, ensuring sustainability. Based on average treatment costs and projected monthly sales, the analysis determines the required number of treatments to cover fixed and variable expenses. This critical metric helps the business understand profitability thresholds and make informed decisions on pricing and operational efficiency.

The IV hydration business plan provides a clear roadmap for success, addressing market trends, financial strategies, and operational efficiency. By focusing on customer-centric services and innovative marketing, the business is poised to thrive in the growing wellness industry. This plan serves as a comprehensive guide to achieving long-term profitability and sustainable growth.

8.1 Summary of Key Points

The IV hydration business plan emphasizes market analysis, pricing strategies, and marketing tactics to capitalize on the growing demand for IV therapy. It outlines operational efficiency, service offerings, and customer acquisition strategies, ensuring a competitive edge. The plan prioritizes customer-centric approaches, highlighting the importance of branding and digital marketing to attract and retain clients in the wellness industry.

8.2 Final Thoughts and Next Steps

Launching an IV hydration business requires careful planning and execution. Focus on market research, location selection, and staff training. Leverage digital tools for branding and marketing to attract clients. Secure necessary permits and partnerships to ensure operational efficiency. Stay updated on industry trends to maintain a competitive edge and achieve long-term success in the wellness industry.

fiske guide to colleges 2024 pdf free download

The Fiske Guide to Colleges 2024 is a comprehensive resource for college planning, offering detailed profiles of over 300 schools, insights into academic programs, campus life, and student reviews, making it an indispensable tool for students and counselors alike.

1.1 Overview of the Fiske Guide to Colleges

The Fiske Guide to Colleges 2024 is a trusted resource for students and families navigating the college search process. It provides detailed profiles of over 300 colleges and universities, offering insights into academic programs, campus culture, and student life. The guide also includes admission requirements, tips, and real student reviews, making it a comprehensive tool for finding the best fit. Known for its honest and straightforward approach, the Fiske Guide helps students evaluate schools based on factors like academic strengths, extracurricular opportunities, and overall quality of life. With its focus on diversity and inclusivity, it covers institutions in the U.S., Canada, Great Britain, and Ireland, ensuring a broad perspective for applicants.

1.2 Importance of the Guide for College Planning

The Fiske Guide to Colleges 2024 is an essential tool for students and families engaged in college planning. It provides detailed insights into academic programs, campus life, and admission requirements, helping students make informed decisions. The guide’s focus on real student reviews and expert tips ensures a balanced perspective, enabling applicants to evaluate schools based on fit rather than just rankings. Its comprehensive approach helps students identify schools that align with their academic goals, personal preferences, and career aspirations. By offering a wealth of information in one resource, the Fiske Guide simplifies the complex college search process, making it a cornerstone for successful college planning and decision-making.

History and Background of the Fiske Guide

The Fiske Guide to Colleges was first introduced by Edward Fiske, a renowned education expert, and has since become an annual, trusted resource for college-bound students. Its rich history dates back to its initial publication, evolving to meet the changing needs of students and families. Over the years, the guide has established itself as a cornerstone for college planning, providing unparalleled insights into higher education institutions across the U.S. and beyond. Its reputation as a reliable and comprehensive resource has made it a go-to for students, counselors, and educators alike.

2.1 The Evolution of the Fiske Guide

Since its inception, the Fiske Guide has undergone significant transformations to adapt to the changing landscape of higher education. Established by Edward Fiske, the guide initially focused on providing unbiased, in-depth profiles of colleges and universities. Over the years, it has expanded its scope to include over 300 institutions, offering detailed insights into academic programs, campus culture, and student experiences. The guide has also incorporated real student reviews and rankings based on factors like academic rigor, campus life, and accessibility. Its evolution reflects a commitment to helping students and families make informed decisions, solidifying its reputation as a trusted resource in college planning.

2.2 Edward Fiske and His Contribution to College Guides

Edward Fiske, a renowned education expert, revolutionized college planning with the Fiske Guide to Colleges. As a former New York Times education editor, Fiske brought unparalleled expertise, creating a trusted resource that emphasizes unbiased, detailed profiles of colleges. His guide stands out for its focus on real student insights and comprehensive overviews of academic programs, campus culture, and admission processes. Fiske’s commitment to transparency and student-centered information has made the guide indispensable for families navigating higher education. His work continues to evolve, ensuring it remains a leading authority in college planning, helping students find the best fit for their academic and personal goals.

Key Features of the Fiske Guide to Colleges 2024

The guide provides detailed profiles of over 300 colleges, insights into academic programs, campus life, and student reviews, offering expert tips for finding the best college fit.

3.1 Comprehensive College Profiles

The Fiske Guide to Colleges 2024 offers detailed profiles of over 300 colleges, providing insights into academic strengths, campus culture, and student life. Each profile is tailored to help students understand what makes each institution unique, covering everything from academic programs to extracurricular opportunities. The guide emphasizes real student perspectives, ensuring that the information is authentic and relatable. Whether you’re interested in small liberal arts schools or large universities, the profiles provide a balanced view of each college’s strengths and weaknesses. This feature makes the guide an invaluable resource for students aiming to find their best college fit. The comprehensive approach ensures that no aspect of college life is overlooked.

3.2 Academic Programs and Campus Life Details

The Fiske Guide to Colleges 2024 provides in-depth details about academic programs, highlighting each college’s unique offerings and strengths. It also explores campus life, including extracurricular activities, dorm life, and student organizations. The guide offers insights into the quality of faculty, classroom experiences, and research opportunities, helping students identify programs that align with their academic goals. Additionally, it covers campus culture, diversity, and social scenes, giving a well-rounded view of life beyond academics. Real student testimonials further enrich the details, offering firsthand perspectives on what to expect. This section is essential for students seeking to match their academic and personal preferences with the right college environment.

3.4 Admission Requirements and Tips

The Fiske Guide to Colleges 2024 offers detailed admission requirements, including GPA, test scores, and course prerequisites, to help students assess their eligibility. It provides tips on crafting standout applications, writing essays, and securing recommendation letters. The guide also includes insights into holistic admissions processes and strategies for showcasing extracurricular achievements. Additionally, it highlights trends in test-optional policies and offers advice on interviewing effectively. Real student testimonials share experiences and mistakes to avoid, giving readers practical guidance. This section equips students with the tools to navigate the competitive admissions landscape confidently and strategically, ensuring they present their best selves to colleges.

How to Download the Fiske Guide to Colleges 2024 for Free

Access the Fiske Guide to Colleges 2024 PDF through official sources or trusted third-party platforms. Ensure safe downloading by verifying the source and avoiding malicious links.

4.1 Official Sources for Free Download

The Fiske Guide to Colleges 2024 PDF can be accessed through the official Fiske Guide website or partner educational platforms. Additionally, many universities and libraries offer free downloads as part of their resources for students. Platforms like Open Library and YUMPU provide free access to the guide, ensuring a safe and legitimate download. Always verify the source to avoid unauthorized or malicious links. Official sources guarantee an unaltered and complete version of the guide, making it a reliable choice for college planning. By using these trusted platforms, students can access the guide without compromising on quality or safety.

4.2 Third-Party Platforms Offering Free Access

Besides official sources, several third-party platforms provide free access to the Fiske Guide to Colleges 2024 PDF. Websites like Open Library, Issuu, and YUMPU offer the guide for free, allowing users to download or read it online. Additionally, platforms like Google Docs and Scribd often host shared copies of the guide. These platforms are popular among students for their convenience and accessibility; However, it’s essential to ensure the authenticity of the document and avoid downloading from unverified sources to prevent potential security risks. Always verify the platform’s credibility before accessing or downloading the guide to ensure a safe and reliable experience. Third-party platforms can be a cost-effective way to access the guide without compromising on quality.

4.3 Tips for Safely Downloading the PDF

When downloading the Fiske Guide to Colleges 2024 PDF, prioritize safety to avoid malware or phishing risks. Ensure you download from verified platforms like official sources or trusted third-party sites. Avoid suspicious links or pop-ups offering free downloads. Always verify the file’s authenticity by checking its size and format, as the guide is typically around 25 MB in PDF format. Use antivirus software to scan the file before opening it. Additionally, avoid sharing personal information on untrusted websites. Stick to well-known platforms like Open Library or Scribd, which are reputable sources for free eBooks. By following these precautions, you can safely access the guide and protect your device from potential threats. Safe downloading ensures a secure and reliable experience.

Why the Fiske Guide Stands Out

The Fiske Guide to Colleges 2024 stands out for its comprehensive, unbiased profiles and real student insights, offering a trusted resource for college planning and decision-making.

5.1 Unique Approach to College Rankings

The Fiske Guide to Colleges 2024 employs a distinctive approach to college rankings by prioritizing quality and fit over traditional rankings. It focuses on detailed profiles of over 300 schools, emphasizing academic strengths, campus culture, and student life. The guide provides a holistic view, helping students identify colleges that align with their goals and preferences. By incorporating real student reviews and feedback, it offers insider perspectives that go beyond numerical rankings. This approach ensures that the guide stands out, making it an invaluable resource for prospective students and counselors seeking comprehensive insights to make informed decisions.

5.2 Real Student Insights and Reviews

The Fiske Guide to Colleges 2024 stands out by incorporating real student insights and reviews, offering a genuine perspective on college life. These reviews, gathered from over 168,000 students, provide detailed feedback on academic programs, campus culture, and overall satisfaction. The guide highlights what students love most about their schools, from financial aid and career services to sustainability efforts. This unique approach ensures that prospective students gain a firsthand understanding of what to expect, helping them make informed decisions. By prioritizing student voices, the guide creates a trusted and relatable resource for navigating the complex college selection process. This focus on authenticity sets it apart from traditional rankings systems.

The Fiske Guide to Colleges 2024 is an indispensable resource for students and families navigating the college search process. With its detailed profiles, real student insights, and expert advice, it provides a comprehensive and trusted guide to finding the perfect college fit. By emphasizing authenticity and student perspectives, the guide offers a unique approach to college planning. Its availability as a free PDF download makes it accessible to everyone, ensuring that no one is left behind in the pursuit of higher education. Whether you’re a student, parent, or counselor, the Fiske Guide is a must-have tool for making informed decisions about your academic future.

cessna 150 parts manual

The Cessna 150 Parts Manual is an essential resource for maintaining, repairing, and operating the aircraft. It provides detailed diagrams, part numbers, and instructions for professionals and DIY enthusiasts alike, ensuring compliance with safety standards and optimal performance.

Overview of the Cessna 150 Aircraft

The Cessna 150 is a two-seat, single-engine aircraft introduced in 1958, known for its simplicity, durability, and ease of handling. It is widely used for flight training and personal flying due to its forgiving nature. The aircraft features a Continental O-200 engine, producing 100 horsepower, and has a maximum speed of 109 knots. Its design emphasizes reliability and accessibility, making it a popular choice for pilots worldwide. The Cessna 150 remains a cornerstone in aviation training and recreational flying.

Importance of the Parts Manual for Maintenance and Repair

The Cessna 150 Parts Manual is indispensable for ensuring proper aircraft maintenance and repair. It provides detailed part numbers, diagrams, and repair procedures, enabling technicians to identify and replace components accurately. This resource is crucial for diagnosing issues, minimizing downtime, and maintaining safety standards. It also helps ensure compliance with FAA regulations by providing standardized repair practices. Whether for routine maintenance or complex overhauls, the parts manual is a vital tool for keeping the Cessna 150 airworthy and operational.

Types of Manuals Available for the Cessna 150

The Cessna 150 offers various manuals essential for operation and maintenance. These include Service Manuals, Parts Catalogs, Pilot’s Operating Handbooks (POH), and detailed Checklists, each serving specific purposes.

Service Manuals

Cessna 150 Service Manuals provide comprehensive instructions for maintenance, repairs, and overhauls. They include detailed procedures, diagrams, and specifications for systems and components, ensuring compliance with FAA standards. These manuals are indispensable for mechanics and owners, offering step-by-step guidance for troubleshooting and resolving common issues. Available for various model years, such as 1969-1976, they cover critical aspects like engine overhaul and system upgrades, making them a primary reference for safe and efficient aircraft maintenance.

Parts Catalogs

Cessna 150 Parts Catalogs are detailed directories listing every component of the aircraft. They provide part numbers, descriptions, and illustrations, making it easy to identify and source necessary parts. Available for specific model years, such as 1963-1969 and 1970-1977, these catalogs are essential for maintenance, repairs, and upgrades. They are organized by aircraft systems, offering a clear and efficient way to locate components. Whether for professional mechanics or DIY enthusiasts, these catalogs are invaluable for ensuring accurate and efficient part replacement, supporting the aircraft’s longevity and airworthiness.

Pilot’s Operating Handbook (POH)

The Pilot’s Operating Handbook (POH) for the Cessna 150 is a crucial document detailing aircraft performance, operating procedures, and flight characteristics. It includes vital information such as weight and balance calculations, emergency procedures, and normal/abnormal flight operations. Specific POHs, like the 1964 version, provide tailored guidance for pilots, ensuring safe and effective operation of the aircraft. By adhering to the POH, pilots can optimize flight safety and performance, making it an indispensable resource for both training and routine flights.

Checklists and Supplementary Guides

Checklists and supplementary guides for the Cessna 150 provide step-by-step procedures for pre-flight, post-flight, and emergency operations. These resources ensure compliance with safety protocols and efficient aircraft management. Supplementary guides often include detailed troubleshooting tips and maintenance schedules, complementing the parts manual. Specific checklists, like those for the Cessna 150L, are tailored to individual models, offering precise guidance for pilots and mechanics. These documents are invaluable for ensuring operational readiness and adherence to best practices, available through official channels and digital libraries.

Where to Find and Download the Cessna 150 Parts Manual

The Cessna 150 Parts Manual can be downloaded from official Cessna service centers, online aviation libraries, or specialized forums. Many platforms offer free PDF downloads, ensuring easy access to essential maintenance and repair information.

Official Cessna Service Centers and Distributors

Official Cessna service centers and authorized distributors are the most reliable sources for obtaining the Cessna 150 Parts Manual. These centers provide authentic, up-to-date manuals, ensuring compliance with safety and regulatory standards. They often offer direct downloads or printed copies, catering to both professional mechanics and aircraft owners. Additionally, these centers may provide supplementary materials, such as maintenance guides and part catalogs, to support comprehensive aircraft care. Purchasing from official sources guarantees accuracy and adherence to manufacturer specifications.

Online Platforms and Digital Libraries

Online platforms and digital libraries offer convenient access to the Cessna 150 Parts Manual. Websites like ManualsLib and Schematics Unlimited provide free downloads in PDF or text formats, covering various model years. These platforms often include comprehensive manuals, maintenance guides, and parts catalogs. Users can instantly access these resources, making it easier to locate specific parts or procedures. Many platforms also allow for searchable and printable versions, enhancing usability for maintenance and repair tasks. Additionally, some sites offer collections of manuals for multiple Cessna models, making them a valuable resource for aircraft enthusiasts and professionals alike.

Specialized Aviation Forums and Communities

Specialized aviation forums and communities, such as Aviatalk and Cessna Pilots Association, serve as invaluable resources for accessing the Cessna 150 Parts Manual. These platforms allow members to share and download manuals, exchange experiences, and seek advice from experienced pilots and mechanics. Many forums host extensive libraries of aircraft-related documents, including parts catalogs and service guides. By engaging with these communities, enthusiasts and professionals can gain insights, troubleshoot issues, and locate rare or hard-to-find manuals, fostering collaboration and knowledge sharing within the aviation community.

Key Sections of the Cessna 150 Parts Manual

The Cessna 150 Parts Manual includes key sections like the Illustrated Parts Catalog, Maintenance Schedules, and Troubleshooting Guide, providing comprehensive coverage for repairs and upgrades.

Illustrated Parts Catalog

The Illustrated Parts Catalog in the Cessna 150 manual offers detailed visuals and part numbers for every component, aiding mechanics and enthusiasts in identifying and sourcing replacements. This section is organized by aircraft systems, making it easy to locate specific parts. Each illustration is paired with exploded views, enhancing clarity. With its thorough indexing, users can quickly find what they need, ensuring efficient maintenance and repair. This catalog is a cornerstone for anyone working on the Cessna 150.

Maintenance Schedules and Procedures

The Cessna 150 manual outlines detailed maintenance schedules and procedures to ensure the aircraft remains airworthy. It specifies routine inspection intervals, lubrication requirements, and wear limits for critical components. Procedures are broken down into daily, pre-flight, and annual checks, aligning with FAA regulations. The manual also includes guidelines for addressing common wear issues and adhering to Airworthiness Directives. By following these schedules, owners and mechanics can maintain safety, performance, and longevity of the aircraft, ensuring compliance with regulatory standards and preventing unexpected failures.

Troubleshooting Guide for Common Issues

The troubleshooting guide in the Cessna 150 parts manual helps identify and resolve common problems efficiently. It covers issues like engine performance, electrical systems, and landing gear malfunctions. Detailed symptom-to-cause analysis and step-by-step solutions empower users to diagnose and address problems accurately. Visual aids and part references simplify repairs, ensuring minimal downtime. This section is invaluable for maintaining aircraft reliability and safety, guiding both novice and experienced mechanics through effective troubleshooting processes tailored to the Cessna 150’s specific systems and components.

Maintenance and Repair Using the Parts Manual

The Cessna 150 parts manual provides detailed maintenance schedules, repair procedures, and tools required for efficient servicing, ensuring aircraft safety and performance are maintained at optimal levels.

Understanding the Parts Catalog for DIY Repairs

The Cessna 150 parts catalog offers a comprehensive guide for DIY repairs, featuring detailed illustrations and part numbers. It aids in identifying components, ensuring correct replacements, and simplifying maintenance tasks. The catalog is structured for easy navigation, with searchable indices and cross-references, making it accessible for both novice and experienced mechanics. Additionally, the manual includes troubleshooting tips and step-by-step instructions, empowering enthusiasts to perform repairs confidently and efficiently while adhering to safety standards.

Tools and Equipment Required for Maintenance

Proper tools and equipment are crucial for maintaining the Cessna 150. Essential items include wrenches, screwdrivers, pliers, and socket sets. Specialized tools like rivet guns and sheet metal shears are often necessary for specific repairs. Additionally, diagnostic equipment such as multimeters and pressure gauges may be required for system checks. The parts manual recommends using high-quality, aviation-specific tools to ensure accuracy and safety. Having the right equipment on hand streamlines maintenance, reduces downtime, and helps maintain the aircraft’s airworthiness.

Legal and Ethical Considerations

Adhering to FAA regulations and using genuine Cessna parts ensures compliance and safety. Ethical practices in maintenance and repair are critical to uphold aircraft airworthiness and protect lives.

Compliance with FAA Regulations

The Cessna 150 parts manual ensures adherence to FAA regulations, providing detailed part numbers and service procedures. It guarantees aircraft airworthiness by specifying approved parts and maintenance schedules. Compliance requires using genuine Cessna components and following outlined procedures to maintain safety and regulatory standards. Proper documentation and regular inspections are essential to verify adherence to these guidelines, ensuring the aircraft operates safely and legally under federal aviation rules.

Importance of Using Genuine Cessna Parts

Using genuine Cessna parts ensures safety, reliability, and compliance with FAA standards. These parts are specifically designed for the Cessna 150, guaranteeing proper fitment and performance. They meet rigorous quality control measures, reducing the risk of malfunctions. Genuine parts also maintain the aircraft’s value and warranty. Non-genuine components may compromise safety, lead to legal issues, and increase maintenance costs. Always prioritize authentic Cessna parts to ensure optimal aircraft performance and adherence to regulatory requirements.

kirkland cheese pizza cooking instructions

Kirkland Signature Cheese Pizza is a popular frozen pizza known for its flavorful blend of cheeses, savory tomato sauce, and crispy hearth-baked crust. Perfect for quick meals, it offers convenience and delicious taste, making it a favorite for family dinners or casual gatherings. This article explores its cooking methods, tips, and more.

Overview of Kirkland Signature Cheese Pizza

Kirkland Signature Cheese Pizza is a frozen pizza offering a blend of whole milk mozzarella, provolone, Parmesan, and Romano cheeses. It features a savory tomato sauce infused with herbs like basil, garlic, and onion, all on a hearth-baked crust. This pizza is a convenient and flavorful option for quick meals. Its combination of high-quality ingredients and classic flavors makes it a popular choice for families and pizza lovers alike. The crust, made with extra virgin olive oil and sourdough flavor, adds a crispy texture that enhances the overall taste experience.

Key Features and Benefits

Kirkland Signature Cheese Pizza offers a crispy crust and a blend of four cheeses, providing a rich, creamy flavor. Its pre-cooked design allows for easy preparation, and it can be cooked in both ovens and air fryers. The pizza is made with high-quality ingredients, including savory tomato sauce and herbs, ensuring a delicious taste. It’s a convenient meal option that caters to various dietary needs and preferences, making it ideal for quick family dinners or casual gatherings. The product’s affordability and quality make it a great value for money, satisfying both kids and adults alike.

Cooking Instructions for Kirkland Cheese Pizza

Preheat your oven to 425°F (220°C). Remove the pizza from packaging and place it directly on the center rack. Bake for 13-16 minutes, or until the crust is golden brown and the cheese is melted and bubbly. Ensure the internal temperature reaches 165°F for safety. Let it cool slightly before serving for the best experience.

Preparation Steps

Start by preheating your oven to 425°F (220°C). Carefully remove the Kirkland Cheese Pizza from its packaging, ensuring all wrapping is taken off. Place the pizza directly on the center rack of the oven to ensure even cooking. Do not place it on a baking sheet unless specified. Once the oven is preheated, bake the pizza for 13 to 16 minutes, or until the crust is golden brown and the cheese is melted and bubbly. Keep an eye on it during the last few minutes to avoid overcooking. Let it cool for a few minutes before slicing and serving.

Oven Cooking Method

Preheat your oven to 425°F (220°C). Remove the pizza from its packaging and place it directly on the center rack. Bake for 13 to 16 minutes, or until the crust is golden brown and the cheese is melted and bubbly. For a crisper crust, bake at 450°F (230°C) for 10 to 12 minutes. Ensure the pizza reaches an internal temperature of 165°F for food safety. Keep an eye on it during the last few minutes to avoid overcooking. Let it cool slightly before slicing and serving for the best results.

Air Fryer Cooking Method

Preheat the air fryer to 400°F (200°C). Place the Kirkland Cheese Pizza directly in the air fryer basket, ensuring it fits without overlapping. Cook for 8 to 10 minutes, or until the crust is golden and the cheese is melted. For a crisper crust, increase the temperature to 425°F (220°C) and cook for 6 to 8 minutes. Shake the basket halfway through cooking for even browning. Optional: Sprinkle extra cheese or seasonings before cooking for added flavor. Allow the pizza to cool slightly before serving for the best results.

Enhancing Your Kirkland Cheese Pizza

Add fresh herbs like basil or oregano, extra cheese, or a drizzle of olive oil to elevate the flavor and texture of your Kirkland Cheese Pizza.

Additional Toppings and Seasonings

Enhance your Kirkland Cheese Pizza by adding fresh or cooked toppings like pepperoni, mushrooms, or vegetables. Sprinkle extra cheese, dried herbs, or garlic powder for added flavor. A drizzle of olive oil or balsamic glaze can elevate the taste. For a spicy kick, add red pepper flakes. Fresh basil leaves or a sprinkle of oregano can also complement the pizza’s savory profile. These simple additions allow you to customize the pizza to your taste preferences while maintaining its convenience.

Customization Ideas

Elevate your Kirkland Cheese Pizza by experimenting with creative combinations. Add fresh vegetables like spinach, bell peppers, or onions for extra flavor and texture. For meat lovers, pepperoni, sausage, or bacon bits can enhance the pizza. Consider a Mediterranean twist with olives, artichokes, or feta cheese. Consider using an air fryer or grill for a crispy crust. Additionally, sprinkle garlic powder or oregano for a herby touch. You can also drizzle with olive oil or balsamic glaze for a gourmet finish. These ideas allow you to tailor the pizza to your preferences while maintaining its convenience and delicious base flavor. By exploring different toppings and seasonings, you can create a personalized meal that suits any taste. This flexibility makes Kirkland Cheese Pizza a versatile option for various dietary needs and cravings.

Common Mistakes to Avoid

Common mistakes include overcooking, undercooking, incorrect temperature settings, and not letting the pizza cool. Follow recommended times and temperatures to achieve a perfectly cooked crust and melted cheese.

Overcooking and Undercooking

Overcooking can lead to a burnt crust and dry cheese, while undercooking results in a soggy texture and unmelted toppings. To avoid this, bake at 425°F for 13-16 minutes. Check for a golden-brown crust and melted, bubbly cheese. Avoid opening the oven too early, as this can disrupt the cooking process. Use a timer and monitor the pizza closely during the last few minutes to ensure it’s perfectly cooked without overdoing it. Proper timing ensures a crispy crust and gooey cheese, making every bite enjoyable.

Incorrect Temperature Settings

Incorrect temperature settings can significantly affect the quality of your Kirkland Cheese Pizza. Oven temperatures below 400°F may result in a soft, undercooked crust, while temperatures above 450°F can cause the crust to burn before the cheese is fully melted. Ensure your oven is preheated to the recommended 425°F for optimal results. Using an oven thermometer can help maintain accuracy. Avoid extreme temperature adjustments, as this can compromise the pizza’s texture and flavor. Proper temperature control ensures a perfectly cooked crust and evenly melted cheese every time.

Nutritional Information

Kirkland Signature Cheese Pizza contains a blend of whole milk mozzarella, provolone, Parmesan, and Romano cheeses, offering rich flavor and calcium. The hearth-baked crust adds fiber, while the savory tomato sauce provides antioxidants. Each serving is designed to meet balanced dietary needs without excessive sodium or artificial additives.

Calorie and Fat Content

Kirkland Signature Cheese Pizza contains approximately 340 calories per 129g serving, with 18g of total fat, including 9g of saturated fat. The combination of whole milk mozzarella, provolone, Parmesan, and Romano cheeses contributes to its rich flavor and fat content. The hearth-baked crust adds to the calorie count, making it a satisfying yet indulgent meal option. While it offers a delicious taste, moderation is key due to its higher fat and calorie levels compared to lighter snack choices.

Nutritional Benefits

Kirkland Signature Cheese Pizza offers several nutritional benefits despite its indulgent nature. The combination of whole milk mozzarella, provolone, Parmesan, and Romano cheeses provides a good source of calcium, essential for bone health. The pizza also contains protein from the dairy and crust, supporting muscle maintenance. Additionally, the hearth-baked crust made with extra virgin olive oil contributes some fiber, while the savory tomato sauce adds antioxidants like lycopene. These elements make it a satisfying meal option with essential nutrients.

Storing and Reheating Kirkland Cheese Pizza

Store Kirkland Cheese Pizza in the freezer to maintain freshness. Reheat by baking in a preheated oven for a crispy crust and melted cheese.

Proper Storage Techniques

Store Kirkland Cheese Pizza in the freezer at 0°F (-18°C) or below to maintain freshness. Keep the pizza in its original packaging to prevent freezer burn. Avoid thawing and refreezing, as this can affect texture and flavor. If you won’t be using the entire pizza, cut it into portions before freezing for convenient reheating. Always store the pizza away from strong-smelling foods to prevent odor transfer. Proper storage ensures the pizza remains crisp and flavorful for up to 8 months.

Reheating Methods

Reheat leftover Kirkland Cheese Pizza slices in the oven at 350°F (175°C) for 5-7 minutes, or until the cheese is melted and bubbly. For a crisper crust, bake at 425°F (220°C) for 3-5 minutes. Alternatively, use a microwave-safe plate, heating on high for 20-30 seconds per slice. Air fryers also work well, reheating at 300°F (150°C) for 2-3 minutes. Ensure the pizza reaches an internal temperature of 165°F (74°C) for food safety. Reheating restores the pizza’s original flavor and texture.

Comparison with Other Frozen Pizzas

Kirkland Signature Cheese Pizza stands out for its high-quality ingredients and flavorful profile, offering a superior taste and texture compared to many other frozen pizza brands.

Taste and Quality

Kirkland Signature Cheese Pizza delivers a rich, authentic flavor with its blend of whole milk mozzarella, provolone, Parmesan, and Romano cheeses. The savory tomato sauce, infused with herbs, adds depth, while the hearth-baked crust provides a crispy texture. High-quality ingredients ensure a superior taste compared to many other frozen pizzas. The combination of gooey cheese and perfectly cooked crust makes it a satisfying meal. Its flavor profile and texture set it apart as a top choice for frozen pizza enthusiasts seeking quality and deliciousness.

Value for Money

Kirkland Signature Cheese Pizza offers excellent value for its price, providing a satisfying meal at a fraction of the cost of restaurant pizza. Priced affordably for a multi-pack, it caters to families and groups without compromising on quality. The convenience of a frozen product that cooks to perfection at home adds to its appeal. With its generous size and flavorful ingredients, it remains a budget-friendly option that consistently delivers a delicious dining experience, making it a smart choice for everyday meals or casual gatherings.

Kirkland Cheese Pizza is a convenient, delicious, and cost-effective meal option that meets expectations for taste and ease of preparation, making it a satisfying choice for any occasion.

Final Thoughts

Kirkland Cheese Pizza stands out as a convenient and flavorful meal option, offering a perfect balance of crispy crust and gooey cheese. Its ease of preparation makes it ideal for busy households, while its taste rivals homemade pizzas. With clear cooking instructions and adaptable methods, it caters to various preferences; Whether baked in an oven or air fryer, the result is consistently satisfying. This pizza is a testament to Costco’s commitment to quality and value, making it a staple for many. Its versatility and deliciousness ensure it remains a crowd-pleaser.

Recommendation

Kirkland Cheese Pizza is an excellent choice for anyone seeking a quick, delicious meal without compromising on quality. Its balanced flavors and crispy crust make it a versatile option for families, gatherings, or solo dining. With easy cooking instructions and affordable pricing, it offers exceptional value. For the best experience, follow the recommended cooking times and consider adding your favorite toppings. This pizza is a must-try for frozen pizza lovers and a great addition to any meal plan. Its convenience and taste make it a standout product in its category.